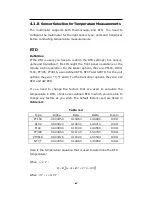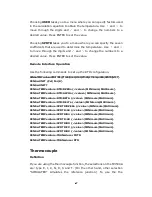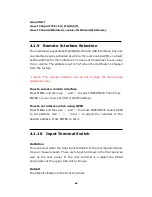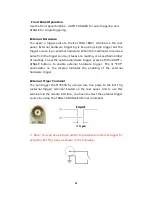
78
78
78
78
How to specify a delay time
You can set the delay time from either the front panel operations or the
remote interface operations.
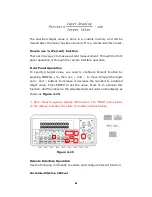
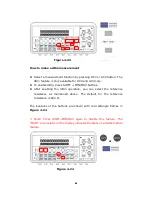
Front Panel Operation
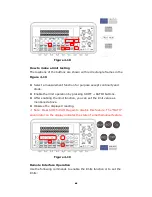
To set the delay time, press MENU button and use
◁
and
▷
buttons to
locate “TRIG” option. Press ENTER to select it. Then again find “DELAY”
option using
◁
and
▷
buttons. Press ENTER to select it. Then use
◁
and
▷
buttons to move through the digits and
△
and
▽
buttons to set
the desired delay time (between 0 to 3600 second). The locations of the
buttons are shown with red rectangle frames in
Figure 4-13
.
Figure 4-13
Remote Interface Operation
You can also use the remote interface operations from your PC terminal
to set the trigger delay. To select a delay time, use the following
command or set the trigger delay to be automatic:
TRIGger:DELay {<seconds>|MINimum|MAXimum}
(Front Panel w/ Auto
Trigger On)
20 Hz
200 ms
200 Hz
100 ms
Frequency/Period
Remote Interface /
External
1.0 s
Front Panel w/ Auto
Trigger ON
0 s
Содержание M3500A
Страница 1: ...PICOTEST M3500A 6 5 Digit Digital Multimeter User s Manual Version 1 06 ...
Страница 2: ...2 2 2 2 M3500A DMM User s Manual ...
Страница 49: ...49 49 49 49 Figure 3 17 1 2 3 5 5 4 4 1 2 3 ...
Страница 50: ...50 50 50 50 Figure 3 18 5 ...
Страница 191: ...191 191 191 191 FreeLibrary hUSBTMCLIB hUSBTMCLIB NULL return ...


