68
68
68
68
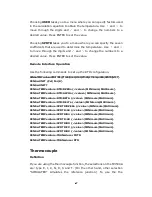
thermocouple function, you have to adjust something. First of all, via a
thermocouple adaptor, you need to measure a known and accurate
reference temperature (T1) as a criterion. Then the display of the
M3500A will show a reference value (T2). At the moment, a remainder
(T3) from (T1 – T2) will be calculated. After that, you just adjust the
default (simulated value 23.0°C) to 23.0°C + (T3). Under the
circumstance, the thermocouple function will be activated completely.
For Example:
If the criterion value is (T1 =30.0°C), the reference value showing on the
M3500A is (T2=24.0°C). You will get a remainder T3 (T1 – T2 = 6.0°C).
Then you just configure the default simulated value from 23.0°C to
29.0°C on the M3500A.
※
Note: Picotest also provides another solution, 10-Channel
TC-Scanner Card (M3500-opt12), to measure thermocouple. For more
information, please refer to its user’s guide.
How to set up thermocouple
You can set up the thermocouple configuration either through the front
panel operation or through the remote interface operation.
Front Panel Operation
1.
Configure the thermocouple type and unit. Pressing CONFIG
>
SHIFT
>
TEMP (TCOUPL), and then using PREV and NEXT to select the type
and unit.
2.
Measure a known and accurate reference temperature (T1). The
result showing on the M3500A is (T2).
3.
Adjust the simulated value (23.0°C to 23.0°C + T3.)
4.
Configure the Simulated value by pressing CONFIG
>
SHIFT
>
TEMP(TCOUPL)
>
NEXT
>
SIMULATED
>
ENTER, and by buttons
「
PREV
」
or
「
NEXT
」
and
△
&
▽
assistance to adjust the value.
Remote Interface Operation
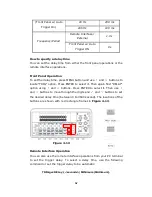
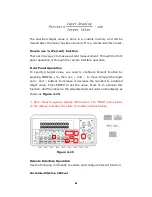
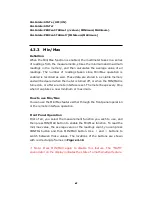
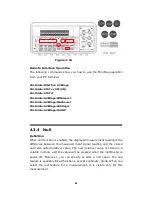
Use the following commands to set up the thermocouple configuration.
SENSe
:UNIT {Cel|Far|K}
Содержание M3500A
Страница 1: ...PICOTEST M3500A 6 5 Digit Digital Multimeter User s Manual Version 1 06 ...
Страница 2: ...2 2 2 2 M3500A DMM User s Manual ...
Страница 49: ...49 49 49 49 Figure 3 17 1 2 3 5 5 4 4 1 2 3 ...
Страница 50: ...50 50 50 50 Figure 3 18 5 ...
Страница 191: ...191 191 191 191 FreeLibrary hUSBTMCLIB hUSBTMCLIB NULL return ...


