1
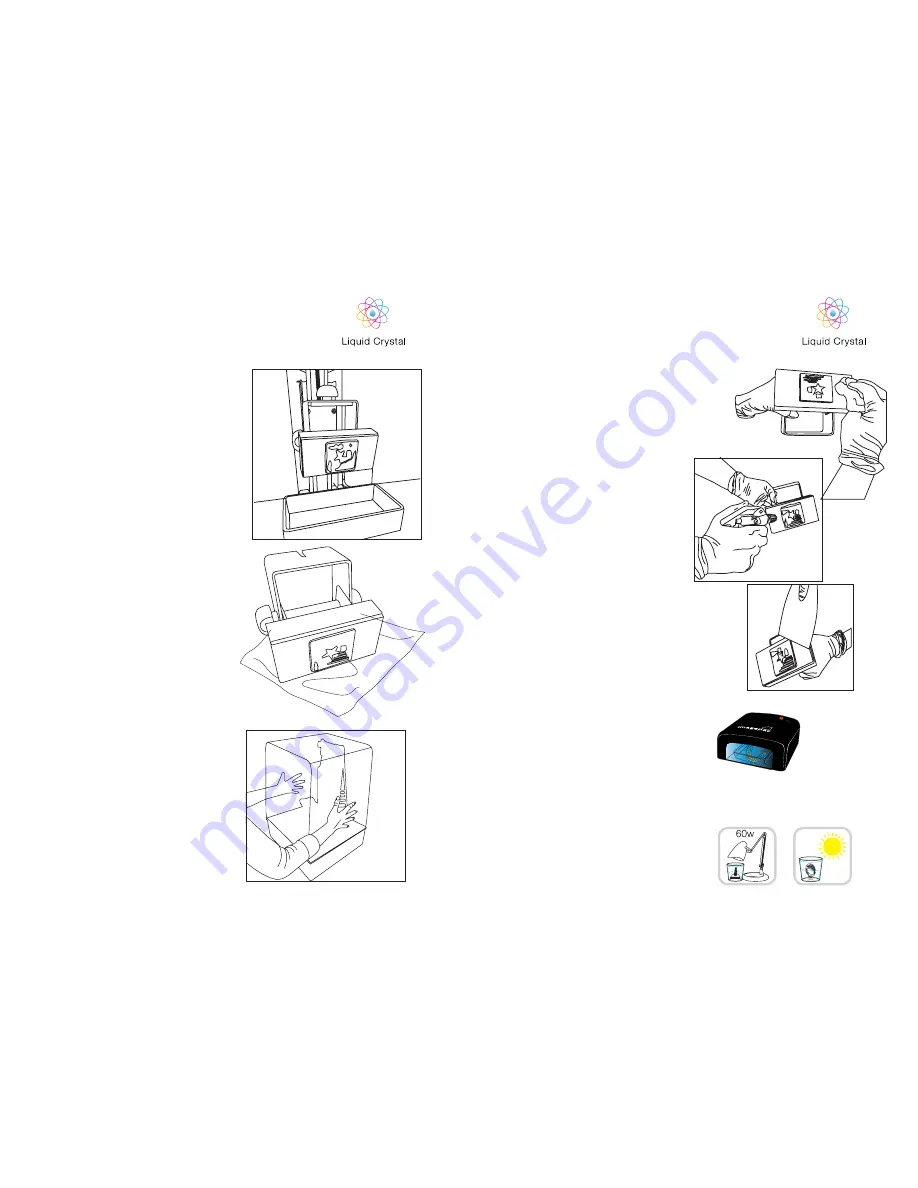
. When your print has finished, press the ‘+50’
button and the platform will rise to above the
level of the vat. Remove the hood and loosen
the two side bolts, tilt the platform slightly to
allow the resin to drip off. Adjust vat postion on
the tilted platform if needed. Put the hood back
on and leave to drain for a few minutes.
2
. Remove the hood again and with absorbent
paper under it, remove the platform completely
and set it down on the paper. Place the hood
back on to protect the resin in the vat from
light.
4. WASHING
13
14
3
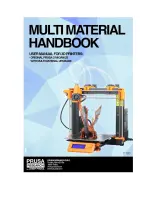
. After all the liquid resin has drained off, gently
remove any excess polymer with absorbent
paper. The fastest way to clean it and achieve
a dry surface is by spraying or immersing it in
IPA. Spray thoroughly to make sure all of the
details, such as miniature holes, are free from
excess resin. Alternatively, you can wash it in
hot water and detergent. Likewise, you can use
a hot soapy water spray to make sure excess
resin has been cleaned from detailed areas.
To avoid a fragile part being damaged, you
can hold the part under running hot water and
gently clean it with a soft brush or sponge and
liquid detergent. To remove the object from the
platform, slide a scraper in at the base and cut
off the supports. Take care not to damage the
print as it will not achieve its full hardness until
after post exposing in light. A small ultrasonic
cleaner filled with fresh soapy water or IPA is
recommended to clean delicate objects.
1.
When completely clean, place it underwater in
light (UV, sunlight or a table light) for a least 30
minutes to remove the surface tack. The part
will only have around 1/4 of its final strength
before post-exposure and strength increases
slowly with more light. Full strength is achieved
with 30 mins in a UV unit, or 60 mins under a
normal 60W table lamp. Then remove from
water and dry.
5. HARDENING
30 mins
post exposure
60 mins
post exposure
60 mins
post exposure
PRECISION
PRECISION


