background image

4.

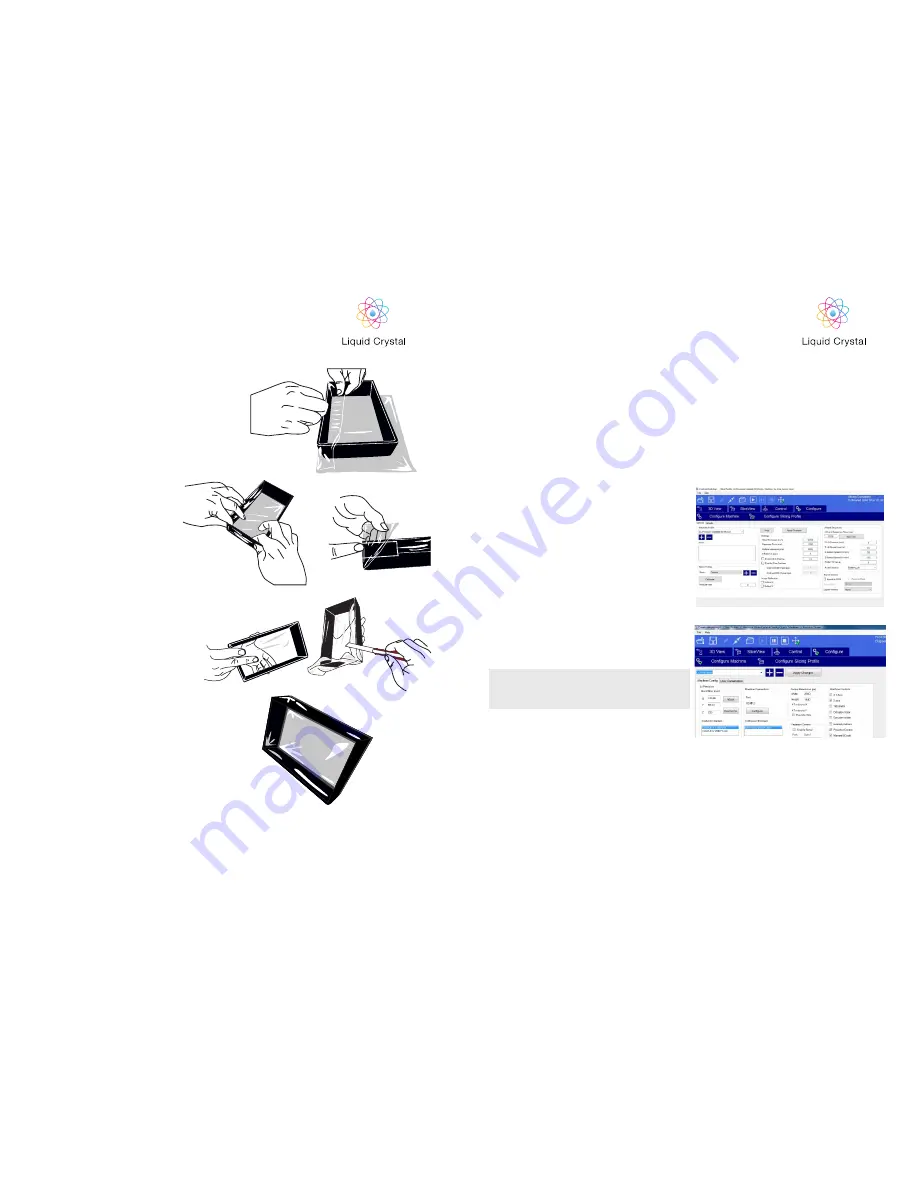
  Fold over the other side of the film and pulling 

it firmly tight in the middle stretch the edges 
out so there are no creases.

5.

  Pull each side of the film up and onto the sides 

of the vat. 

6.

  Apply single sided tape at the corners over the 

folds to keep the film tight. The vat should now 
be tensioned. Trim excess edges off.

7.

 Finally, fill with water and leave on absorbent 

paper to check for leaks. Drain and dry with 
paper towel before use.

If you are unsure of the process and need a video 
guide, then please visit the Support section of our 
website.

17

18

8. PRINTING YOUR 

OWN PARTS

STARTING A PRINT WITH 

CREATION WORKSHOP

In this section, we will learn how to use Creation 
Workshop to prepare your 3D parts for printing.

1. Home the printer by consulting section 2 the 

homing procedur.

2. Open Creation Workshop.exe and load your 

objects (STL, OBJ or AMF).

3.  With the object loaded and located in  the 


build area check the settings of the printing 
profile. Go to the “Configure” screen and open 
the “Configure Slicing Profile” tab. Select the 
printing profile from the “Machine Profiles” list 
that matches your resin and desired resolution 
for example “LCPrecision High Tensile Cream 50 
Microns”. 

Note:  Always click “Apply Changes” to save if 

you had to change any values. If you don’t click 
this your data will not be re-set.

4.  Now click “3D View” and check that the object 

is correctly placed inside the printing area. 

5. Press the slice button to start the slicing 

operation. A confirmation window will show. 
Always re-click the “Slice” button if you adjust 
the file in any way.

6.  Now check the “Slice View” screen to check that 

the first layer of every object is in contact with 
the build base. If it is above the build platform   
it will not adhere. If you click on the view box 
located in the bottom left corner you can scroll 
forward through the slicing views using the 
slider bar and check that the object is always 

You should now have successfully printed the ring 
and it’s time to print your own parts.

PRECISION

PRECISION

Содержание LC Precision

Страница 1: ...d com www photocentric3d com UK USA DISPOSAL INSTRUCTIONS Do not throw this electronic device into the waste when discarding To minimize pollu tion and ensure utmost protection of the global environme...

Страница 2: ...ftware Installation 2 Homing Procedure 3 Starting a Test Print 4 Washing 5 Hardening 6 Preparing for the next print 7 Re Skinning the Vat 8 Printing your own parts 9 Detailed Creation Workshop softwar...

Страница 3: ...ogy i Low cost We use high resolution low cost LCD screens that are widely available in monitors tablets mobile phones and televisions These provide phenomenal value for money which we pass onto you i...

Страница 4: ...clean off any resin spills Disconnect the printer from AC before storage or when not used for a long period of time This 3D printer is connected to the electrical net work with an input of 110 or 240...

Страница 5: ...box 3 Open up the printer package remove the hood and then remove the printer 4 Place the printer in the work area Make sure the printer stands level and stable on four feet If it is not level you can...

Страница 6: ...his can be checked by gently tapping on the film with your finger not your fingernail 1 Go to www photocentricgroup com and download the Liquid Crystal Precision Driver and Creation Workshop for Liqui...

Страница 7: ...till find difficulties please contact your national supplier or contact us at info photocentric co uk 9 10 Ensure that the screen is clean wipe with a little liquid soap and warm water if it s dirty a...

Страница 8: ...at this stage pressing the Show calibration button lo cated and a blue grid will appear To turn off the backlight send M107 command Now you have set up your printer lets make your first print 3 START...

Страница 9: ...detergent Likewise you can use a hot soapy water spray to make sure excess resin has been cleaned from detailed areas To avoid a fragile part being damaged you can hold the part under running hot wat...

Страница 10: ...rently taped to the vat and dispose of it It may be possible to use the double sided tape again if it has no resin on it If the tape cannot be reused remove it completely and replace on the lower edge...

Страница 11: ...area check the settings of the printing profile Go to the Configure screen and open the Configure Slicing Profile tab Select the printing profile from the Machine Profiles list that matches your resi...

Страница 12: ...er with supports and positioning These three buttons start pause and stop a print These buttons only become active once you have sliced your object Clicking this button allows you to view the 3D objec...

Страница 13: ...all models to fit on the build platform Any model that does not fit within the build platform will be moved outside the build area This tabs provides you with information about your model A model can...

Страница 14: ...ck the boxes under support general and generate only on downward Adaptive supports You can add supports to areas in the model that are unsupported There are 2 algorithms to help you accomplish this Th...

Отзывы: