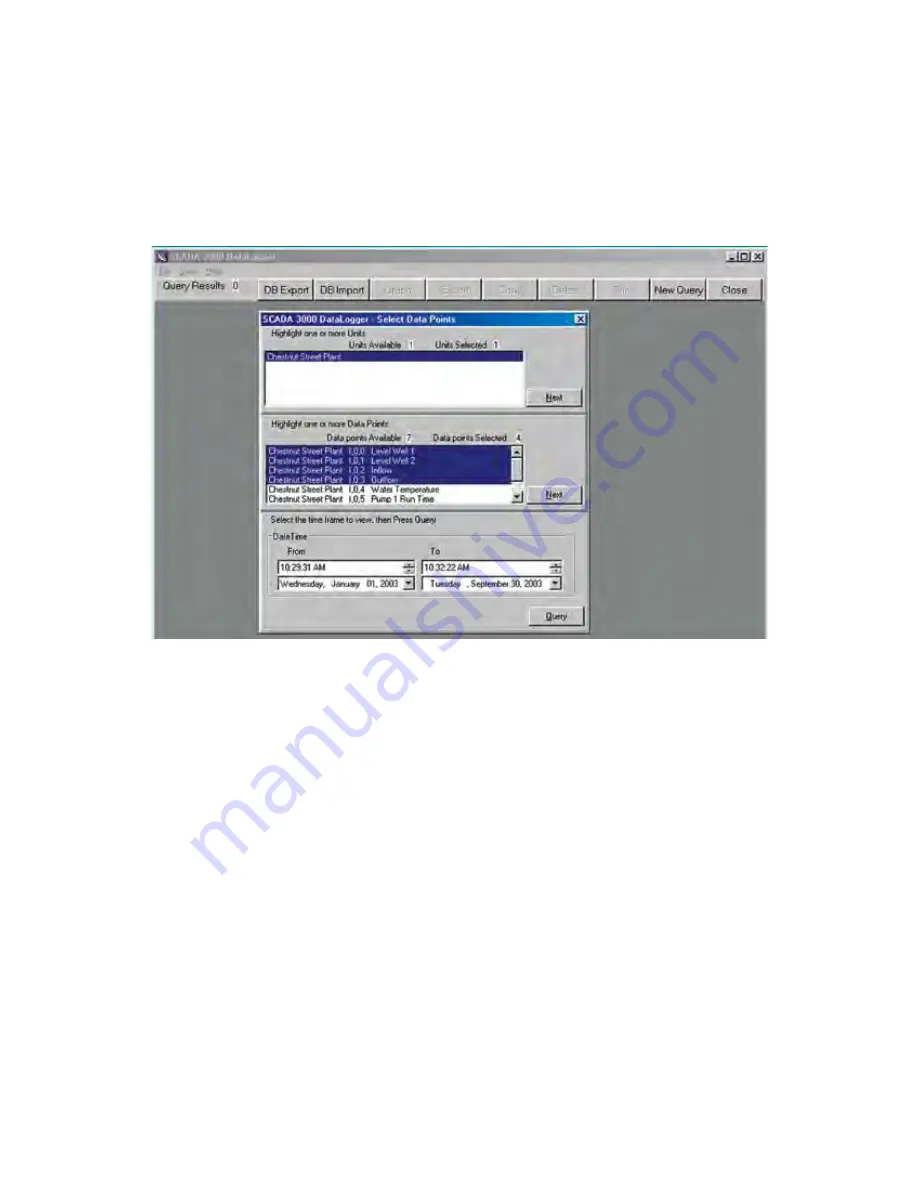
key down while you click each unit you want to highlight. When finished, click the
Next
but-
ton. A list of all available points, from the units you selected will be displayed. Choose the data
points you want to view by dragging the mouse over the list or hold the control key down while
you click each item you want to highlight. Click the
Next
button. Enter the range of dates and
times to perform your query and click on the
Query
button. The figure below shows the proce-
dure just described. After you click the
Query
button the data which matches your request will
be displayed on a grid. Use the up/down arrows to scroll through the data in the grid. At the
top of the form are seven buttons which provide additional options that are described below.
Figure 19: DataLogger Data form
DB export
You can export the entire datalogger database for a particular SCADA unit by clicking the
DB
Export
button. This is useful if you need to create backups or to relocate the files to another
computer. To perform the data export, click the
DB Export
button and then click on the name
of the unit you wish to export data from. Enter a file name and click
OK
.
DB Import
You can import datalogger data from another computer or backup file using this function. To
import a SCADA datalogger database click
DB Import
. Next, click the database file (.lar) you
wish to import, then click
Open
. Select the unit to which this data belongs, or click the
New
Unit
button and enter a new unit name. Click
OK
.
Graph
If you click on the graph button, all of the points in the query will be displayed as a line graph.
You can use the arrows on the bottom and side of the graph to adjust the position of the graph.
The graph may be printed by clicking the Print button at the top of the screen. You may also
copy the graph to the windows clipboard by clicking the
Copy
button. This allows you to paste
the graph into other applications. The
Zoom In
and
Zoom Out
buttons let you view the data
with more or less detail. The
Reset
button restores the original view of the graph. When fin-
ished, click the
Close
button to return to the Datalog form.
11-26
SCADA 3000 User’s Manual
Содержание Sensaphone SCADA 3000
Страница 1: ...Sensaphone SCADA 3000 User s Manual Version 2 34...
Страница 6: ...vi SCADA 3000 User s Manual...
Страница 10: ...x SCADA 3000 User s Manual...
Страница 30: ...1 6 SCADA 3000 User s Manual...
Страница 48: ...4 6 SCADA 3000 User s Manual...
Страница 70: ...9 8 SCADA 3000 User s Manual...
Страница 122: ...12 8 SCADA 3000 User s Manual...
Страница 190: ...15 30 SCADA 3000 User s Manual...
Страница 211: ...lead 1 lag 0 else lead 0 lag 1 16 21 Chapter 16 Programming in C...
Страница 212: ...16 22 SCADA 3000 User s Manual...
Страница 236: ...21 8 SCADA 3000 User s Manual...
Страница 248: ...22 12 SCADA 3000 User s Manual...
Страница 258: ...23 10 SCADA 3000 User s Manual...
Страница 274: ...25 8 SCADA 3000 User s Manual...
Страница 288: ...27 8 SCADA 3000 User s Manual...
Страница 294: ...28 6 SCADA 3000 User s Manual...
Страница 296: ...A 2 SCADA 3000 User s Manual...
Страница 302: ...D 2 SCADA 3000 User s Manual...
Страница 318: ...I 2 SCADA 3000 User s Manual...
Страница 320: ...J 2 SCADA 3000 User s Manual...
Страница 322: ...K 2 SCADA 3000 User s Manual...
Страница 335: ...Test Log...
Страница 336: ......


