x
Switch on delay
– Select switch on delay time for each display in a large matrix or video wall to
prevent AC inrush current. Use the PLUS/MINUS buttons to make selection (Off, Auto, 1-50 seconds
from switch on).
¾
Heat status
This function allows you to check the thermal status of the display at any time. The accuracy of the
temperature indicated is
r
5 degrees.
Press the
SET/PLUS
button to view the heat status. Press the
EXIT
button to return to the previous
menu.
¾
Date and time
Adjust current date and time for the display’s internal clock.
Press the
PLUS
button to open the submenu. Press the
UP
/
DOWN
button to toggle between the
Year
,
Month
,
Day
,
Hour
,
Minute
, and
Daylight saving
settings. Press the
PLUS
/
MINUS
button to adjust
all settings except
Daylight saving time
. Press the
SET
button to open the
Daylight saving
submenu. Press
PLUS
/
MINUS
button to make a selection and then press
UP
/
DOWN
button to adjust.
¾
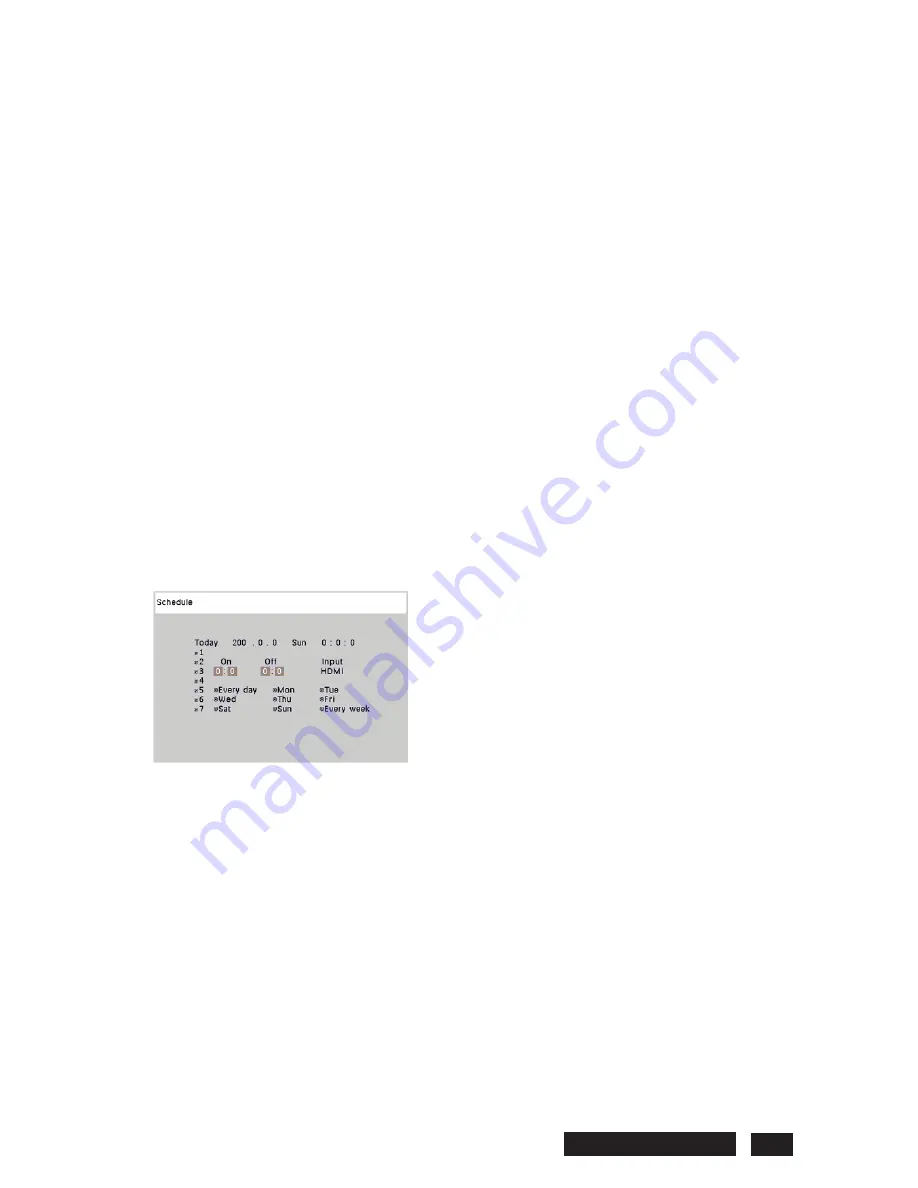
Schedule
Note: We recommend that you set up the current date and time before using this function.
The Schedule function allows you to program up to seven different scheduled time intervals for the
display. You can select the time the displayturns on and turns off, the days in a week the displayis
activated, and which input source the displaywill use for each scheduled activation period.
1). Press the
SET/PLUS
button to open the submenu.
2). Press the
UP
/
DOWN
button to select a schedule item (item 1 through item 7), and then press the
PLUS
button.
3). With the
ON
item highlighted, press the
UP
/
DOWN
button to set the hour when the displaywill be
turned on, then press the
PLUS
button to move to the minute slot to set the minute. If you do not want
to use a power on time, select "__" for the hour slot and minute slot.
4). Press the
PLUS
button to highlight the
OFF
item. Press the
UP
/
DOWN
button to set the hour when
the displaywill be turned off, then press the
PLUS
button to move to the minute slot to set the minute.
If you do not want to use a power off time, select "__" for the hour slot and minute slot.
5). Press the
PLUS
button to highlight the
Input
item, and then press the
UP
/
DOWN
button to select
an input source. If no input source is selected, the input source will remain the same as the last
selected input.
6). Press the
PLUS
button to select what days in a week this schedule item will be take effect, and
then press the
SET
button.
Philips BDL5545E 33
Содержание BDL5545E
Страница 1: ...SERVICE MANUAL BDL5545E ...
Страница 7: ...2 Outline Front view Rear view Philips BDL5545E 6 ...
Страница 8: ... Side view Left Right Top view Button view Philips BDL5545E 7 ...
Страница 13: ...Philips BDL5545E 12 RS 232C Pin No Signal name 1 NC 2 RXD 3 TXD 4 NC 5 GND 6 NC 7 NC 8 NC 9 NC ...


