Step 5.5: Soldering Battery EC3 Connector
In the final soldering step of ELEV-8 assembly, you will be soldering an EC3 connector to the
battery leads. This is one of the most difficult assembly steps, so we strongly suggest you take
your time and
on soldering the EC3 connector before getting started. You can
skip this step if your battery came pre-installed with an EC3 connector. Even though the
Parallax LiPo batteries (#752-00010) come with bullet connectors, they do not quite fit into the
EC3 connector housings, so they have to be replaced.
WARNING
!
NEVER create a situation where both battery leads are exposed. If the two leads
were to touch (directly or through any conductive object, such as wire cutters), it would result in
a dangerous short circuit which will catastrophically damage the battery, and could cause
flames or toxic fumes. Keep one lead properly isolated and protected at ALL TIMES to prevent
this.
Tools Needed
● Wire Strippers/Cutters (12-16 AWG)
● Ruler or Measuring Tape
● Soldering Iron
● Rosin-Core Solder
● Work-Holding Vise
● Metal or Wood Block with 5/32” (4 mm) hole (
optional
)
● Rosin Soldering Flux Paste (
optional
)
● Electrical Tape or Heat-Shrink Tubing
● Small Flat-Head Screwdriver
● Flat-Nose Pliers
Parts Needed
● 1 – LiPo Battery
● 1 – "Male"/"Female" EC3 pair w/cover and bullet connectors (not interchangeable with
other bullet connectors) (#452-00088)
Instructions
1. Carefully cut ONLY the positive (red) lead just behind any connector on the battery
leads; DO NOT cut both wires at the same time. If your battery did not come with any
connectors pre-soldered, wrap electrical tape or slide heat-shrink tubing over the tip of
the negative (black) lead.
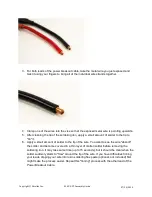
2. Using the wire strippers, remove 1/8” (3 mm) of insulation from the end of the lead.
Copyright © Parallax Inc.
ELEV-8 V2 Assembly Guide
07/26/2018
Содержание ELEV-8 V2
Страница 14: ...Copyright Parallax Inc ELEV 8 V2 Assembly Guide 07 26 2018...
Страница 19: ...Copyright Parallax Inc ELEV 8 V2 Assembly Guide 07 26 2018...
Страница 37: ...Results at end of this step Copyright Parallax Inc ELEV 8 V2 Assembly Guide 07 26 2018...
Страница 39: ...Copyright Parallax Inc ELEV 8 V2 Assembly Guide 07 26 2018...
Страница 44: ...3 Repeat this process for the three remaining motors Copyright Parallax Inc ELEV 8 V2 Assembly Guide 07 26 2018...
Страница 47: ...Copyright Parallax Inc ELEV 8 V2 Assembly Guide 07 26 2018...
Страница 57: ...Copyright Parallax Inc ELEV 8 V2 Assembly Guide 07 26 2018...
Страница 59: ...2 Repeat this for the remaining three standoffs Copyright Parallax Inc ELEV 8 V2 Assembly Guide 07 26 2018...
Страница 65: ...4 Repeat steps 1 3 to mount the three remaining ESCs Copyright Parallax Inc ELEV 8 V2 Assembly Guide 07 26 2018...
Страница 67: ...Copyright Parallax Inc ELEV 8 V2 Assembly Guide 07 26 2018...
Страница 87: ...Copyright Parallax Inc ELEV 8 V2 Assembly Guide 07 26 2018...
Страница 91: ...Copyright Parallax Inc ELEV 8 V2 Assembly Guide 07 26 2018...
Страница 96: ...Copyright Parallax Inc ELEV 8 V2 Assembly Guide 07 26 2018...
Страница 98: ...Copyright Parallax Inc ELEV 8 V2 Assembly Guide 07 26 2018...
Страница 102: ...4 Repeat instructions 2 and 3 for the remaining holes Copyright Parallax Inc ELEV 8 V2 Assembly Guide 07 26 2018...
Страница 107: ...Copyright Parallax Inc ELEV 8 V2 Assembly Guide 07 26 2018...
Страница 114: ...Copyright Parallax Inc ELEV 8 V2 Assembly Guide 07 26 2018...
Страница 121: ...4 Repeat instructions 2 3 for the remaining battery strap Copyright Parallax Inc ELEV 8 V2 Assembly Guide 07 26 2018...
Страница 123: ...Copyright Parallax Inc ELEV 8 V2 Assembly Guide 07 26 2018...
Страница 130: ...Copyright Parallax Inc ELEV 8 V2 Assembly Guide 07 26 2018...


