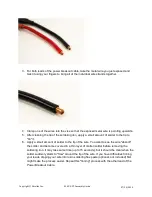
Step 4: Soldering ESC Bullet Connectors
In this step, you’ll again be using the same soldering techniques you learned in Step 2, but this
time to solder "male" and "female" bullet connectors to opposite ends of the ESCs.
Tools Needed
● Soldering Iron
● Rosin-Core Solder
● Work-Holding Vise
● Metal or Wood Block with 5/32” (4 mm) hole
(optional)
● Rosin Soldering Flux Paste (
optional)
Parts Needed
● 4 – 30A Electronic Speed Controller (ESC) (#750-90009)
● 8 – 3.5 mm "Male" Bullet Connectors (#450-00050)
● 12 – 3.5 mm "Female" Bullet Connectors (#450-00050)
Instructions
1. Prepare the wires for soldering by twisting and tinning them. (same procedure as in Step
2)
a. Take the wire at the end of each wire and twist it using your fingers to bring all of
the individual wires together.
b. Clamp one of the wires into the vise so that the exposed metal wire is pointing
upwards.
c. After cleaning the tip of the soldering iron, apply a small amount of solder to the
tip to "tin" it (this will provide better heat conduction from the iron to the
connection).
d. Apply a small amount of solder to the tip of the wire. You want to see the wire
"absorb" the solder and become covered in a thin layer of molten solder before
removing the soldering iron. It may take some time (up to 15 seconds), but it
should be clear when the solder suddenly starts to "flow" around the tip of the
wire. If you have difficulties tinning your leads, dipping your wire into rosin
soldering flux paste (optional, not included) first might make the process easier.
e. Repeat this process with every wire.
2.
Solder "male" bullet connectors to the red and black input leads on each ESC (same
procedure as in Step 2);
a.
Place a bullet connector into the vise, with the shallow “cup” end facing up. If you
are using the block, clamp it into the vise and seat the bullet connector into the
hole.
Copyright © Parallax Inc.
ELEV-8 V2 Assembly Guide
07/26/2018
Содержание ELEV-8 V2
Страница 14: ...Copyright Parallax Inc ELEV 8 V2 Assembly Guide 07 26 2018...
Страница 19: ...Copyright Parallax Inc ELEV 8 V2 Assembly Guide 07 26 2018...
Страница 37: ...Results at end of this step Copyright Parallax Inc ELEV 8 V2 Assembly Guide 07 26 2018...
Страница 39: ...Copyright Parallax Inc ELEV 8 V2 Assembly Guide 07 26 2018...
Страница 44: ...3 Repeat this process for the three remaining motors Copyright Parallax Inc ELEV 8 V2 Assembly Guide 07 26 2018...
Страница 47: ...Copyright Parallax Inc ELEV 8 V2 Assembly Guide 07 26 2018...
Страница 57: ...Copyright Parallax Inc ELEV 8 V2 Assembly Guide 07 26 2018...
Страница 59: ...2 Repeat this for the remaining three standoffs Copyright Parallax Inc ELEV 8 V2 Assembly Guide 07 26 2018...
Страница 65: ...4 Repeat steps 1 3 to mount the three remaining ESCs Copyright Parallax Inc ELEV 8 V2 Assembly Guide 07 26 2018...
Страница 67: ...Copyright Parallax Inc ELEV 8 V2 Assembly Guide 07 26 2018...
Страница 87: ...Copyright Parallax Inc ELEV 8 V2 Assembly Guide 07 26 2018...
Страница 91: ...Copyright Parallax Inc ELEV 8 V2 Assembly Guide 07 26 2018...
Страница 96: ...Copyright Parallax Inc ELEV 8 V2 Assembly Guide 07 26 2018...
Страница 98: ...Copyright Parallax Inc ELEV 8 V2 Assembly Guide 07 26 2018...
Страница 102: ...4 Repeat instructions 2 and 3 for the remaining holes Copyright Parallax Inc ELEV 8 V2 Assembly Guide 07 26 2018...
Страница 107: ...Copyright Parallax Inc ELEV 8 V2 Assembly Guide 07 26 2018...
Страница 114: ...Copyright Parallax Inc ELEV 8 V2 Assembly Guide 07 26 2018...
Страница 121: ...4 Repeat instructions 2 3 for the remaining battery strap Copyright Parallax Inc ELEV 8 V2 Assembly Guide 07 26 2018...
Страница 123: ...Copyright Parallax Inc ELEV 8 V2 Assembly Guide 07 26 2018...
Страница 130: ...Copyright Parallax Inc ELEV 8 V2 Assembly Guide 07 26 2018...


