2. Installation
8820-A2-GN20-80
November 2004
2-9
Installation into a Rack without Threaded Screw Holes
Procedure
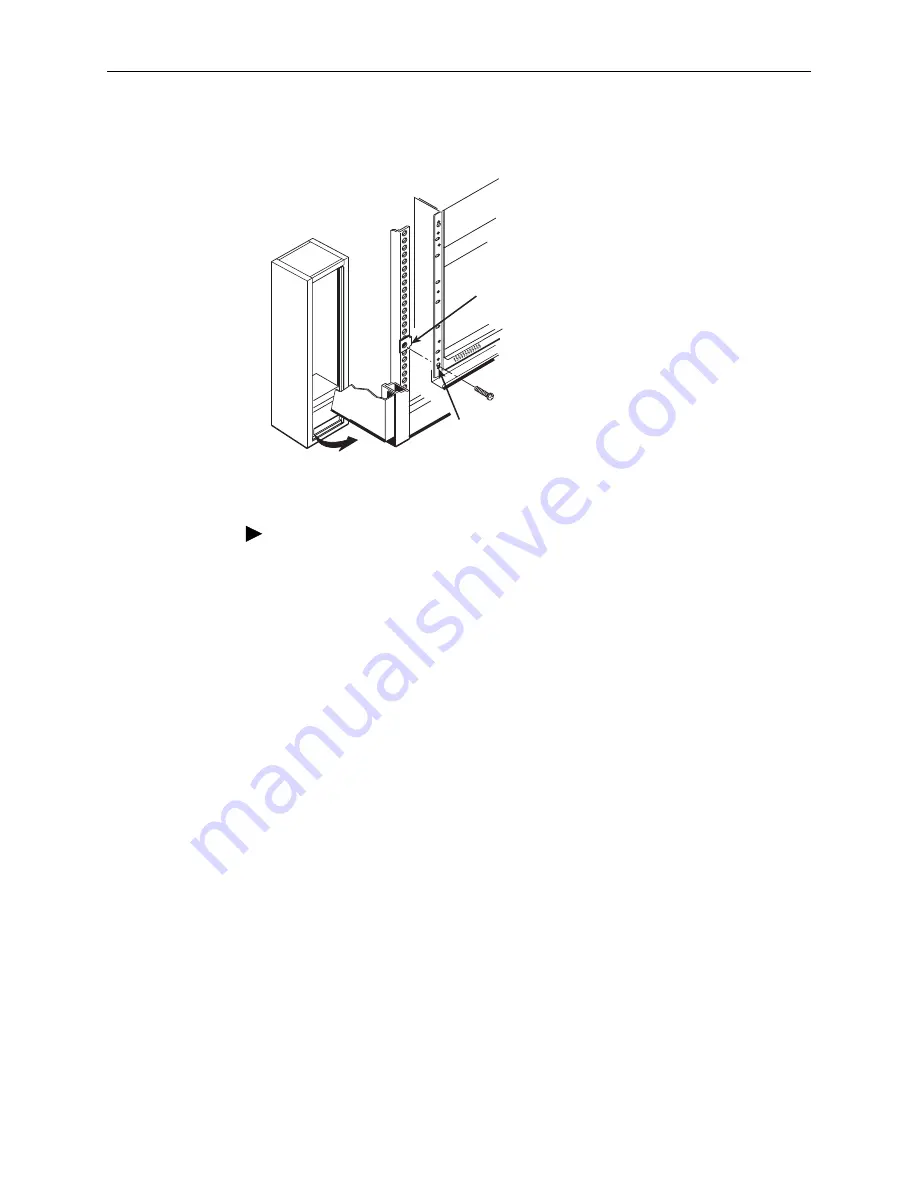
To install the chassis in a rack that does not have threaded screw holes:
1. Determine the preferred placement of the chassis in the rack. The chassis is
24.5 inches (62.2 cm) high. The top mounting hole is 1.484 inches (3.77 cm)
from the top of the chassis. Mark the appropriate locations for the machine
screws on the rack.
2. Slip a self-retaining nut onto each rail hole selected and align the hole of the
self-retaining nut with the hole in the rail.
3. Line up the chassis mounting bracket with the self-retaining nut and start to
rotate the self-retaining nut screw into the chassis mounting bracket and the
self-retaining nut. Start all screws, then tighten all screws until each screw
head is flush with the chassis and is securely mounted in the rack.
Front Rail
Keyhole
02-15324b-02
Front of 19-inch Rack
Screw
Self-retaining
Nut
Содержание 8820
Страница 1: ...8820 Broadband Access Concentrator Installation Guide Document No 8820 A2 GN20 80 November 2004...
Страница 10: ...Contents iv November 2004 8820 A2 GN20 80...
Страница 14: ...About This Guide viii November 2004 8820 A2 GN20 80...
Страница 20: ...1 Introduction 1 6 November 2004 8820 A2 GN20 80...
Страница 48: ...2 Installation 2 28 November 2004 8820 A2 GN20 80...
Страница 54: ...3 Cabling Line Card Tip and Ring 3 6 November 2004 8820 A2 GN20 80...
Страница 78: ...A Pinouts A 8 November 2004 8820 A2 GN20 80...
Страница 82: ...B Technical Specifications B 4 November 2004 8820 A2 GN20 80...
Страница 86: ...Index IN 4 November 2004 8820 A2 GN20 80...


