


10
Installation Guide
AT-OME-RX31
OMEGA
TM
AT-OME-RX31
FW
3
2
1
PWR
INPUT
IP MODE
RESET
LAN
SHOW IP
AT-OME-RX31
DC 24V
RELAY
COM C2
RX
C1
P
TX
TX RX
1
2
RS-232
TRIGGER I/O
-
+
L
R
-
-
+
+
OUTPUT
INPUT
3
2
1
IP Configuration
1. Make sure the AT-OME-RX31 is powered
2. Press and hold the
IP MODE
button, on the rear of the unit, for approximately five seconds.
The AT-OME-RX31 is shipped with DHCP enabled. Once connected to a network, the DHCP
server (if available), will automatically assign an IP address to the unit. If the AT-OME-RX31
is unable to detect a DHCP server within 15 seconds, then the unit will use a self-assigned IP
address within the range of
169.254.xxx.xxx
.
Use an IP scanner, along with the MAC address on the bottom of the unit, to identify the unit on
the network. If a static IP address is desired, the unit can be switched to static IP mode.
The default static IP address is
192.168.1.254
.
Switching the IP mode
IP MODE LED flashes
Description
Two
Factory Static IP mode (IP address set to
192.168.1.254
)
Four
DHCP mode
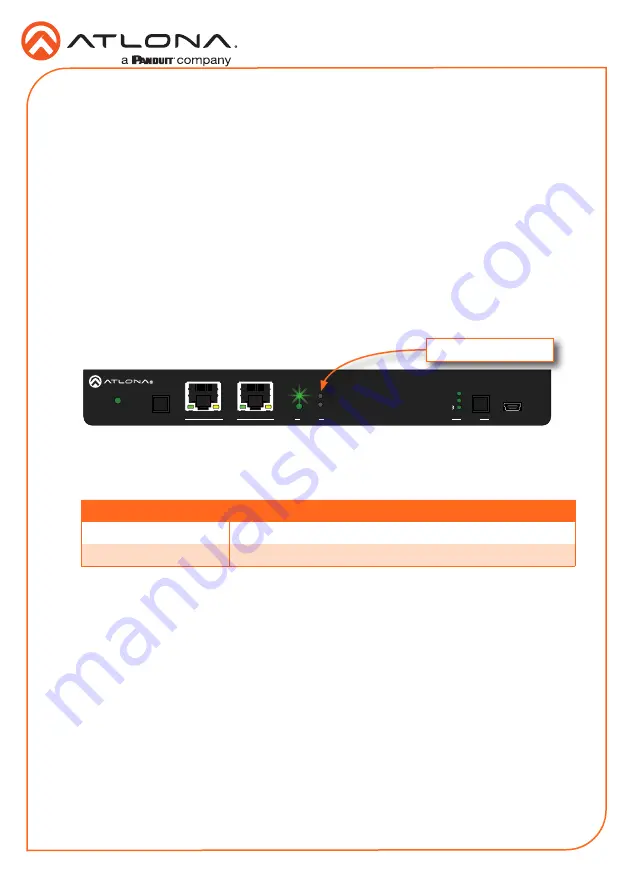
3. Release the button once the LED indicator, next to the
IP MODE
button, begins to flash
green. The number of flashes will indicate the currently selected IP mode.
IP Mode button
To display the IP address of the AT-OME-RX31, on the connected display, press and release the
SHOW IP
button on the front panel.
Displaying the IP Address


