


■
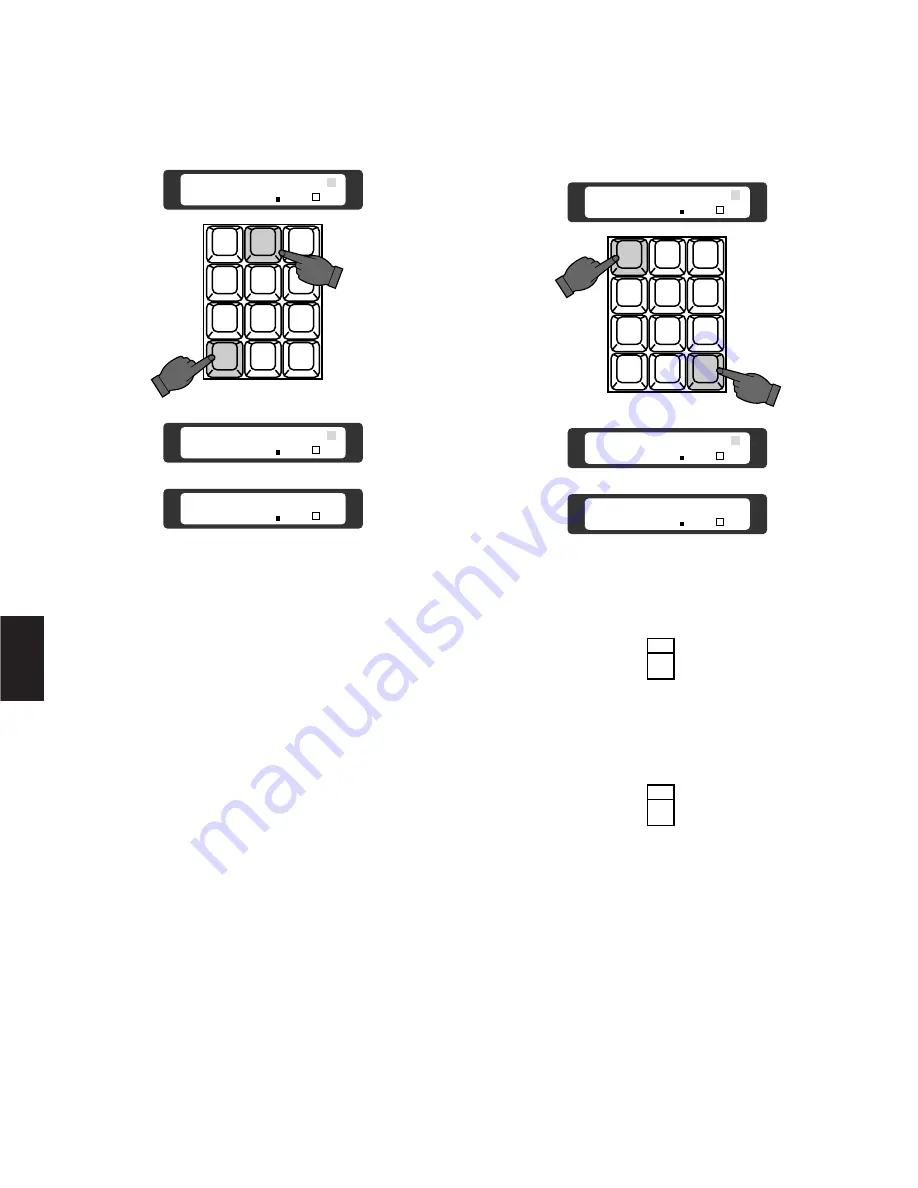
Camera Selection
1. Select the desired camera number by pressing the
Numeric keys, then press the
CAM (SET)
key.
The selected camera picture appears on the active
monitor.
2. Press the
INC +1CAM
button to replace the currently
selected camera with the next higher camera number.
3. Press the
DEC –1CAM
button to replace the currently
selected camera with the next lower camera number.
Notes:
• “PROHIBITED” is displayed on the LCD display, if
control of the selected camera is disabled due to
limited operator authorization.
• “Camera Busy” is displayed on the LCD display of
the camera is selected by a higher priority opera-
tor. Control of the same camera is denied to an
operator with a lower priority.
100
5
■
Monitor Selection
Select the desired Monitor Number
(1
to
16)
by pressing
the Numeric keys, then press the
MON (ESC)
key to exe-
cute the selection.
Notes:
• “Monitor Busy” appears on the LCD display, if the
monitor is selected by a higher priority operator.
Control of the same monitor is denied to an opera-
tor with a lower priority.
• If the CAM-P Mode is in On mode, press the
Function
(F1)
button instead of the
MON (ESC)
key.
CAM
ESC
SET
1
2
3
4
5
6
7
8
9
MON
0
A1
Camera
Monitor 02 SLW
FST
Camera 2
Monitor 01 SLW
FST
Camera
Monitor 01 SLW
FST
INC
+1CAM
DEC
-1CAM
1
2
3
4
5
6
7
8
9
MON
CAM
ESC
SET
0
A1
Camera 01
Monitor 02 SLW
FST
Camera 2
Monitor 02 SLW
FST
Camera
Monitor 02 SLW
FST
5
Содержание WJSX550C - MATRIX SWITCHER
Страница 8: ...9 1 SECTION 1 FEATURES OF THE SYSTEM 500 MATRIX SWITCHER ...
Страница 19: ...21 2 SECTION 2 DETAILED PRODUCT DESCRIPTION AND SELECTION ...
Страница 45: ...47 3 SECTION 3 INSTALLATION AND SYSTEM CONNECTIONS ...
Страница 61: ...65 4 SECTION 4 SOFTWARE SETUP ...
Страница 90: ...95 5 SECTION 5 OPERATING PROCEDURES ...
Страница 122: ...127 6 SECTION 6 TROUBLESHOOTING ...
Страница 126: ...131 7 SECTION 7 SPECIFICATIONS ...


