background image

RQT9478

2

Before use

Supplied accessories .................... 3
Caution for AC Mains Lead ........... 4
Safety precautions ........................ 4
Control guide ................................. 5
Remote control preparation ......... 6

Connection

Installing and 

assembling the rack ...... 7
Home Theater connections .... 10

Basic connections ....................... 10
Connecting equipment with HDMI 
terminal (TV, DVD recorder, etc.) ..... 10

Connecting STB etc. .....................................11
Setting for automatically switching the input source to STB  ....11

Connecting equipment without HDMI 
terminal (DVD player, VCR, etc.) ...... 12
Other connections ....................... 13

To connect a second set of equipment 
that supports HDMI .......................................13
To connect audio equipment (CD player, etc.) .....13

AC mains supply connection ..... 13
Connecting the wireless 

surround speakers ...................... 14
Checking speaker output ............ 15

Checking audio output 
with a test signal .......................... 15

Adjusting speaker (subwoofer, wireless 
surround speaker) output ..............................15

Play

Troubleshooting 

and other 

information

Error messages ........................... 24
Digital signals that can be 

played on this system ................. 24
Maintenance ................................. 24
Glossary ....................................... 25
Speci

fi

 cations .............................. 25

Troubleshooting guide ................ 26

Table of contents

Adjusting sound quality .................................21
Adjusting the volume balance of front speakers ...21
Setting distances ...........................................21
Reducing standby power consumption (HDMI off mode) ....21
VIERA Link “HDAVI Control” setting .............22
Adjusting the time lag between audio and 
video by delaying audio output .....................22
Switching between dual sounds ....................22
Clear audio at low volume .............................22
Switching the attenuator ...............................23
Switching the input signal detection setting ......23
Reset (factory settings) .................................23
When other equipment (mini component system, 
AV amp, etc.) manufactured by Panasonic operates 
with the remote control operations of this system ...........23

Enjoying movies and 

music ............................ 16

Enjoying sound 

fi

 eld effects ....... 17

Dolby Virtual Speaker ........................................17
SFC (Sound Field Control) ................................17
Cancelling sound 

fi

 eld effects ............................17

When connecting the wireless surround speakers ....17

Surround playback ........................................17
SFC (Sound Field Control) ............................17
Dolby Pro Logic    ..........................................17

Using the VIERA Link “HDAVI 

Control™” .................................... 18

What you can do with VIERA Link “HDAVI Control” .....18

Functions and settings ............... 20

Using “WHISPER-MODE SURROUND” .......20
Using “GAME” ...............................................20
Muting ...........................................................20
Adjusting speaker (subwoofer, wireless 
surround speaker) output during playback ....20
Setup menu items .........................................21

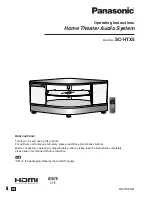
Содержание SC-HTX5

Страница 1: ... for purchasing this product For optimum performance and safety please read these instructions carefully Before connecting operating or adjusting this product please read the instructions completely Please keep this manual for future reference EB on the packaging indicates the United Kingdom EB Note ...

Страница 2: ... Troubleshooting guide 26 Table of contents Adjusting sound quality 21 Adjusting the volume balance of front speakers 21 Setting distances 21 Reducing standby power consumption HDMI off mode 21 VIERA Link HDAVI Control setting 22 Adjusting the time lag between audio and video by delaying audio output 22 Switching between dual sounds 22 Clear audio at low volume 22 Switching the attenuator 23 Switc...

Страница 3: ...ur Internet is direct shopping for a wide range of finished products take a browse on our website for further details Interested in purchasing an extended guarantee Please call 0870 240 6284 or visit our website www panasonic co uk guarantee Before use Connection Play Troubleshooting and other information Supplied accessories Please check and identify the supplied accessories Use numbers indicated...

Страница 4: ...e system This may result in serious injury Place the television properly on the system Use the Fall prevention band to prevent the television from falling over and causing serious damage or injury Do not place items heavier than the recommended weight on the system or the shelves Be careful not to get hit by the protruded TV When you use a stand with a rotating function install it so it does not p...

Страница 5: ...onnector Amplifier Digital transmitter terminal Wire dressing cover Subwoofer Front speaker left Subwoofer Front speaker right Glass shelf Caster Caster trays Front view Rear view Display PCM W DIGITAL DTS PL SFC VS DIGITAL INPUT Digital surround signal Sound field below page 17 When input signal is digital When PCM signal is being input or the input signal setting is fixed to PCM page 23 General ...

Страница 6: ...nese batteries Do not use batteries if the covering has been peeled off Do not heat or expose to flame Do not leave the batteries in an automobile exposed to direct sunlight for a long period of time with doors and windows closed Mishandling of batteries can cause electrolyte leakage which can severely damage the remote control Remove the batteries if the remote control is not going to be used for...

Страница 7: ...e the Styrofoam marked with on page 3 packing plan used at the upper center when shipped and then tip the rack back so that the top board can be put on the Styrofoam At least 2 people are necessary for this If you do not have the Styrofoam spread soft cloth such as a blanket and tip the rack to the front side slowly Do not apply the load to the wire dressing part when tipping the rack back Remove ...

Страница 8: ...g position Shelf board position Height of compartment Maximum depth for storing equipment Recommended width of equipment Width of compartment Upper shelf A Upper 117 340 430 610 Lower 144 Lower shelf B Upper 147 Lower 114 Do not put equipment weighing more than 12 kg on the upper shelf A and lower shelf B Image interference may occur if you put recording equipment such as a DVD recorder on the upp...

Страница 9: ... not have directions 3 Match the other end press and set it until it clicks If the wire dressing cover is misaligned move it up and down to align the position To remove Press and hold the end of the wire dressing cover to remove inward outward Rear view Wire dressing hole Fixing hole Protrusion Wire dressing case Wire dressing cover Click Cover Caster tray Arrow Stabilising the television Attach t...

Страница 10: ...gh the television s speakers even if this system is in standby mode Reduce the volume on the television and select TV after you have made connections as above if you want to use this system Connecting equipment with HDMI terminal TV DVD recorder etc Connection cable HDMI cable not included Stereo phono cable not included Optical fibre cable not included SPEAKERS SUBWOOFER TV TV OUT OPTICAL 1 OPTIC...

Страница 11: ...opriate operating instructions Connecting STB etc Use this connection to enjoy STB multi channel sources on this system TV OUT OPTICAL 1 OPTICAL 2 COAXIAL TV AUX 2 AUX 3 BD DVD IN AUX 1 UX 4 N R L DIGITAL IN Amplifier HDMI input TV HDMI Video Audio out Digital audio out optical Blu ray Disc player DVD recorder etc Make sure to connect to TV OUT Digital audio out optical STB Set Top Box etc Setting...

Страница 12: ...ut optical Home Theater connections Connection Digital audio out coaxial DVD player VCR etc Optical fibre cable not included Stereo phono cable not included Coaxial cable not included For the correct type of video cable refer to the operating instructions for the equipment you are connecting Make the connection either A B or C according to the suitability for your equipment To connect a DVD record...

Страница 13: ...re connected READ THE CAUTION FOR THE AC MAINS LEAD ON PAGE 4 BEFORE CONNECTION This system consumes approx 0 4 W when AC mains lead is connected to the household mains socket approx 0 1 W HDMI off mode page 21 To save power when the system is not to be used for a long time unplug it from the household mains socket Make sure to turn this system off before unplugging the AC mains lead AC mains supp...

Страница 14: ...left of the listening viewing position Setup example When connecting the speaker system SB HS100A not included Keep the cover in a safe place after removal Surround speaker right Wireless system SH FX70 approx 120 Surround speaker left This system Setup of the surround speakers SH FX70 is necessary to install the surround speakers SH FX70 not included is a combined unit of digital transmitter and ...

Страница 15: ...ignal above steps 1 to 3 2 Press to select a speaker for adjustment When not using the wireless surround speakers SUBW Subwoofer When using the wireless surround speakers page 14 SUBW Subwoofer p RS Wireless surround right p LS Wireless surround left 3 Press to adjust each speaker s output level The test signal comes from the speaker being adjusted The test signal is output again in the above orde...

Страница 16: ...n on the control panel 2 Select the source 3 Start play on the connected equipment 4 To adjust the volume Control panel page 5 See page 24 for digital signals that can be played on this system Depending on the playback signal you may feel the volume of subwoofer or surround speakers when used page 14 is not balanced with the volume of the front speakers In this case you can adjust the speaker volu...

Страница 17: ...CD and TV When the input signals are multi channel LPCM signals or surround digital signals such as Dolby Digital or DTS those signals are converged to 2 1 channel and are output from the left and right front speakers and subwoofer When you connect the wireless surround speakers the surround playback 4 1 channel below is achieved When connecting the wireless surround speakers Surround playback Mul...

Страница 18: ...rol is a unique function that we have developed and added As such its operation with other manufacturers equipment that supports HDMI CEC cannot be guaranteed This system supports HDAVI Control 4 function HDAVI Control 4 is the newest standard current as of December 2008 for Panasonic s HDAVI Control compatible equipment This standard is compatible with Panasonic s conventional HDAVI equipment Ple...

Страница 19: ...5 0 meters or less It is recommended that you use Panasonic s HDMI cables Non HDMI compliant cables cannot be utilized Recommended part number RP CDHG10 1 0 m RP CDHG15 1 5 m RP CDHG20 2 0 m RP CDHG30 3 0 m RP CDHG50 5 0 m etc Note Only with HDMI cable connection you cannot enjoy TV VIERA sounds on this system Connect TV VIERA to this system with the optical fibre cable or stereo phono cable to en...

Страница 20: ...put during playback Depending on the playback signal you may feel the volume of the subwoofer or surround speakers when used page 14 is not balanced with the volume of the front speakers In this case you can adjust the speaker volume during playback 1 Press CH to select a speaker for adjustment The speaker is switched each time you press the button When not using the wireless surround speakers SUB...

Страница 21: ...em is turned off Normal power consumption Factory setting ON 5 Press RETURN several times to select EXIT and press OK to finish the setting Setup menu items appears only when audio adjustment can be made Select EXIT and press OK to finish the setup mode Adjusting sound quality You can adjust the level of bass and treble This setting is effective only when you perform stereo playback of 2 channel a...

Страница 22: ...ing audio output is not necessary select OFF AUTO is effective only when connecting the Panasonic TV VIERA supporting HDAVI Control 3 and later versions Auto Lip Synchronization Function When you connect the Panasonic TV incompatible with HDAVI Control 3 and later versions or non Panasonic TV if AUTO is set 40 msec is set Switching between dual sounds You can switch between dual sounds of Dolby Di...

Страница 23: ... the same number as the code number you have selected in step 3 To set the remote control code to 2 press and hold OK in step 4 and then press BD DVD more than 2 seconds 5 Press RETURN several times to select EXIT and press OK to finish the setting If different codes are set between this system and remote control the error message REMOTE 2 or REMOTE 1 is displayed Switching the attenuator Switch t...

Страница 24: ...o correct the problem Consult your dealer if the error code remains on the display Turn the connected equipment off and on again Disconnect the HDMI cable then reconnect it Do not connect more than 2 sets of equipment to this system s output U704 The system received incompatible video signals through HDMI connection Check the settings of the connected equipment Digital signals that can be played o...

Страница 25: ...ling rate of a signal that was sampled at a certain rate DTS Digital Theater Systems Surround system used in most movie theatres Separation works well between channels resulting in realistic surround effects Dynamic range Dynamic range is the difference between the lowest level of sound that can be heard above the noise of the equipment and the highest level of sound before distortion occurs HDMI ...

Страница 26: ...ght protection of the disc if using digital connection This system may not be able to play sources with sampling frequency of over 48 kHz Sound stops F61 appears on the display for about a second The protection circuit is activated when some abnormality is detected and turns off the system automatically Amplifier output is abnormal Straining of the speakers through excessive volume or power This m...

Страница 27: ...uropean Union If you wish to discard these items please contact your local authorities or dealer and ask for the correct method of disposal Note for the battery symbol bottom two symbol examples This symbol might be used in combination with a chemical symbol In this case it complies with the requirement set by the Directive for the chemical involved Cd Problem Possible solution Pages VIERA Link HD...

Страница 28: ...Y FRIENDLY MANNER WARNING TO REDUCE THE RISK OF FIRE ELECTRIC SHOCK OR PRODUCT DAMAGE DO NOT EXPOSE THIS APPARATUS TO RAIN MOISTURE DRIPPING OR SPLASHING AND THAT NO OBJECTS FILLED WITH LIQUIDS SUCH AS VASES SHALL BE PLACED ON THE APPARATUS USE ONLY THE RECOMMENDED ACCESSORIES DO NOT REMOVE THE COVER OR BACK THERE ARE NO USER SERVICEABLE PARTS INSIDE REFER SERVICING TO QUALIFIED SERVICE PERSONNEL ...

Отзывы: