background image

2

Things You Should Know

Thank you for choosing Panasonic! 

You have purchased one of the most sophisticated and reliable 
products on the market today. Used properly, we’re sure it will 
bring you and your family years of enjoyment. Please take time to 
fill in the information on the right. 
The serial number is on the tag located on the underside of your 
Palmcorder. Be sure to retain this manual as your convenient 
Palmcorder information source.

Safety Precautions

WARNING: TO PREVENT FIRE OR SHOCK HAZARD,
DO NOT EXPOSE THIS EQUIPMENT TO RAIN OR MOISTURE.

Your


Palmcorder is designed to record and play back in Standard Play (SP) mode and Long Play (LP) mode.

It is recommended that only cassette tapes that have been tested and inspected for use in Palmcorder with the 

 mark be 

used.

The above markings are located on the appliance bottom cover.

Note: 

This equipment has been tested and found to comply with Part 15 of the FCC Rules. These limits are designed to provide 

reasonable protection against harmful interference when operated in a residential environment.
If this equipment does cause interference to radio or television reception, which can be determined by turning the equipment off 
and on, use the equipment in another location and/or utilize an electrical outlet different from that used by the receiver.
If necessary, consult the dealer or an experienced radio/TV technician for help. You may find the booklet, ‘Something About 
Interference’ available from FCC local regional offices helpful.

FCC Warning: 

To assure continued FCC compliance, the user must use only the provided shielded interfacing cable with ferrite core when 
connecting to computer in accordance with instruction herein. Also, any unauthorized changes or modifications to this 
equipment could void the user’s authority to operate.

Declaration of Conformity

Model No.:

PV-DV852

Trade Name:

Panasonic

Responsible party:

Matsushita Electric Corporation of America

Address:

One Panasonic Way, Secaucus, New Jersey 07094

Telephone number:

1-800-211-PANA (7262)

This device complies with Part 15 of the FCC Rules. Operation is subject to the following two conditions: (1)This device 
may not cause harmful interference, and (2) this device must accept any interference received, including interference 
that may cause undesired operation.

CAUTION:  TO PREVENT FIRE OR SHOCK HAZARD AND ANNOYING INTERFERENCE, USE THE RECOMMENDED 

ACCESSORIES ONLY.

CAUTION: TO PREVENT ELECTRIC SHOCK, MATCH WIDE BLADE OF PLUG TO WIDE SLOT, FULLY INSERT.
WARNING: DANGER OF EXPLOSION IF BATTERY IS INCORRECTLY REPLACED. REPLACE ONLY WITH THE SAME OR 

EQUIVALENT TYPE.

Ò

Ò

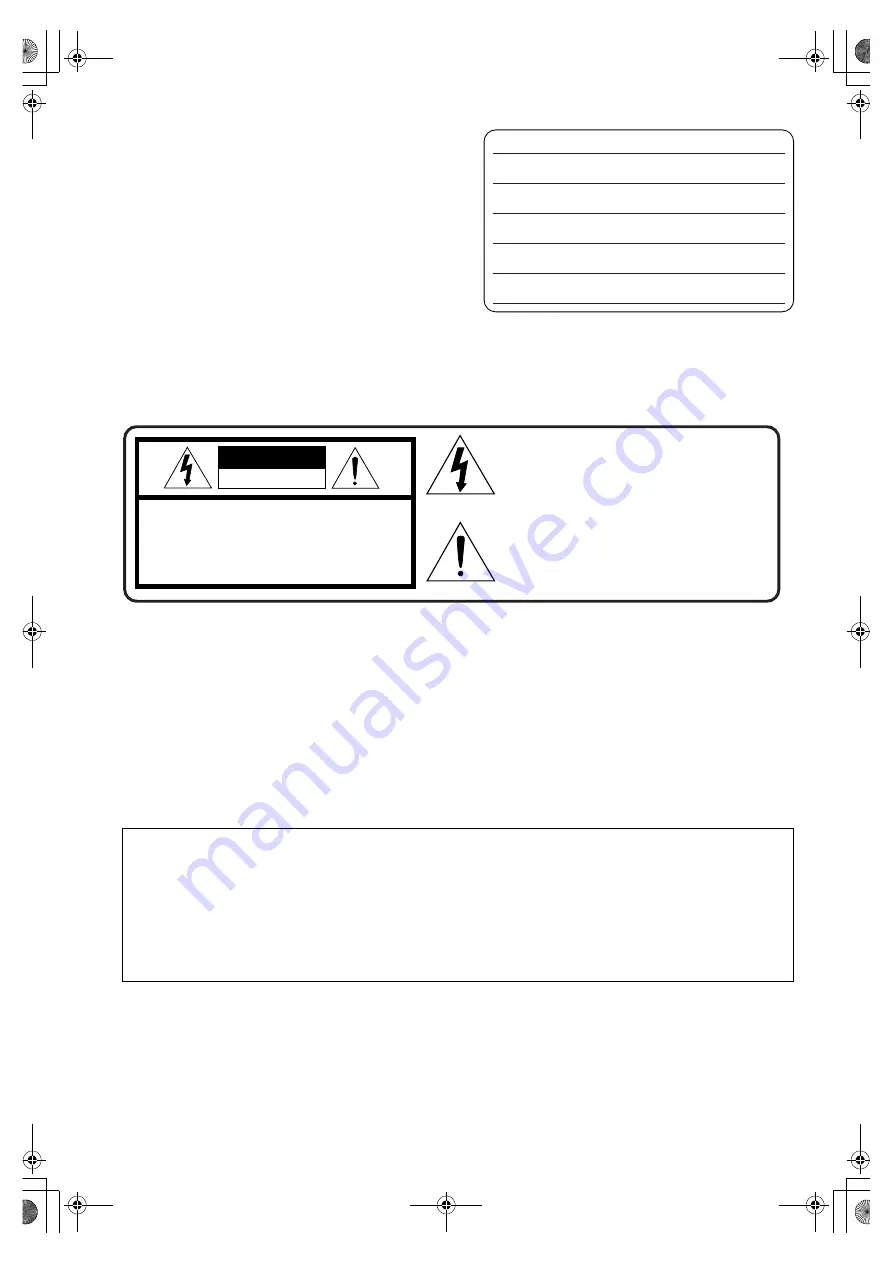
This symbol warns the user that  uninsulated 
voltage within the unit may have sufficient 
magnitude to cause electric shock. 
Therefore, it is dangerous to make any kind 
of contact with any inside part of this unit.                       

This symbol alerts the user that important 
literature concerning the operation and 
maintenance of this unit has been included. 
Therefore, it should be read carefully in order 
to avoid any problems.                          

CAUTION

RISK OF ELECTRIC SHOCK 

DO NOT OPEN     

CAUTION: TO REDUCE THE RISK OF ELECTRIC SHOCK,                 

DO NOT REMOVE COVER (OR BACK)                      

NO USER-SERVICEABLE PARTS INSIDE                      

REFER SERVICING TO QUALIFIED SERVICE PERSONNEL                    


Date of Purchase 

Dealer Purchased From 

Dealer Address

Dealer Phone No. 

Model No.

PV-DV852

Serial No.

137P.book  2 ページ  2002年3月19日 火曜日 午後2時57分

Содержание Palmcorder MultiCam PV-DV852

Страница 1: ... DV852 Before attempting to connect operate or adjust this product please read these instructions thoroughly Mini For USA assistance please call 1 800 211 PANA 7262 or send e mail to consumerproducts panasonic com For Canadian assistance please call 1 800 561 5505 or visit us at www panasonic ca LSQT0512B R 137P book 1 ページ 2002年3月19日 火曜日 午後2時57分 ...

Страница 2: ... the provided shielded interfacing cable with ferrite core when connecting to computer in accordance with instruction herein Also any unauthorized changes or modifications to this equipment could void the user s authority to operate Declaration of Conformity Model No PV DV852 Trade Name Panasonic Responsible party Matsushita Electric Corporation of America Address One Panasonic Way Secaucus New Je...

Страница 3: ...blade wider than the other or 3 wire grounding type plug a plug having a third grounding pin The 2 wire polarized plug will fit into the power outlet only one way This is a safety feature If you are unable to insert the plug fully into the outlet try reversing the plug If the plug still fails to fit contact your electrician to replace your obsolete outlet Do not defeat the safety purpose of the po...

Страница 4: ...ct the power supply or operate your Palmcorder if it gets wet Your Palmcorder has been designed for outdoor use however it is not designed to sustain direct exposure to water rain sleet snow sand dust or a direct splashing from a pool or even a cup of coffee This action could permanently damage the internal parts of your Palmcorder Do not attempt to disassemble this unit There are no user servicea...

Страница 5: ...bing 34 Special Features Using a Memory Card 35 Recording on the Memory Card 35 Playing Back Files from the Memory Card 38 Copying pictures on a Memory Card to a Cassette 39 Slide Show 40 Creating a Title 41 Inserting a Title 41 Protecting the Files on a Memory Card from Accidental Erasure File Lock 42 Deleting the Files Recorded on a Memory Card 42 Formatting a Memory Card 43 DPOF Setting 43 Copy...

Страница 6: ... 3 Remote Controller and Button Type Battery l 10 11 4 Lens Cap and Lens Cap Cord l 13 5 A V Cable l 34 44 6 SD Memory Card l 55 7 CD ROM USB Driver for Panasonic DVC l 48 G726 Decoder l 46 49 ArcSoft Software l 46 47 Microsoft and Windows are registered trademarks of Microsoft in the United States and other countries Macintosh is a registered trademark of Apple Computer Inc 2001 ArcSoft the ArcSo...

Страница 7: ...ng the Viewfinder upward 3 Turn the Palmcorder on l 14 Slide the 1 Switch to ON The CAMERA Lamp lights up 4 Insert the Cassette l 13 Slide the 2 lever to the right and pull down to open the Cassette compartment cover Insert the Cassette Press the PUSH TO CLOSE 3 to load the Cassette Close the lower compartment Cover 5 Start recording l 20 Press the 4 Button Recording starts Press the 4 Button agai...

Страница 8: ...l 20 23 24 25 20 Multi Function Dial PUSH l 15 19 24 25 29 30 21 Operation Lever Operates by pushing the lever to each direction A Reverse Search s l 20 Rewind Review 6 l 29 Forward Search r l 20 Fast Forward Cue 5 l 29 Recording Check S l 20 B Playback 1 l 29 38 40 Pushing it twice activates the Variable Speed Search mode C Stop l 29 38 40 Operates by pressing D Pause l 30 40 22 Menu Button MENU ...

Страница 9: ...nting the Palmcorder on an optional tripod 47 Audio Video Input Output Jack A V IN OUT l 34 44 Headphone Jack PHONES l 61 When a cable is connected to this jack the built in speaker of the Palmcorder is disabled 48 Digital Still Picture Terminal D STILL PICTURE 49 USB Jack TO PC l 48 50 DV Input Output Terminal i LINK l 45 Connect this to the digital video equipment i LINK is the name of connector...

Страница 10: ...l 67 4 Indication Shift Button COUNTER l 58 5 Multi Picture Picture in Picture Button MULTI P IN P l 28 33 39 41 6 Recording Button REC l 44 45 7 Audio Dubbing Button A DUB l 34 8 Upward Direction Button π for Playback Zoom Function l 32 9 Left Right Direction Button for Playback Zoom Function l 32 10 Downward Direction Button for Playback Zoom Function l 32 11 Slow Motion Still Advance Button E D...

Страница 11: ...nasonic PART NO VSBW0004 CR2025 only Use of another battery may present a risk of fire or explosion Caution Battery may explode if mistreated Dispose of used battery promptly Keep away from children Do not recharge disassemble or dispose of in fire ªUsing the Remote Controller 1 Direct the Remote Controller at the Remote Control Sensor on the Palmcorder and press the desired button Distance from t...

Страница 12: ...Since the Battery will not be charged when the DC Cable is connected to the AC Adaptor disconnect it The CHARGE Lamp lights up and charging starts When the CHARGE Lamp goes off charging is completed 2 2 2 2 Attach the charged Battery to the Palmcorder Disconnecting the Power Source Set the OFF ON MODE Switch 1 to OFF and while pressing the BATT PUSH Button 2 slide the Battery or DC Cable upward to...

Страница 13: ...nd pull the Shoulder Strap 2 Fold the tip of the Shoulder Strap pass it through the Shoulder Strap Length Adjuster and pull it Pull it out more than 1 inch 2 cm 1 from the Shoulder Strap Length Adjuster so that it cannot slip off Inserting a Cassette When power is supplied to the Palmcorder the cassette can be taken out without turning the Palmcorder on 1 Slide the OPEN EJECT Lever to the right an...

Страница 14: ...he PUSH OPEN Button and at the same time bring out the LCD Monitor about 90x in the direction of the arrow The Viewfinder goes off 3 3 3 3 Adjust the LCD Monitor angle according to the desired recording angle The LCD Monitor can rotate a maximum of 180x 2 from the vertical position to the upward direction and a maximum of 90x 3 to the downward direction Forcefully rotating the LCD monitor beyond t...

Страница 15: ...Remote Controller To select items on the Menu press the ITEM Button 5 on the Remote Controller To set the mode for the selected items press the SET Button 6 on the Remote Controller To Exit the Menu Screen Press the MENU Button again About the Menu Mode Setting The setting selected on the Menu will be retained even when the Palmcorder is turned off However if the Battery or AC Adaptor is disconnec...

Страница 16: ...rogressive PhotoShotTM Mode PROGRESSIVE l 21 3 Digital Zoom D ZOOM l 22 4 Cinema like Format Recording CINEMA l 23 5 Returning to the Main Menu RETURN DIGITAL EFFECT Sub Menu 6 Digital Effects 1 EFFECT1 l 27 7 Digital Effects 2 EFFECT2 l 27 CARD SETUP Sub Menu 8 Picture Size PICTURE SIZE l 35 9 Picture Quality PICTURE QUALITY l 36 10 Title Creation CREATE TITLE l 41 MULTI PICTURES Sub Menu 11 Mult...

Страница 17: ...Digital Effect On Off EFFECT l 32 33 8 Digital Effect Selection EFFECT SELECT l 32 33 CARD SETUP Sub Menu 9 Picture Quality PICTURE QUALITY l 36 10 Title Creation CREATE TITLE l 41 MULTI PICTURES Sub Menu 11 Multi Picture Mode SCAN MODE l 33 12 Strobe Multi Picture Speed SPEED l 33 13 Swing Mode SWING l 33 RECORDING SETUP Sub Menu 14 Recording Speed Mode REC SPEED l 19 44 45 15 Audio Recording Mod...

Страница 18: ... file being displayed appears l 42 Use this Menu after the file to be erased appears 12 FILE LOCK The FILE LOCK Menu to prevent the accidental erasure of files Lock Setting being displayed appears l 42 Use this Menu after the file to be locked appears 13 DPOF SETTING The DPOF SETTING Menu for performing the DPOF settings for the displayed picture appears l 43 Use this Menu after the picture whose ...

Страница 19: ...e recording If the 0 Indication is flashing charge the built in lithium battery and reset the date and time Internal Lithium Battery Recharge The internal lithium battery sustains the operation of the clock When the 0 Indication is lit the internal lithium battery is near discharge 1 Connect the AC Adaptor to the Palmcorder with the power turned off and then connect to the AC Jack After charging f...

Страница 20: ...ding Pause Mode ªTo View the recorded scene while the Recording is paused Camera Search The recorded scene can be viewed by holding down the Operation Lever towards j 7 or i 8 in the Recording Pause Mode The Camera Search function is useful for finding the starting point of a new scene to create a smooth transition from one scene to another When the Operation Lever is pushed towards j images are p...

Страница 21: ...L Button 2 is pressed images become still pictures When the Button is pressed again the Digital Still Picture Mode is cancelled We recommend that you press the STILL Button first at the position where you want to record the picture and then press the PHOTO SHOT Button For the still pictures taken in the Continuous PhotoShot Mode or Digital Still Picture Mode PhotoShot index signals are not recorde...

Страница 22: ...BILIZER Button until the EIS Indication 1 appears 2 Press the Recording Start Stop Button or PHOTO SHOT Button to start recording MEGA EIS Optical Image Stabilizer Function This function increases the effect We recommend using MEGA EIS Optical Image Stabilizer Function when performing Card Photo Shot Function 3 Press the OPTICAL IMAGE STABILIZER Button repeatedly until the EIS Indication 2 appears...

Страница 23: ... Special Situations Program AE Select optimal automatic exposures under specific recording situations 1 Set the Mode Selector Switch to MANUAL The MNL Indication appears 2 Set CAMERA FUNCTIONS CAMERA SETUP PROG AE a desired Mode 5 7 4 Ω º The Indication of the selected Mode is displayed 5 Sports Mode 1 For Recording scenes involving quick movements such as sports scenes 7 Portrait Mode 2 Focuses o...

Страница 24: ...s 2 Press the PUSH Dial repeatedly until the Iris Indication 2 appears 3 Rotate the PUSH Dial to adjust the iris Adjustable Range of the Iris CLOSE Closed F16 F1 7 OP Opened 0dB 18dB When a value closer to CLOSE is selected the image becomes darker When a value closer to OPi18dB is selected the image becomes brighter The value to which idB is attached indicates a gain value If this value is too la...

Страница 25: ...n appears 3 Rotate the PUSH Dial until the 1 Indication is displayed 4 Point the Palmcorder at a full screen white subject and then keep the PUSH Dial pressed until Indication 1 stops flashing When the 1 Indication flashes after turning the Palmcorder on the previously adjusted white balance setting is still kept To Resume Automatic Adjustment Rotate PUSH Dial until the AWB Indication is displayed...

Страница 26: ...recording may appear dark if flash is set off in front of white background Using Tele Conversion Lens not supplied or Wide Conversion Lens not supplied can block flash light and may cause vignetting effect Adjusting Brightness of the Video Flash Brightness of the Video Flash can be set in FLASH LEVEL on the RECORDING SETUP Sub Menu Set FLASH LEVEL on the RECORDING SETUP Sub Menu to desired Flash L...

Страница 27: ... Records an image with a painting like effect Selecting a desired digital effect Set CAMERA FUNCTIONS DIGITAL EFFECT EFFECT1 or EFFECT2 a desired digital effect Cancelling the digital effect Set CAMERA FUNCTIONS DIGITAL EFFECT EFFECT1 or EFFECT2 OFF For other notes see page 61 ªWipe Mode and Mix Mode Wipe Mode Like a curtain is being pulled the still picture of the last recorded scene gradually ch...

Страница 28: ...s are displayed press the MULTI Button If MANUAL has been selected press the MULTI Button after 9 pictures are displayed To Display the Multi Pictures again Press the MULTI Button for 1 second or longer To Delete Multi Pictures one by one When pictures were captured in MANUAL When the MULTI Button is pressed for 1 second or longer while the still pictures are displayed the picture captured last is...

Страница 29: ...Push the Operation Lever towards 6 2 during playback If the Operation Lever is held continuously it turns to Cue Playback or Review Playback until you release it If the Operation Lever is pushed briefly Cue Playback or Review Playback continues even when it is released ªHyper Check Function If you press the 5 Button during fast forwarding of the tape or the 6 Button during rewinding of the tape Cu...

Страница 30: ...f the E Button still pictures advance in the reverse direction With each pressing of the D Button still pictures advance in the forward direction If either one of the Buttons is pressed continuously still pictures advance continuously one frame at a time until the Button is released Resuming Normal Playback Press the 1 Button or Button on the Remote Controller ªJog Playback By rotating the Jog Dia...

Страница 31: ... Controller With each press of the corresponding button still pictures recorded in PhotoShot Mode are searched After Pictures with Sounds are played back for 4 seconds the Palmcorder switches to the Still Playback Mode ªScene Index Search 1 Set VCR FUNCTIONS PLAYBACK FUNCTIONS INDEX SCENE 2 Press the 9 Button 1 or the Button 2 on the Remote Controller When the corresponding Button is pressed once ...

Страница 32: ...Cancelling the Digital Effect Press the SELECT Button on the Remote Controller repeatedly until the Digital Effect Indication is cleared For other notes see page 61 ªPlayback with Wipe Mode and Mix Mode 1 Press the 1 Button 2 Press the SELECT Button of the Remote Controller and select WIPE or MIX 3 Press the STORE Button at the moment you want to save as a still picture The last scene is stored in...

Страница 33: ...s are automatically captured from the point at which the Button is pressed If MANUAL is selected press the MULTI Button at each scene you want to capture When 9 screens are captured the tape will stop If PHOTO or SCENE is selected From the point at which the Button is pressed 9 screens of pictures to which index signals are attached are captured in the playback direction After 9 screens are captur...

Страница 34: ...SETUP Sub Menu of the CAMERA FUNCTIONS Main Menu set to 16bit the original sound is erased If you want to preserve the original sound use the 12bit Mode when recording Audio Dubbing cannot be performed onto recordings made in LP Mode l 19 1 Set VCR FUNCTIONS AV IN OUT SETUP AV JACK IN OUT 2 And then select A DUB INPUT MIC or AV IN Set to AV IN when external sound equipment is used or set to MIC wh...

Страница 35: ... Recording when recording voice select VOICE Voice Recorder Function If the TAPE CARD Selector is set to CARD the Palmcorder is automatically turned off when you leave it for about 5 minutes without performing any PhotoShot recording When the TAPE CARD Selector is set to CARD you cannot record to the Tape ªCard PhotoShot Still pictures can be recorded on the Memory Card from the Palmcorder lens as...

Страница 36: ...ecting the quality of Card PhotoShot images 1 Set CAMERA FUNCTIONS or VCR FUNCTIONS CARD SETUP PICTURE QUALITY a desired picture quality Maximum number of images recordable on the supplied Card 8MB When the picture size is 1280t960 FINE high image quality approximately 8 pictures NORMAL Normal approximately 14 pictures ECONOMY low image quality approximately 20 pictures When the picture size is 64...

Страница 37: ... the Recording Start Stop Button at the desired scene Recording from an other equipment VCR Mode 1 Slide the TAPE CARD Selector to CARD 2 Slide the STILL MPEG4 VOICE Selector to MPEG4 3 Input the image from other equipment then press the Recording Start Stop Button at the desired scene Maximum recording time on the supplied Card 8 MB Approximately 6 minutes The video resolution of the camera is re...

Страница 38: ...in hexadecimal form When the object is moving fast or zoom operation is performed picture may appear to be still or a mosaic noise pattern appears but this is not a malfunction ªPlaying back Voice 1 Set the Palmcorder to Card Playback Mode The CARD P B Lamp lights up 2 Set the STILL MPEG4 VOICE Selector to VOICE 3 Start Playback 1 Playing back Stop the playing back Pause playing back This button d...

Страница 39: ...Playback Mode l 38 To Copy One Picture 1 Slide the TAPE CARD Selector to TAPE 2 Slide the STILL MPEG4 VOICE Selector to STILL 3 Display a desired picture Please refer to To select a Desired File and Play it Back 4 Press the PHOTO SHOT Button It takes approximately 7 seconds to copy a still picture to the Cassette During the copying the indication 1 appears To Copy All the Pictures 1 1 1 1 Display ...

Страница 40: ...DE Indication is displayed 4 To Play Back All the Pictures Continuously After setting the SLIDE SHOW to ALL push the Operation Lever towards 1 The SLIDE Indication is displayed 5 All pictures are played back for approximately 5 seconds each from the first to the last recorded picture and playback then stops To Pause the Slide Show Push the Operation Lever towards The M SLIDE Indication is displaye...

Страница 41: ...4 Preset colors black blue green cyan red pink yellow and white Title in a preset color in which the bright portion whitish portion of the captured image is missing Inserting a Title You can select one of your original titles and display it It can be displayed in Camera Mode VCR Mode and Card Playback Mode But when the STILL MPEG4 VOICE Selector Switch is set to MPEG4 or VOICE adding a Title is no...

Страница 42: ...emory Card After the file is deleted it cannot be restored At first slide the STILL MPEG4 VOICE Selector to select the type of data to be erased After setting the Palmcorder to the Card Playback Mode l 38 To Select and Delete File s by selection 1 Set CARD FUNCTIONS DELETE CARD FILE DELETE FILE BY SELECTION or DELETE TITLE BY SELECTION 2 Rotate the PUSH Dial to select the file that you want to del...

Страница 43: ...rmat and since printing data can be added to images on the Memory Card the Memory Card can be used with any system that provides DPOF After setting the Palmcorder to the Card Playback Mode l 38 1 Slide the STILL MPEG4 VOICE Selector to STILL 2 Set CARD FUNCTIONS CARD EDITING DPOF SETTING YES 3 Rotate the PUSH Dial to select VARIABLE and then press it 4 Rotate the PUSH Dial to select the picture an...

Страница 44: ... Press the 1 Button to start playback VCR 4 Start recording 5 Press the Pause or Stop Button to stop recording Palmcorder 6 Press the Button to stop playback 1 S Video Cable not supplied 2 A V Cable supplied Copying an S VHS or VHS Cassette to your DV Cassette After connecting the Palmcorder and the S Video Video Audio Output Jacks B of the other equipment as illustrated on the left start the foll...

Страница 45: ...the REC Button press the PLAY Button Both Buttons are located on the Remote Controller Recording starts Stopping Dubbing Press the Button on the recording unit first and then press the Button on the playback unit to stop dubbing CAUTION Unauthorized exchanging and or copying of copyrighted recordings may be copyright infringement For other notes see page 62 ªAnalog Digital Conversion When the Palm...

Страница 46: ...SB Driver ªSoftware Installation Windows 1 Turn on Computer and start up Windows 2 Insert supplied CD ROM into the CD ROM drive Setup Menu 1 appears 3 Select the software to be installed from Setup Menu USB Driver l 48 Software for USB Driver allows you to transfer images directly off of the memory card into the computer Please refer to page 48 to install the driver of the USB Driver G726 Decoder ...

Страница 47: ...ial effects to any image Also offers creative solutions for making greeting cards and calendars 3 PhotoBase 3 0 Windows PhotoBase 2 0 Mac Create albums of image video audio and other electronic files for easy viewing retrieval and management 4 PhotoPrinter 2000 Pro Windows PhotoPrinter Pro Mac Program to layout images in multiple sizes quickly and effortlessly to create a collage or photo album al...

Страница 48: ... OK when the Restarting Windows Dialog appears Reboot the computer to finish installing USB driver Installation continues after the computer reboots if you selected additional software If you no longer need the driver see page 54 Update the driver after upgrading the OS Connecting Computer and Palmcorder Install USB Driver above before connecting Before making these connections turn off all device...

Страница 49: ...t the ArcSoft logo ArcSoft PhotoImpression ArcSoft PhotoPrinter Pro ArcSoft Photo Base and ArcSoft Panorama Maker are trademarks of ArcSoft Inc All product brand names are trademarks or registered trademarks of the respective holders Intel Pentium is a registered trademark i LINK and are trademarks IBM is a registered trademark of IBM Company SD is a trademark Disk drive CD ROM drive Ports USB Ter...

Страница 50: ...omputer is on error message may appear In such a case click OK and close the dialog box By following the steps below you can disconnect the cable safely 1 Double click the icon in task tray Hardware disconnect dialog appears 2 Select Panasonic DVC USB Driver and click Stop 3 Verify Panasonic DVC USB Driver is selected and click OK 4 Click OK You can safely disconnect the cable Some OS such as Wind...

Страница 51: ...mend updating the driver by following the steps below ªUpdating driver 1 1 1 1 Select DVC in Other devices of Device Manager and click Properties 2 2 2 2 Select Driver and click Update Driver 3 3 3 3 Select Search for a better driver than the one your device is using now Recommended and click Next 4 4 4 4 Select Specify a location refer to the location of the driver and the driver file name click ...

Страница 52: ...tab we recommend updating the driver as described below to Panasonic DVC USB Driver ªUpdating driver 1 1 1 1 Click USB Mass Storage Device of Device Manager 2 2 2 2 Select Driver and click Update Driver 3 3 3 3 Select Search for a suitable driver for my device recommended and click Next 4 4 4 4 Select Specify a location refer to the location of the driver and the driver file name click Next Locati...

Страница 53: ...w ªUpdating driver 1 1 1 1 Select USB Mass Storage Device in Universal Serial Bus controllers of Device Manager and click Properties 2 2 2 2 Select Driver and click Update Driver 3 3 3 3 Select Specify the location of the driver Advanced and click Next 4 4 4 4 Select Specify a location in Search for a better driver than the one your device is using now Recommended refer to the location of the driv...

Страница 54: ...install ªUninstalling Application Software 1 Click Start Settings Control Panel 2 Double Click Add Remove Programs in Control Panel 3 Select the application software you want to remove ªUninstalling Application Software Windows XP 1 Click Start Control Panel Pick a Category 2 Click Add or Remove Programs in Pick a Category 3 Select the application software you want to remove ªUninstalling ArcSoft ...

Страница 55: ...corder you may not be able to play them back Please check the compatibility with other equipment in advance ªAbout the folder structure when using the Memory Card in a personal computer When a Card with data recorded on it is inserted into a personal computer folders will be displayed as in the figure below 100CDPFP The images Imga0001 jpg etc in this folder are recorded in the JPEG format MISC Fi...

Страница 56: ...rded the INDEX Indication flashes l 31 Search Number S1 l 31 The figure indicates which number of scenes ahead from the present scene is to be played back 8 Tape Run Indications REC Recording l 20 PAUSE Recording Paused l 20 Playback Camera Search in forward direction l 20 29 Camera Search in reverse direction l 20 Still Playback l 30 Fast forward Cue Playback l 29 Rewind Review Playback l 29 Slow...

Страница 57: ... B Mode Image size l 35 38 When you playback a scene recorded on a Palmcorder with a picture size specification different from the one stated above the following indications should be displayed If the size of the picture is from 640 pixels to 800 horizontal pixels the Indication will be displayed if picture size is 640 pixels or lower the scene should be displayed without any indication of picture...

Страница 58: ...dication AV INPUT RECORDING When you are attempting to record on the Memory Card during dubbing l 44 45 on the Cassette NO CARD There is no Memory Card inserted PLEASE WAIT When reading of the Memory Card playback format when using the Multi Picture Function l l l l 38 39 43 CARD ERROR The Memory Card is not compatible with the Palmcorder CARD DOOR OPENED Card Slot Cover is opened After inserting ...

Страница 59: ...ot an indication of malfunction If you record still pictures in Progressive PhotoShotTM Mode when your Palmcorder is set to Program AE the brightness of the images may vary About PROGRESSIVE Setting When the æ Indication is displayed you can use the Progressive PhotoShot Function When PROGRESSIVE is set to ON You can use the Progressive PhotoShot Function at any time In this case however the follo...

Страница 60: ...k transition from one scene to another may not appear smooth Because the color and brightness of the playback image may become unstable avoid recording under fluorescent light mercury light or sodium light If you are using either MAGICPIX Mode or Program AE Mode you cannot adjust the shutter speed If the shutter speed is adjusted manually this setting will be cancelled ªManual Iris Adjustment l 24...

Страница 61: ...layback Zoom Functions are being used images that are output from the DV Terminal or Digital Still Picture Terminal are not enlarged As you enlarge an image the quality of image suffers If you select Multi Picture Mode in the Playback Zoom Mode equivalent magnification 1k becomes zoom magnification During the Playback Zoom Function the Variable Speed Search Function cannot be used with the Remote ...

Страница 62: ...ent If this happens please format the card with the equipment with which the card is to be used Before proceeding with this operation we suggest that you take the precautionary measure of storing important images in your personal computer In the Card PhotoShot mode the Palmcorder automatically saves the file numbers 100 0012 etc along with the pictures A file number is recorded with each picture a...

Страница 63: ...HER FUNCTIONS Menu is set to ON the power save function is activated and the screen turns off in a few seconds after some operations such as play or recording are performed The Voice Power Saving Function is cancelled when any operation is performed Do not forget to turn off the power ªSlide Show l 40 The playback time can be set from 5 to 99 seconds Perform the Slide Show Settings with your own P...

Страница 64: ...nd removing the Cassette Do not spray insecticides or volatile chemicals onto the Palmcorder If the Palmcorder is sprayed with such chemicals the Palmcorder body may deform and the surface finish may peel off Do not keep a rubber or plastic product in contact with the Palmcorder for a long period of time When cleaning the Palmcorder do not use any solvent such as benzine alcohol thinner etc The Pa...

Страница 65: ... Steps 1 to 3 Do not use the Head Cleaner 3 times or more consecutively Notes Do not rewind every time you use the Head Cleaner Rewind only when the tape reaches the end and then use it again from the beginning in the same manner as before If the heads become dirty soon after cleaning the tape may be damaged In this case immediately stop using that Cassette Do not clean the heads excessively Exces...

Страница 66: ...bject it to vibration or impact Do not leave the Card in places where there is high temperature or direct sunlight or where electromagnetic waves or static electricity are easily generated Do not bend or drop the Card The Card or the recorded content may be damaged After use be sure to remove the Card from the Palmcorder After use store the supplied SD Memory Card in the enclosed bag ªLCD Monitor ...

Страница 67: ...o minimize the effect of light on the subject s color what is called White Balance Adjustment becomes necessary White Balance Adjustment White Balance Adjustment recognizes the color of light and makes adjustment so that the white color will become pure white Auto White Balance Adjustment This Palmcorder stores settings that are optimal for several kinds of general light sources The Palmcorder det...

Страница 68: ...Mbps No copyright protection support Digital Interface DV Input Output Terminal i LINK 4 pin Dimensions 2 5 8 W k 3 3 8 H k 6 5 8 D inch 76 W k 87 H k 199 D mm Weight 1 21lbs 0 64 kg without Battery and DV cassette Operating Temperature 32 oF 104 oF 0 oC 40 oC Operating Humidity 10 80 Card Memory Functions Recording Media SD Memory Card MultiMediaCard Image Compression JPEG Video Compression MPEG4...

Страница 69: ...y Pack 2800mAH Rechargeable Lithium Ion Battery Pack 5300mAH Rechargeable Lithium Ion Battery Pack DV Interface Cable i LINK 4 pin to 4 pin IR Remote Control Figure PV DRC9 For USA PV DRC9 K For Canada PV H150 USA only Carrying Case Leather Carrying Case RP SD064BPPA RP SD032BPPA RP SD016BPPA 64 MB SD Memory Card 32 MB SD Memory Card 16 MB SD Memory Card USB Reader Writer for SD Memory Card compat...

Страница 70: ...ue South Kent WA 98032 Ship To Mr Mrs Ms First Last Street Address City State Zip Phone Day Night 4 Shipping information UPS delivery requires complete street address Please photocopy this form when placing an order 3 Method of payment check one Check of Money Order enclosed NO C O D SHIPMENTS VISA MasterCard Make Check or Money Order to PANASONIC ACCESSORIES Please do not send cash 2 Items Ordere...

Страница 71: ... the Battery becomes shorter Has the Battery worn out If the operating time is still too short even after the Battery is fully charged the Battery has worn out The Battery cannot be charged If the DC Cable is connected to the AC Adaptor charging cannot be performed Disconnect the DC Cable Recording does not start although power is supplied to the Palmcorder and the Cassette is correctly inserted I...

Страница 72: ... result the original sound and sound that was recorded by audio dubbing are played back together It is possible to reproduce the sounds separately The original sound was erased when audio dubbing was performed If you perform audio dubbing on a recording done in 16bit Mode the original sound will be erased If you want to preserve the original sound be sure to select 12bit Mode at the time of record...

Страница 73: ... Notice Please photocopy this form when making a request for service notice In the unlikely event this product needs service Please include your proof of purchase Failure to due so will delay your repair To further speed your repair please provide an explanation of what wrong with the unit and any symptom it is exhibiting Please write the displayed above Self Diagnostic number here 137P book 73 ペー...

Страница 74: ...reen TV s or onscreen data in a stationary and fixed location The warranty ALSO DOES NOT COVER damages which occurred in shipment or failures which are caused by products not supplied by the warrantor or failures which result from accidents misuse abuse neglect mishandling misapplication alteration faulty installation set up adjustments misadjustment of consumer controls improper maintenance power...

Страница 75: ...0 4300 Fax 787 768 2910 Web Site http www panasonic com You can purchase parts accessories or locate your nearest servicenter by visiting our Web Site Accessory Purchases 1 800 332 5368 Customer Orders Only Panasonic Services Company 20421 84th Avenue South Kent WA 98032 Monday Friday 6 am 5 pm Saturday 6 am 10 30 am PST Visa MasterCard Discover Card American Express Check As of February 2002 MAIL...

Страница 76: ...so the above limitations and exclusions may not be applicable WARRANTY SERVICE For product operation and information assistance please contact your Dealer or our Customer Care Centre at Telephone 905 624 5505 Fax 905 238 2360 Web www panasonic ca For product repairs please contact one of the following Your Dealer who will inform you of an authorized Servicentre nearest you Our Customer Care Centre...

Страница 77: ...one 21 62 Mirror Mode Digital Effect 27 32 Mix Mode 27 32 Mosaic Mode 27 32 Moving Picture MPEG4 Recording 37 Multi Picture Mode 28 33 ªN Negative Mode 27 32 ªO Optical Image Stabilizer Function 22 ªP Palmcorder Accessory 69 PhotoShot 21 Picture in Picture Mode 28 Playback Digital Effect Functions 32 33 Playback Zoom 32 Portrait Mode 23 Program AE 23 Progressive PhotoShot Mode 21 ªR Recording Chec...

Страница 78: ...a batería cargada 3 Active la videocámera Desplace el interruptor 1 a ON Se enciende la luz CAMERA 4 Introduzca la cassette Lleve la palanca 2 a la derecha y tire hacia abajo para abrir la tapa Introduzca la cassette Oprima PUSH TO CLOSE 3 para cargar la cassette Cierre la tapa del asiento inferior ªPara grabar 1 1 1 1 Ajuste el OFF ON MODE y ponga a ON Se enciende la luz CAMERA 1 2 2 2 2 Oprima e...

Страница 79: ... la tarjeta y originar un funcionamiento defectuoso a la videocámara ªPara grabar en una tarjeta de memoria 1 1 1 1 Lleve el selector TAPE CARD a CARD 2 2 2 2 Lleve el selector STILL MPEG4 VOICE a STILL 3 3 3 3 Ajuste el PICTURE SIZE en el submenú CARD SETUP a 1280t960 o bien a 640t480 4 4 4 4 Ajuste CAMERA FUNCTIONS o VCR FUNCTIONS CARD SETUP REC MODE según la calidad deseada FINE NORMAL ECONOMY ...

Страница 80: ... Baymeadow Drive Glen Burnie MD 21060 Panasonic Company Central 1707 North Randall Road Elgin IL 60123 Panasonic Company West 6550 Katella Avenue Cypress CA 90630 Panasonic Sales Company PSC Division of Matsushita Electric of Puerto Rico Inc San Gabriel Industrial Park Ave 65 de Infanteria Km 9 5 Carolina PR 00984 Panasonic Canada Inc 5770 Ambler Drive Mississauga ON L4W2T3 P LSQT0512B F0102Nm0 70...

Страница 81: ... Modèle PV DV852 R LSQT0512B Il est recommandé de lire attentivement ce manuel avant d utiliser I appareil Pour de I aide composez le 1 800 561 5505 ou visitez notre site Internet à www panasonic ca Mini 137F book 1 ページ 2002年3月19日 火曜日 午後3時23分 ...

Страница 82: ...ectriques introduire la lame la plus large de la fiche dans la borne correspondante de la prise et pousser jusqu au fond Mise en garde Afin de prévenir tout risque d explosion ne remplacer le bloc batterie qu avec un bloc batterie identique ou équivalent Les informations ci dessus se trouvent sur le dessous de l appareil Date d achat Vendeur Adresse du vendeur Numéro de téléphone du vendeur Numéro...

Страница 83: ...st impossible d insérer la fiche complètement dans la prise essayer de l insérer dans l autre sens Si le branchement demeure impossible communiquer avec un électricien pour remplacer la prise Ne pas essayer d insérer la fiche quand même 12 Protection du fil d alimentation Ne pas marcher sur le fil d alimentation ou placer des objets dessus Porter une attention particulière à la fiche aux prises de...

Страница 84: ...il ne contient aucune pièce pouvant être réparée par l utilisateur Débrancher le caméscope du bloc d alimentation avant de le nettoyer Ne pas orienter le caméscope vers le soleil ou d autres sources de lumière intense Afin de prévenir tout dommage au viseur ne pas laisser le caméscope avec le viseur orienté directement vers le soleil Ne pas exposer le caméscope à des températures élevées pendant d...

Страница 85: ...nti 30 Lecture fixe Lecture avance fixe 30 Repérage de la fin de l enregistrement 30 Fonctions de recherche de l index 31 Fonction de lecture zoom 32 Lecture avec effets numériques 32 Lecture sur téléviseur 34 Doublage audio 34 Caractéristiques particulières Utilisation d une carte mémoire 35 Enregistrement sur une carte mémoire 35 Lecture des fichiers enregistrés sur carte mémoire 38 Copie d imag...

Страница 86: ...outon l 10 11 4 Capuchon d objectif et cordon du capuchon d objectif l 13 5 Fil A V l 34 44 6 Carte mémoire SD l 55 7 CD ROM Pilote USB pour caméscope numérique Panasonic l 48 Décodeur G726 l 46 49 Logiciel ArcSoft l 46 47 MicrosoftMD et WindowsMD sont des marques déposées de Microsoft aux États Unis et dans les autres pays Macintosh est une marque déposée de Apple Computer Inc 2001 ArcSoft le log...

Страница 87: ...éscope l 14 Glisser l interrupteur 1 sur ON Le voyant CAMERA s allume 4 Insérer la cassette l 13 Glisser le bouton 2 vers la droite et le presser vers le bas pour ouvrir le couvercle du logement de la cassette Introduire la cassette Appuyer sur PUSH TO CLOSE 3 pour la charger Refermer le couvercle 5 Commencer l enregistrement l 20 Appuyer sur la touche 4 L enregistrement démarre Appuyer une nouvel...

Страница 88: ...ur du sélecteur de mode AUTO MANUAL l 20 23 24 25 20 Cadran multi fonction PUSH l 15 19 24 25 29 30 21 Touche sélecteur de fonctions Fonctions activées en appuyant en différentes directions A Recherche arrière j l 20 Rebobinage révision 6 l 29 Recherche avant i l 20 Avance accélérée repérage 5 l 29 Vérification de l enregistrement S l 20 B Lecture 1 l 29 38 40 Une double pression active le mode de...

Страница 89: ...nférieur de la cassette l 13 46 Emplacement pour fixation du trépied Utilisé pour la fixation du caméscope sur un trépied en option 47 Prise d entrée sortie Audio Vidéo A V IN OUT l 34 44 Prise de casque PHONES l 61 Lorsqu un câble AV est branché à cette prise le haut parleur incorporé du caméscope est désactivé 48 Prise d image fixe numérique D STILL PICTURE 49 Prise USB TO PC l 48 50 Prise d ent...

Страница 90: ...TI P IN P l 28 33 39 41 6 Touche d enregistrement REC l 44 45 7 Touche de doublage audio A DUB l 34 8 Touche de direction vers le haut π pour fonction zoom de lecture l 32 9 Touches de direction droite gauche pour fonction zoom de lecture l 32 10 Touche de direction vers le bas pour fonction zoom de lecture l 32 11 Touches de mode ralenti image fixe E D E direction vers l arrière D direction norma...

Страница 91: ...éro VSBW0004 CR2025 L utilisation d une autre pile peut entraîner un risque d incendie ou d explosion Attention La pile risque d exploser si elle n est pas manipulée avec précaution Disposer promptement de toute pile usagée Garder hors de la portée des enfants Ne pas la recharger la démonter ou la jeter au feu ªEn utilisant la télécommande 1 Diriger la télécommande vers le capteur de télécommande ...

Страница 92: ...e s il est branché à l adaptateur secteur Le voyant CHARGE s allume la recharge commence Lorsque le voyant CHARGE s éteint la recharge est terminée 2 2 2 2 Fixer la batterie rechargée au caméscope Débranchement de la source d alimentation Régler le commutateur OFF ON MODE 1 sur OFF et tout en appuyant sur la touche BATT PUSH 2 faire glisser la batterie ou le câble c c vers le haut pour les débranc...

Страница 93: ...er la bandoulière 2 Rabattre l extrémité de la bandoulière l enfiler dans la sangle de réglage de la longueur et tirer La tirer à plus de 2 cm 1 po 1 de la sangle de réglage de longueur de la bandoulière de façon à ce qu elle ne puisse pas glisser Mise en place d une cassette Lorsque le caméscope est sous tension la cassette peut être retirée sans mettre le caméscope en marche 1 Glisser le bouton ...

Страница 94: ...simultanément sortir l écran à cristaux liquides à environ 90 degrés dans le sens de la flèche Le viseur s éteint 3 3 3 3 Régler l angle de l écran à cristaux liquides selon l angle d enregistrement souhaité L écran à cristaux liquides peut pivoter jusqu à 180 max 2 à partir de la position verticale vers une direction orientée vers le haut et jusqu à 90x max 3 dans une direction orientée vers le b...

Страница 95: ...0 Pour afficher le menu appuyer sur la touche MENU 4 de la télécommande Pour sélectionner les rubriques sur le menu appuyer sur la touche ITEM 5 de la télécommande Pour régler le mode des rubriques sélectionnées appuyer sur la touche SET 6 de la télécommande Pour quitter le menu Appuyer sur la touche MENU une nouvelle fois À propos du réglage du menu Le réglage sélectionné sur le menu sera mainten...

Страница 96: ...raphique CINEMA l 23 5 Retour au menu principal RETURN Sous menu DIGITAL EFFECT 6 Effets numériques 1 EFFECT1 l 27 7 Effets numériques 2 EFFECT2 l 27 Sous menu CARD SETUP 8 Taille de l image PICTURE SIZE l 35 9 Qualité d image PICTURE QUALITY l 36 10 Création d un titre CREATE TITLE l 41 Sous menu MULTI PICTURES 11 Mode d écran multiple SCAN MODE l 28 12 Vitesse d écran multiple stroboscopique SPE...

Страница 97: ...T l 32 33 Sous menu CARD SETUP 9 Qualité d image PICTURE QUALITY l 36 10 Création d un titre CREATE TITLE l 41 Sous menu MULTI PICTURES 11 Mode d écran multiple SCAN MODE l 33 12 Vitesse d écran multiple stroboscopique SPEED l 33 13 Oscillation SWING l 33 Sous menu RECORDING SETUP 14 Mode vitesse d enregistrement REC SPEED l 19 44 45 15 Mode enregistrement audio AUDIO REC l 19 34 Sous menu AV IN O...

Страница 98: ...éro l 39 11 DELETE FILE Le menu DELETE FILE pour l effacement d un fichier apparaît l 42 Utiliser ce menu après l affichage du fichier devant être effacé 12 FILE LOCK Le menu FILE LOCK est destiné à prévenir l effacement accidentel d une image affichée Verrouillage de fichier l 42 Utiliser ce menu seulement lorsque l image à être verrouillée est affichée 13 DPOF SETTING Le menu DPOF SETTING est de...

Страница 99: ...t être sélectionnée avec REC SPEED à partir du sous menu RECORDING SETUP 1 Si le mode longue durée est sélectionné le temps d enregistrement sera 1 fois plus long que pour le mode courte durée SP Bien que la qualité de l image ne diminue pas en mode enregistrement longue durée LP des parasites de type mosaïque peuvent apparaître lors de la lecture de l image ou peut restreindre certaines fonctions...

Страница 100: ...sionnement de la scène enregistrée lorsque l enregistrement est en pause Recherche caméra La scène enregistrée peut être visionnée en appuyant sur la touche vers l indication j 7 ou i 8 en mode pause d enregistrement La fonction recherche caméra est utilisée pour repérer le point de départ d une nouvelle scène afin de créer une transition douce entre deux scènes Lorsqu on appuie sur la touche vers...

Страница 101: ...xes Lorsqu on appuie à nouveau sur la touche le mode image fixe est annulé Nous vous recommandons d appuyer sur la touche STILL d abord à l endroit où vous désirez enregistrer l image de façon à entrer dans le mode image fixe numérique et appuyer ensuite sur la touche PHOTO SHOT Pour les images fixes prises en mode continu PhotoShot ou les images fixes en mode numérique les signaux de l index Phot...

Страница 102: ...ffiche 2 Appuyer sur la touche d enregistrement ou sur PHOTO SHOT pour amorcer l enregistrement Fonction de méga stabilisation optique de l image MEGA EIS Cette fonction accentue l effet Nous en recommandons l utilisation de pair avec la fonction de prise d images fixes enregistrées sur carte 3 Appuyer à répétition sur OPTICAL IMAGE STABILIZER jusqu à ce que l indication EIS 2 s affiche Pour d aut...

Страница 103: ... automatiquement lors de situations d enregistrement particulières 1 Régler le commutateur du sélecteur de mode sur MANUAL L indication MNL apparaît 2 Régler CAMERA FUNCTIONS CAMERA SETUP PROG AE dans le mode désiré 5 7 4 Ω º L indication du mode sélectionné est affichée 5 Mode sports 1 Pour enregistrer des scènes qui impliquent des actions rapides telles que des scènes de sport 7 Mode portrait 2 ...

Страница 104: ...indication MNL 1 apparaît 2 Appuyer sur le cadran PUSH jusqu à ce qu apparaisse l indication d iris 2 3 Tourner le cadran PUSH pour régler l iris Portée de l iris réglable CLOSE Fermé F16 F1 7 OPEN Ouvert 0dB 18dB Lorsqu une valeur plus proche de CLOSE est sélectionnée l image devient plus foncée Lorsqu une valeur plus proche de OPi18dB est sélectionnée l image devient plus claire La valeur associ...

Страница 105: ...er le cadran PUSH jusqu à ce que l indication 1 s affiche 4 En projetant un sujet blanc sur tout l écran maintenir pressé le cadran PUSH jusqu à ce que l indication 1 cesse de clignoter Lorsque l indication 1 clignote après la mise sous tension du caméscope le réglage précédent de l équilibre du blanc est encore conservé Pour continuer le réglage automatique Tourner le cadran PUSH jusqu à ce que l...

Страница 106: ...plan est blanc et ce malgré l utilisation de la lampe éclair L utilisation d un téléobjectif ou d un objectif grand angulaire vendus séparément peut bloquer la lumière et créer un vignettage Réglage de la luminosité de la lampe éclair Il est possible de régler la luminosité de la lampe éclair en faisant appel à la rubrique FLASH LEVEL du sous menu de configuration de l enregistrement RECORDING SET...

Страница 107: ... un effet numérique désiré Régler CAMERA FUNCTIONS DIGITAL EFFECT EFFECT1 ou EFFECT2 selon l effet numérique désiré Annulation de l effet numérique Régler CAMERA FUNCTIONS DIGITAL EFFECT EFFECT1 ou EFFECT2 OFF Pour d autres notes voir à la page 61 ªMode volet et mode mixage Mode volet Tel un rideau qui est tiré l image fixe de la dernière scène enregistrée passe peu à peu à l image en mouvement d ...

Страница 108: ...ULTI à chaque scène que l on souhaite capturer 4 Appuyer sur la touche d enregistrement ou sur PHOTO SHOT pour enregistrer sur la cassette Effacer tous les multi écrans capturés Lorsque que les 9 multi images sont affichées appuyer sur la touche MULTI Si MANUAL a été sélectionné appuyer sur la touche MULTI après que les 9 images aient été affichées Pour afficher les multi écrans à nouveau Appuyer ...

Страница 109: ... 2 pendant la lecture Si la touche est maintenue enfoncée le mode lecture de repérage ou de rétrospective est activé Si la touche n est enfoncée que brièvement le mode lecture de repérage ou de rétrospective demeure activé même lorsque la touche est relâchée ªFonction de vérification rapide Lorsque la touche 5 est pressée lors de l avance accélérée de la bande ou la touche 6 lors du rebobinage la ...

Страница 110: ...ou de la télécommande ªLecture avec molette Jog En tournant la molette Cadran PUSH 1 du caméscope en mode lecture fixe il est possible de faire avancer les images fixes une image après l autre en avant ou en arrière Si le caméscope est laissé en mode image fixe pendant plus de 5 minutes le caméscope passe en mode arrêt pour protéger les têtes de lecture contre l usure Repérage de la fin de l enreg...

Страница 111: ... PHOTO 2 Appuyer sur la touche 9 1 ou sur la touche 2 de la télécommande À chaque pression de la touche correspondante les images fixes enregistrées en mode PhotoShot sont recherchées Après la lecture des images avec son pendant 4 secondes le caméscope passe en mode lecture fixe ªRecherche de l index de scène 1 Régler VCR FUNCTIONS PLAYBACK FUNCTIONS INDEX SCENE 2 Appuyer sur la touche 9 1 ou la t...

Страница 112: ...l effet numérique Appuyer sur la touche SELECT de la télécommande plusieurs fois jusqu à ce que l indication d effet numérique s efface Pour d autres notes voir à la page 61 ªLecture en mode volet et mode mixage 1 Appuyer sur la touche 1 2 Appuyer sur la touche SELECT de la télécommande et sélectionner WIPE ou MIX 3 Appuyer sur la touche STORE au moment où vous souhaitez sauvegarder une image fixe...

Страница 113: ...touche a été pressée Si MANUAL est sélectionné appuyer sur la touche MULTI à chaque scène que vous souhaitez capturer Lorsque les 9 écrans auront été capturés la cassette s arrêtera Si PHOTO ou SCENE est sélectionné À partir du point où la touche a été pressée 9 écrans images auxquels sont fixés les signaux de l index sont saisis en direction lecture Dès que les 9 écrans auront été capturés la ban...

Страница 114: ...r 16bit dans le sous menu RECORDING SETUP du menu principal CAMERA FUNCTIONS le son d origine est effacé Si vous souhaitez conserver le son original utilisez le mode 12bit lors de l enregistrement Les doublages audio ne peuvent pas être exécutés sur les enregistrements effectués en mode LP l 19 1 Régler VCR FUNCTIONS AV IN OUT SETUP AV JACK IN OUT 2 Et ensuite sélectionner A DUB INPUT MIC ou AV IN...

Страница 115: ...ement au format MPEG4 enfin pour un enregistrement sonore sélectionner VOICE fonction enregistreur audio Si le commutateur TAPE CARD est sur CARD le caméscope est automatiquement mis hors marche après un délai d inactivité d environ 5 minutes Si le commutateur TAPE CARD est sur CARD il ne sera pas possible d enregistrer sur la bande magnétoscopique ªCarte PhotoShot Les images fixes peuvent être en...

Страница 116: ...e 8 Mo Avec image de 1280t960 Images de haute qualité FINE environ 8 images Images de qualité normale NORMAL environ 14 images Images de faible qualité ECONOMY environ 20 images Avec image de 640t480 Images de haute qualité FINE environ 45 images Images de qualité normale NORMAL environ 95 images Images de faible qualité ECONOMY environ 190 images Pour d autres notes voir à la page 62 ªCopie autom...

Страница 117: ...r la touche d enregistrement au passage de la scène désirée Enregistrement sur carte à partir d un autre appareil mode magnétoscope 1 Glisser le commutateur TAPE CARD sur CARD 2 Glisser le commutateur STILL MPEG4 VOICE sur MPEG4 3 Transférer l image provenant d un autre appareil puis appuyer sur la touche d enregistrement lors du passage de la scène désirée Temps d enregistrement maximum sur la Ca...

Страница 118: ...et mosaïque pourrait être produit ces phénomènes ne sont le signe d aucun mauvais fonctionnement ªLecture d enregistrements sonores 1 Régler le caméscope en mode lecture de carte Le voyant CARD P B s allume 2 Régler le sélecteur STILL MPEG4 VOICE sur VOICE 3 Lancer la lecture 1 Lancement de la lecture Arrêt de la lecture Pause L interruption de la lecture n intervient qu environ 2 secondes après p...

Страница 119: ...EG4 VOICE sur STILL 3 Afficher l image désirée Se reporter à Sélection d un fichier souhaité et visualisation 4 Appuyer sur la touche PHOTO SHOT Il faut environ 7 secondes pour copier une image fixe sur la cassette Pendant la copie l indication 1 apparaît Pour copier toutes les images 1 1 1 1 Afficher la première image Si une image autre que la première est affichée seules les images suivantes ser...

Страница 120: ...ion en continu de toutes les images Après avoir sélectionné ALL pour SLIDE SHOW glisser la touche sélecteur de fonctions vers l indication 1 L indication SLIDE s affiche 5 Chacune des images demeure affichée environ 5 secondes et ce à partir de la plus récente jusqu à la dernière après quoi la présentation est arrêtée Interruption du diaporama pause Appuyer sur la touche sélecteur de fonctions ver...

Страница 121: ...rée partie blanchâtre manque 4 Présélectionner les couleurs noir bleu vert cyan rouge rose jaune et blanc Titrer dans une couleur présélectionnée où la partie brillante partie blanchâtre de l image capturée manque Insertion d un titre Vous pouvez sélectionner un de vos titres original et l afficher Il peut être affiché en mode caméra mode magnétoscope et mode lecture carte Il n est pas possible d ...

Страница 122: ...ilisant le caméscope il est possible d effacer les fichiers enregistrés sur une carte mémoire Lorsqu un le fichier est effacé il ne peut plus être rétabli En premier lieu glisser le sélecteur STILL MPEG4 VOICE pour sélectionner le format de fichier devant être effacé Après avoir réglé le caméscope en mode lecture de carte l 38 Sélection et effacement d un fichier 1 Régler CARD FUNCTIONS DELETE CAR...

Страница 123: ...que les données d impression peuvent être ajoutées aux images de la carte mémoire la carte mémoire peut être utilisée avec tous les systèmes qui prévoient le DPOF Après avoir réglé le caméscope en mode lecture de carte l 38 1 Glisser le sélecteur STILL MPEG4 VOICE sur STILL 2 Régler CARD FUNCTIONS CARD EDITING DPOF SETTING YES 3 Tourner le cadran PUSH pour sélectionner VARIABLE et ensuite appuyer ...

Страница 124: ...assette S VHS ou VHS sur cassettes DV Après avoir branché le caméscope aux prises de raccordement de sortie S vidéo vidéo et audio B de l autre appareil comme illustré à gauche entamer les procédures suivantes Vous avez besoin de la télécommande Caméscope 1 1 1 1 Régler VCR FUNCTIONS AV IN OUT SETUP AV JACK IN OUT 2 2 2 2 Introduire une cassette vierge munie d une languette de protection anti effa...

Страница 125: ...TENTION Échanger et ou copier des enregistrements non autorisés et protégés par des droits d auteurs est une infraction Pour d autres notes voir à la page 62 ªConversion analogique numérique Lorsque le caméscope est branché à un autre appareil vidéo numérique via la prise DV le format analogique des images qui est entré à partir d un autre appareil externe peut sortir de l appareil vidéo numérique...

Страница 126: ...nfiguration du pilote USB ªInstallation du logiciel Windows 1 Allumer l ordinateur et lancer Windows 2 Introduire le CD ROM fourni dans le lecteur de CD ROM Setup Menu 1 apparaît 3 Sélectionner le logiciel à installer à partir du Setup Menu Pilote USB l 48 Le logiciel pilote USB permet de transférer directement des images de la carte mémoire à un ordinateur Se reporter à la page 48 pour les instru...

Страница 127: ... Ce programme propose également des solutions créatives pour la création de cartes de souhaits et de calendriers 3 PhotoBase 3 0 Windows PhotoBase 2 0 Mac Programme permettant de créer des albums d images vidéo audio ou autres fichiers électroniques pour les consulter accéder et gérer facilement 4 PhotoPrinter 2000 Pro Windows PhotoPrinter Pro Mac Programme permettant de monter des images de taill...

Страница 128: ...a boîte de dialogue Restarting Windows s affiche Pour terminer l installation redémarrer l ordinateur Si d autres logiciels ont été sélectionnés le processus d installation se poursuit après le redémarrage de l ordinateur Si le pilote n est plus nécessaire se reporter à la page 54 Après une mise à jour du système d exploitation il sera nécessaire de mettre le pilote USB à jour également Connexion ...

Страница 129: ...hotoPrinter Pro ArcSoft Photo Base et ArcSoft Panorama Maker sont des marques commerciales de ArcSoft Inc Tous les noms de produits et de marques sont des marques commerciales ou déposées de leur propriétaire respectif IntelMD PentiumMD est une marque déposée i LINK et sont des marques commerciales IBM est une marque déposée de IBM Company SD est une marque commerciale Lecteur de disques Lecteur C...

Страница 130: ...Dans un tel cas cliquer sur OK et fermer la boîte de dialogue Suivre les instructions ci après pour déconnecter le câble 1 Double cliquer sur l icône dans la barre de tâches La boîte de dialogue de déconnexion s affiche 2 Sélectionner Panasonic DVC USB Driver puis cliquer sur Stop 3 S assurer que Panasonic DVC USB Driver est sélectionné puis cliquer sur OK 4 Cliquer sur OK Il est maintenant possib...

Страница 131: ...ommandé de mettre le pilote à jour Pour ce faire suivre les instructions ci dessous ªMise à jour du pilote 1 1 1 1 Sélectionner DVC dans Other devices du Device Manager puis cliquer sur Properties 2 2 2 2 Sélectionner Driver puis cliquer sur Update Driver 3 3 3 3 Sélectionner Search for a better driver than the one your device is using now Recommended puis cliquer sur Next 4 4 4 4 Sélectionner Spe...

Страница 132: ...nglet Device Manager il est recommandé de mettre le pilote à jour Pour ce faire suivre les instructions ci dessous ªMise à jour du pilote 1 1 1 1 Sélectionner USB Mass Storage Device dans Device Manager 2 2 2 2 Sélectionner Driver puis cliquer sur Update Driver 3 3 3 3 Sélectionner Search for a suitable driver for my device recommended puis cliquer sur Next 4 4 4 4 Sélectionner Specify a location ...

Страница 133: ...ructions ci dessous ªMise à jour du pilote 1 1 1 1 Sélectionner USB Mass Storage Device dans Universal Serial Bus controllers du Device Manager puis cliquer sur Properties 2 2 2 2 Sélectionner Driver puis cliquer sur Update Driver 3 3 3 3 Sélectionner Specify the location of the driver Advanced puis cliquer sur Next 4 4 4 4 Sélectionner Specify a location dans Search for a better driver than the o...

Страница 134: ...giciel 1 Cliquer sur Start Settings Control Panel 2 Double cliquer sur Add Remove Programs dans Control Panel 3 Sélectionner le logiciel d application que vous souhaitez retirer ªDésinstallation du logiciel Sous Windows XP 1 Cliquer sur Start Control Panel Pick a Category 2 Cliquer sur Add or Remove Programs dans Pick a Category 3 Sélectionner le logiciel d application que vous souhaitez retirer ª...

Страница 135: ...vice versa de lire des fichiers enregistrés à partir d autres équipements sur ce caméscope il ne sera peut être pas possible de les lire Vérifier au préalable la compatibilité avec les autres équipements ªÀ propos de la structure du dossier lors de l utilisation de la carte mémoire dans l ordinateur Si vous insérez dans votre PC une carte mémoire sur laquelle des données ont été sauvegardées le ré...

Страница 136: ... indication INDEX clignote pendant quelques instants l 31 Recherche nombre S1 l 31 Ce chiffre indique le numéro de la scène qui doit être lue en comptant à partir de l avant de la scène courante 8 Indications de fonctionnement de bande REC Enregistrement l 20 PAUSE Enregistrement interrompu momentanément l 20 Lecture recherche caméra vers l avant l 20 29 Recherche caméra vers l arrière l 20 Lectur...

Страница 137: ...ons des fichiers sauvegardés sur carte mémoire 2 mode CARD P B Taille d image l 35 38 Lorsque vous reproduisez une scène enregistrée sur un caméscope avec une spécification de taille d image différente de celle indiquée ci dessus les indications suivantes devraient s afficher Si la taille de l image se situe entre 640 pixels et 800 pixels l indication s affichera si la taille de l image est égale ...

Страница 138: ...egistrement est tenté sur la carte mémoire pendant un doublage l 44 45 sur la cassette NO CARD Absence de carte mémoire dans l appareil PLEASE WAIT Ce message s affiche lors de la lecture sur la carte mémoire lecture formatage pendant l utilisation de la fonction d écran multiple l l l l 38 39 43 CARD ERROR La carte mémoire utilisée n est pas compatible avec le caméscope CARD DOOR OPENED Le couver...

Страница 139: ...us passez en mode image fixe vous entendez un déclic Il correspond au bruit de fermeture de l iris et non d un mauvais fonctionnement Si vous enregistrez des images fixes en mode PhotoShotMC progressif lorsque votre caméscope est réglé sur le réglage automatique de I exposition la clarté des images peut changer À propos du réglage PROGRESSIVE Lorsque l indication æ s affiche il est possible d util...

Страница 140: ...une image d un sujet éclatant ou très réfléchissant Pendant la lecture standard le passage d une scène à l autre peut ne pas être régulier Parce que la couleur et la clarté d une image reproduite peuvent devenir instables éviter d enregistrer sous une lumière fluorescente au mercure ou au sodium Si vous utilisez le mode accroissement du gain ou le mode de réglage automatique de I exposition le rég...

Страница 141: ...onner correctement si l intervalle entre 2 signaux de scène indexée est inférieur à 1 minute ªFonctions de lecture zoom l 32 Il n est pas possible de régler le volume avec la télécommande en mode de lecture zoom Si vous éteignez le caméscope ou si vous passez du mode magnétoscope au mode caméra le mode de lecture zoom est annulé automatiquement Même si les fonctions de lecture zoom sont utilisées ...

Страница 142: ...l n est pas possible d accéder à la carte Les images larges ne peuvent pas être enregistrées Une carte qui a été formatée avec ce caméscope peut ne pas être utilisable sur un autre appareil Si cela se produit formater la carte au moyen de l appareil avec lequel elle sera utilisée Avant d effectuer cette opération nous conseillons de mémoriser les images importantes sur l ordinateur par mesure de p...

Страница 143: ...menu OTHER FUNCTIONS est activé ON la fonction d économie d énergie coupe l alimentation du moniteur quelques secondes après la fin d opérations telles que la lecture et l enregistrement La fonction d économie d énergie est automatiquement désactivée dès qu une opération est lancée Ne pas oublier de mettre l appareil hors marche après utilisation ªDiaporama l 40 La durée du diaporama peut être fix...

Страница 144: ...nettoyage du caméscope n utiliser aucun type de solvant tels que de l essence alcool diluants etc Le boîtier du caméscope pourrait se déformer et la finition pourrait s écailler Avant de nettoyer le caméscope retirer la batterie ou débrancher le câble c a de la prise secteur Nettoyer le caméscope avec un linge doux et sec Pour enlever les taches rebelles le nettoyer à l aide d un linge trempé dans...

Страница 145: ...assette Ne pas nettoyer les têtes de manière excessive Un nettoyage excessif peut user les têtes Si les têtes sont usées les images ne peuvent plus être reproduites même après qu elles aient été nettoyées Si les têtes sales ne peuvent pas être nettoyées au moyen d une cassette auto nettoyante le caméscope doit être nettoyé par le centre de service Consulter un détaillant ou un centre de service Pa...

Страница 146: ...s retirer la carte couper le contact ou faire vibrer l appareil Ne pas exposer la carte aux rayons directs du soleil à des températures élevées à des champs magnétiques ou à des endroits générant de l électricité statique Ne pas plier ou échapper la carte La carte ou son contenu pourrait être endommagé Après utilisation retirer la carte du caméscope Après utilisation conserver la carte mémoire SD ...

Страница 147: ...ce bleuâtre ou rougeâtre Afin de minimiser l effet de lumière sur la couleur du sujet ce qu on appelle réglage de l équilibre du blanc devient nécessaire Réglage de l équilibre du blanc Le réglage de l équilibre du blanc reconnaît la couleur de la lumière et fait les réglages nécessaires de façon à ce que le blanc devienne un blanc optique Réglage de l équilibre du blanc automatique Ce caméscope m...

Страница 148: ...ture sur carte conforme à USB 1 1 maximum de 12 Mbits s Aucune protection contre le piratage Interface numérique Prise d entrée sortie DV i LINK 4 broches Dimensions 76 L k 87 H k 199 P mm 2 5 8 L k 3 3 8 H k 6 5 8 P po Poids 0 64 kg 1 21 Ib sans batterie ni cassette DV Température de fonctionnement 0 oC 40 oC 32oF 104oF Humidité de fonctionnement 10 80 Fonctions de la carte mémoire Enregistrement...

Страница 149: ...cteur Enregistreur USB SD compatible avec la carte MultiMediaCardMC Adaptateur de carte SD PCMCIA compatible avec la carte MultiMediaCardMC Carte mémoire SD de 64 Mo Carte mémoire SD de 32 Mo Carte mémoire SD de 16 Mo Unité de connexion PC comprend les câbles de connexion RS 232C et le logiciel pour liaison PHOTOVU RP SD064BPPA RP SD032BPPA RP SD016BPPA BN SDCAPU 1B BN SDABPU 1B PV DRS2 Descriptio...

Страница 150: ...ébrancher le câble c c L enregistrement ne commence pas bien que le caméscope soit sous tension et que la cassette soit correctement positionnée La languette de protection contre l effacement accidentel de la cassette est elle ouverte Si elle est ouverte sur SAVE l enregistrement est alors impossible La bande est elle déroulée jusqu à la fin Introduire une nouvelle cassette Le caméscope est il all...

Страница 151: ...uire les sons séparément Le son original a été effacé lorsque le doublage audio a été effectué Si un doublage audio est effectué en mode 16bit le son original sera effacé Si vous souhaitez conserver le son original assurez vous de sélectionner le mode 12bit au moment de l enregistrement Les sons ne peuvent pas être reproduits Bien qu une cassette sans doublage audio soit reproduite AUDIO du sous m...

Страница 152: ...RANTIE Pour de l aide sur le fonctionnement de l appareil ou pour toute demande d information veuillez contacter votre détaillant ou notre service à la clientèle au N de téléphone 905 624 5505 N de télécopieur 905 238 2360 Site Internet www panasonic ca Pour la réparation des appareils veuillez consulter votre détaillant lequel pourra vous renseigner sur le centre de service agréé le plus près de ...

Страница 153: ...ique 67 Mise au point manuelle 24 Mode accroissement du gain 27 Mode cinéma 23 Mode d écran multiple 28 33 Mode effet traînée 27 32 Mode image sur image 28 Mode longue durée et courte durée SP LP 19 Mode mer et neige 23 Mode miroir Effet numérique 27 32 Mode mixage 27 32 Mode mosaïque 27 32 Mode noir et blanc 27 32 Mode négatif 27 32 Mode oscillation 28 33 Mode pause d enregistrement 20 Mode portr...

Страница 154: ...74 137F book 74 ページ 2002年3月19日 火曜日 午後3時23分 ...

Страница 155: ...75 137F book 75 ページ 2002年3月19日 火曜日 午後3時23分 ...

Страница 156: ...Louis A Amos Lachine Québec H8T 1C4 514 633 8684 Toronto 5770 Ambler Drive Mississauga Ontario L4W 2T3 905 238 2181 Calgary 6835 8th Street N E Calgary Alberta T2E7H7 403 295 3922 Vancouver 12111 Riverside Way Richmond BC V6W 1K8 604 278 4211 K LSQT0512B Imprimé au Japon R 137F book 76 ページ 2002年3月19日 火曜日 午後3時23分 ...

Отзывы: