Wall Mounting
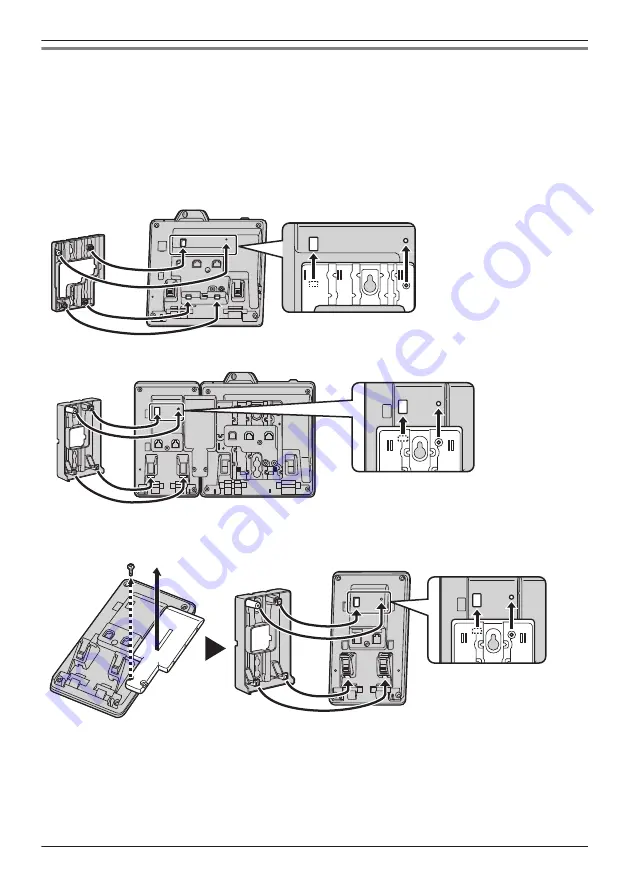
The KX-HDV430 and up to 5 optional KX-HDV20 units can be mounted on a wall.
IMPORTANT
R
Make sure that the wall and the fixing method are strong enough to support the weight of the unit. (See
“Specifications”, Page 95.)
1. Insert the tabs of the wall mounting adaptor into the designated openings in the base, and then slide
the wall mounting adaptor in the direction of the arrow until it clicks.
KX-HDV430
With optional KX-HDV20
For 2nd to 5th KX-HDV20
Remove the screw from the DSS cover of the KX-HDV20, and then slide the cover up to remove it.
2. Fasten the wall mounting adaptor to the base with the included small screw.
(Recommended torque: 0.4 N·m [4.08 kgf·cm/3.54 lbf·in] to 0.6 N·m [6.12 kgf·cm/5.31 lbf·in])
3. Connect the AC adaptor, handset cord, Ethernet cables, and connection cable as necessary.
4. Drive the large screws into the wall either 83 mm (3 1/4 in) or 100 mm (3 15/16 in) apart, and mount
the unit on the wall.
79
Installation and Setup
Содержание KX-HDV430
Страница 12: ...Location of Controls KX HDV430NE M JK L I P O Q B E A C D F G H N 12 Before Operating the Telephones...
Страница 13: ...KX HDV430X KX HDV430SX M JK L I P O Q B E A C F G H N D 13 Before Operating the Telephones...
Страница 14: ...KX HDV430RU M JK L I P O Q B E A C F G H N D 14 Before Operating the Telephones...
Страница 15: ...KX HDV430 M JK L I P O Q B E A C D F G H N 15 Before Operating the Telephones...
Страница 16: ...KX HDV430C M JK L I P O Q B E A C D F G H N 16 Before Operating the Telephones...


