background image

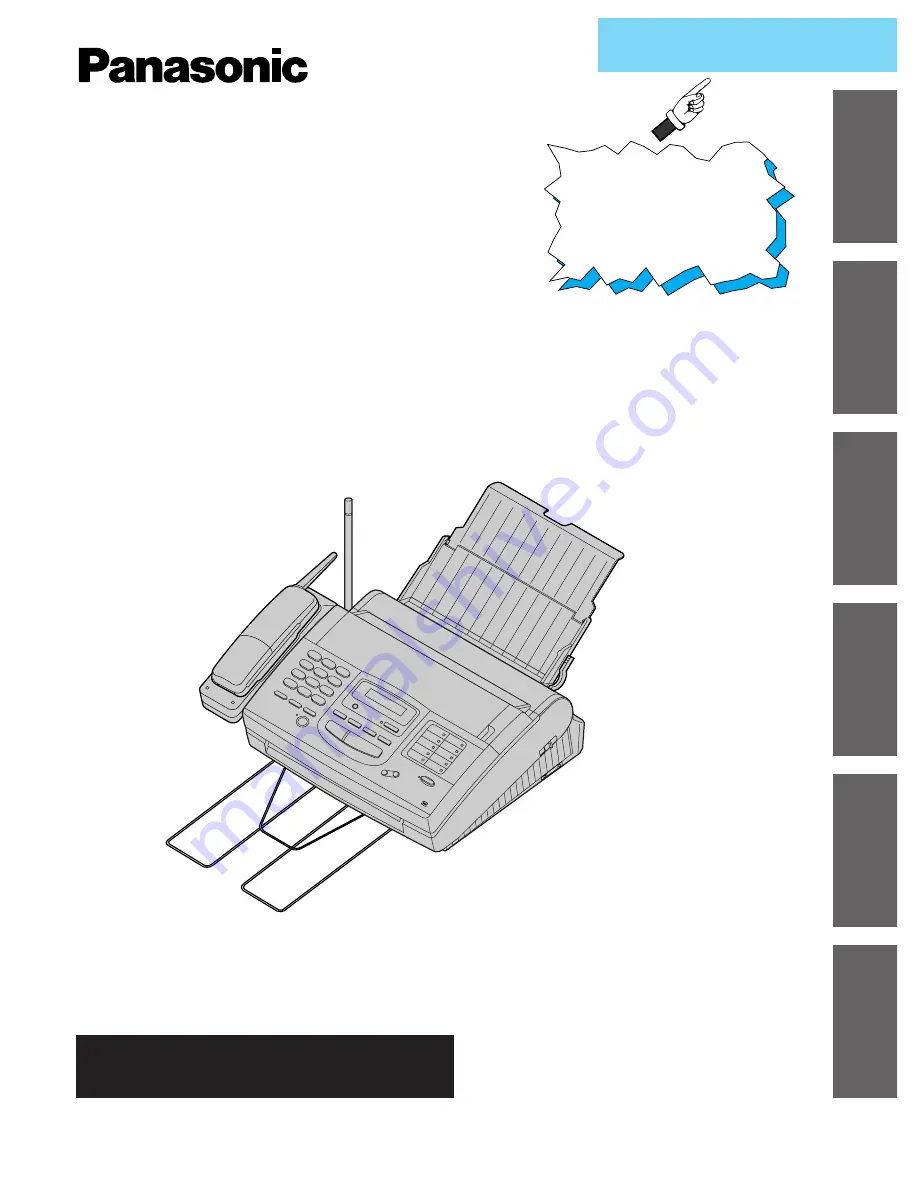
Multi-Function Plain Paper Facsimile
with 900MHz Cordless Phone

Model No.

KX-FMC230

Please read these Operating Instructions
before using the unit and save for future
reference.

¡

This product is designed for use in the
United States of America, and may not
operate in other countries. (See page
124 for more details.)

¡

Este producto ha sido diseñado para su uso
en los Estados Unidos de América, y puede
no funcionar correctamente en otros países.
(Consulte la página 124 para tener más
detalles.)

FOR OPERATION ASSISTANCE,
CALL 1-800-HELP-FAX (1-800-435-7329)
OR SEND A FAX TO 1-215-741-2069.

Initial Preparation

Telephone

Help

General Information

To get started, 
please read the 
Quick Start section
(pages 10 to 17).

OPERATING  INSTRUCTIONS

Multi-Function

Center/PC

Fax/Copy

Q

Q

Q

Q

u

u

u

u

ii

ii

c

c

c

c

k

k

k

k


S

S

S

S

tt

tt

a

a

a

a

rr

rr

tt

tt

Содержание KX-FMC230

Страница 1: ...te producto ha sido diseñado para su uso en los Estados Unidos de América y puede no funcionar correctamente en otros países Consulte la página 124 para tener más detalles FOR OPERATION ASSISTANCE CALL 1 800 HELP FAX 1 800 435 7329 OR SEND A FAX TO 1 215 741 2069 Initial Preparation Telephone Help General Information To get started please read the Quick Start section pages 10 to 17 OPERATING INSTR...

Страница 2: ...Do not rub or use an eraser on the printed side as the print may smear Trademarks IBM is a registered trademark of International Business Machines Corporation Microsoftg and Windowsg are registered trademarks of Microsoft Corporation in the United States and or other countries All other trademarks identified herein are the property of their respective owners Copyright This manual is copyrighted by...

Страница 3: ...e p 27 Operating distance and noise Calls are transmitted between the main unit and the handset using wireless radio waves For maximum distance and noise free operation the recommended main unit location is Away from electrical appliances such as TVs radios or personal computers In a HIGH and CENTRAL location with no obstructions such as walls Raise the antenna ...

Страница 4: ...the unit where no one can step or trip on the cord 10 Do not overload wall outlets and extension cords This can result in the risk of fire or electric shock 11 Never push any objects through slots in this unit This may result in the risk of fire or electric shock Never spill any liquid on the unit 12 To reduce the risk of electric shock do not disassemble this unit Take the unit to an authorized s...

Страница 5: ...d for use with this product only in accordance with the instructions and limitations specified in this manual INSTALLATION 1 Never install telephone wiring during a lightning storm 2 Never install telephone jacks in wet locations unless the jack is specifically designed for wet locations 3 Never touch uninsulated telephone wires or terminals unless the telephone line has been disconnected at the n...

Страница 6: ...and transporting of the unit Power cord RRR 1 pc Part No PQJA200Z Telephone line cord RRRRRR 1 pc Part No PQJA59V Cordless handsetR 1 pc Battery cover for cordless handset R 1 pc Part No PFYCFMC230M Diverter RRRRR 1 pc Part No PFUS1074Z Paper tray RRRR 1 pc Part No PFYE1FMC230M Film cartridge RR 1 pc with starter film Panasonic Multi Function Center Software Floppy disks RR 3 pcs Part No PFZXFM210...

Страница 7: ...daptor Accessory order information The starter film is only 20 meters 65P long We recommend buying regular film 100 m 328P for extra stock To order call toll free 1 800 332 5368 or see the fax order instructions below Fax orders Please send a fax to 1 800 237 9080 Include Your name shipping address telephone number Credit card type number expiration and your signature Part number of accessories yo...

Страница 8: ...ialing mode touch tone or pulse RRRRRRR 42 Voice Contact Talking to the caller during or after fax receiving or transmissionRRRRRRRRRRRRRRRRRRRR 43 Sending Faxes Sending manually RRRRRRRRRRRRRRRRRRR 44 Sending using automatic dialing electronic telephone directoryRRRRRRRRRRRRRRRRRRRRRRR 45 Acceptable documents RRRRRRRRRRRRRRRRR 47 Printing the transmission report RRRRRRRRRRRRR 48 Setting the journ...

Страница 9: ...nd help instructions RRR 93 Error Messages Error messages on printed reports RRRRRRRRRRRR 95 Error messages on the LCD display RRRRRRRRRRR 96 Operations When a function does not work check here before requesting help General Fax transmission Fax reception Copying In the EXT TAM mode and Multi Function Center RRRR 98 Power Failure If a power failure occurs this is what happens RRRRRR 106 Jams Clear...

Страница 10: ...ever forward B Fan the stack of paper to avoid a paper jam and insert the paper into the paper tray C Move the recording paper set lever back g Handset See page 27 A Close the battery cover for the main unit B Install the battery as shown observing the proper polarity C Install the battery cover D Place the handset on the cradle for about 15 hours h Diverter See page 19 A Insert the diverter into ...

Страница 11: ... Connect to LINE on the unit B Connect to a single telephone line jack k Power cord See page 21 A Connect to the power socket B Connect to a power outlet Single telephone line RJ11C Line surge protector Power surge protector Power outlet 120 V 60 Hz Recording paper set lever Slots Slots Tab Q Q Q Qu u u ui i i ic c c ck k k k S S S St t t ta a a ar r r rt t t t Bottom ...

Страница 12: ...u u u ui i i ic c c ck k k k S S S St t t ta a a ar r r rt t t t To make a voice call Using the speakerphone See page 31 Using the handset See page 30 e Press TALK g To hang up press TALK f Dial e Press SP PHONE f Dial g To hang up press SP PHONE ...

Страница 13: ...ice call Handset is off the main unit See page 32 Handset is on the main unit See page 32 e Press TALK f To hang up press TALK f After talking hang up the handset e Q Q Q Qu u u ui i i ic c c ck k k k S S S St t t ta a a ar r r rt t t t Lift the handset ...

Страница 14: ... ck k k k S S S St t t ta a a ar r r rt t t t To make a copy e Open the document feeder tray f Insert the documents until a beep tone is heard FACE DOWN up to 15 sheets h Press START COPY SET g Adjust the width of the document guides For further details see page 77 ...

Страница 15: ...ument guides FACE DOWN up to 15 sheets h Press SP PHONE To transmit documents i Dial the fax number j When a fax tone is heard press START COPY SET f Insert the documents until a beep tone is heard For further details see page 44 Q Q Q Qu u u ui i i ic c c ck k k k S S S St t t ta a a ar r r rt t t t ...

Страница 16: ...eceive documents e When the unit rings lift the handset to answer the call f When document reception is required a slow beep is heard or no sound is heard press START COPY SET g Replace the handset For further details see page 58 You can select the desired receiving mode according to your needs See pages 56 and 57 ...

Страница 17: ...Center software See page 80 g Using as a printer fax or scanner Printer functions Printing documents from Windows 3 1 3 11 or Windows 95 See pages 83 and 84 Printing received documents See page 89 Fax functions Personal information database for fax and phone numbers See page 82 Sending a document See pages 85 and 86 Receiving faxes on your PC See page 87 Viewing faxes on your screen See page 88 Fa...

Страница 18: ... see page 79 Document exit Microphone Used to talk to the other party when using the speakerphone Document entrance Battery cover for main unit Assembly Spare battery charger beneath the cover Speaker Antenna SPARE CHARGE indicator CHARGE indicator Charge contacts Installing the battery cover on the main unit Close the battery cover on the main unit You can insert a spare battery beneath the cover...

Страница 19: ...ay 1 Open the paper tray 2 Insert the two tabs on the paper tray into the slots on the back of the main unit Do not place the main unit in areas where the paper tray may be obstructed by walls etc Paper tray Paper tray Slots Tabs Diverter Slots Bottom Pull out the paper stacker from the bottom of the main unit completely Paper stacker Pulling out the paper stacker ...

Страница 20: ... other copiers or printers or a paper jam may occur Upper limit Tab Correct Incorrect Paper tray Stack of paper 1 Pull the recording paper set lever forward Recording paper set lever Installing the paper Letter or legal size recording paper can be loaded The paper tray can hold up to 150 sheets of 75 g m2 20 lb paper You may use 60 g m2 to 90 g m2 16 lb to 24 lb paper 2 Fan the stack of paper to a...

Страница 21: ...of a surge protector The following types are available TELESPIKE BLOK MODEL TSB TRIPPE MFG CO SPIKE BLOK MODEL SK6 0 TRIPPE MFG CO SUPER MAX PANAMAX or MP1 ITW LINX When you operate this product the power outlet should be near the product and easily accessible If the following message is displayed when the unit is plugged in the recording paper set lever is released Display Move the lever back see...

Страница 22: ... 110 Changes from pulse to tone during dialing p 41 Used as a hookswitch p 41 Used to turn on off the auto receive mode p 56 57 59 61 Used for voice muting p 31 Used to initiate fax transmission reception and copying Also used to store a parameter during programming Used to stop an operation or programming Adjusts ringer speaker volumes Also used as a cursor key or a selection key p 23 29 31 Used ...

Страница 23: ...yed The J key is available to select AM or PM wherever the cursor may be TIME 03 15PM TIME 03 15AM TIME 12 00AM M 08 D 10 Y 97 M 01 D 01 Y 97 SET DATE TIME SYSTEM SET UP Note If you press STOP while programming the display will return to the previous one The accuracy of the clock will be approximately L60 seconds a month MENU STOP START COPY SET Dial keypad Fax Correspondence FROM Panasonic Fax sy...

Страница 24: ...orm 1 Press MENU Display 2 Press K then B 3 Press START COPY SET 4 Enter your logo up to 30 characters using the dial keypad and direct call station keys For example when entering Bill as your logo 1 Press B twice 2 Press D six times 3 Press E six times 4 Press fl VOLUME to move the cursor and press E six times Note If you use the same number key continuously to enter the next character press fl V...

Страница 25: ... COPY SET 6 Press MENU SETUP ITEM NO YOUR TEL NO SYSTEM SET UP 1 2 3 4 5 6 7 8 9 0 MENU STOP START COPY SET Dial keypad fi fl VOLUME Setup Main Unit To correct a mistake while programming Press fi fl VOLUME to move the cursor to the incorrect number then make the corrections OR Press STOP to delete the wrong number to the left of the cursor Note The K button inserts a space and the J button a ...

Страница 26: ...when the handset is in use p 30 Also flashes when the battery needs to be charged p 28 Used to page the main unit p 35 Used for automatic dialing p 38 39 Used as a hookswitch p 41 Used to adjust handset ringer volumes p 29 Used to select a clearer channel p 30 Redials the last number dialed p 30 Also inserts a pause during dialing p 41 Used to enter programming functions p 38 Changes from pulse to...

Страница 27: ...ing the proper polarity Battery Battery cover for the cordless handset 27 Initial preparation 2 Install the battery cover on the cordless handset Setup Handset Battery charge Place the handset on the cradle of the main unit for about 15 hours The CHARGE indicator lights CHARGE indicator Handset ...

Страница 28: ...fe may vary depending on usage conditions and ambient temperature Clean the handset and the main unit charge contacts with a dry soft cloth once a month or the battery may not charge properly see page 115 Once the battery is fully charged you do not have to place the handset on the main unit until the TALK BATT LOW indicator flashes slowly or the unit beeps intermittently The battery cannot be ove...

Страница 29: ... using the speakerphone INCOMING CALL RINGER OFF YES PRESS SET RINGER OFF OK LOUD RINGER J TALK BATT LOW indicator Main unit Handset Ringer volume 3 levels high low off are available Be sure the TALK BATT LOW indicator light is off To set to high or low Press LOUD RINGER To turn the ringer off While pressing LOUD RINGER press until 2 beeps sound To turn the ringer on Press LOUD RINGER The ringer s...

Страница 30: ...t Note If an alarm tone sounds in step 1 move towards the main unit or place the handset on the main unit Then try again TALK REDIAL PAUSE CH TALK BATT LOW indicator Dial keypad Making calls with the handset To redial the last number Press TALK then press REDIAL PAUSE If noise interferes with the conversation Press CH to select a clear channel or move closer to the main unit Lighted keypad The dia...

Страница 31: ...sy the unit will automatically redial the number up to 14 times Voice muting Using this feature the other party cannot hear you but you can hear them 1 Press MUTE during a telephone conversation Display 2 To resume the conversation press MUTE Hints for the speakerphone operation Use the speakerphone in a quiet room If you have difficulty hearing the other party adjust the volume using VOLUME If yo...

Страница 32: ...g up press SP PHONE again SP PHONE Answering calls with the handset 1 If the handset is off the main unit Press TALK You can also answer a call by pressing any dialing button 0 to 9 or Any key talk OR If on the main unit Just lift it 2 To hang up press TALK or place the handset on the main unit OR TALK ...

Страница 33: ...o 2 or more rings See page 59 for FAX ONLY mode ring count and See page 65 for TEL FAX mode ring count Viewing who called on the display When the unit has received new calls the display will show the number of new calls up to 35 calls To view who called on the display 1 Press MENU twice Display 2 Press START COPY SET The display will show the oldest caller s information name has priority Order of ...

Страница 34: ...t data is deleted from the list SETUP ITEM MODE OFF Ÿÿ MODE ON Ÿÿ AUTO CALL LIST SYSTEM SET UP If you do not want to print the caller list automatically proceed as follows 1 2 3 4 5 6 7 8 9 0 START COPY SET MENU Dial keypad Caller ID Jan 04 1997 04 37PM NO NAME TEL NO TIME OF CALL ANSWER 01 ROGER DAVIS 345 3809 Jan 01 02 35PM FAX 02 SHARON SMITH 103 2238 Jan 02 08 35AM 03 JOHN 345 3809 Jan 02 02 3...

Страница 35: ... unit Press LOCATOR INTERCOM The IN USE indicator flashes The handset beeps for 1 minute To stop paging press LOCATOR INTERCOM again 2 Handset Press INTERCOM to answer 3 Main unit Speak into the microphone During the intercom the main unit s display will show 4 Handset To end the intercom press INTERCOM INTERCOM CALL During the intercom Intercom calls can only be ended by the handset If the handse...

Страница 36: ... unit To answer the call press SP PHONE The transfer is completed The handset user can join the conversation by pressing TALK CONFERENCE CALL INTERCOM HOLD From the main unit to the handset 1 Main unit During a call press LOCATOR INTERCOM The call is put on hold Display 2 Handset Press INTERCOM to answer the page 3 Handset To answer the call press TALK The transfer is completed The main unit user ...

Страница 37: ...r the telephone number up to 30 digits in length To enter a hyphen in a telephone number press HYPHEN direct call station 8 4 Press START COPY SET 5 Enter the station name up to 10 characters by following the instructions on page 24 6 Press START COPY SET To program other stations repeat steps 2 to 6 7 Press STOP Helpful hint To confirm stored telephone numbers and station names print a telephone ...

Страница 38: ... storing then repeat from step 1 3 Press AUTO 4 Press a memory station number 0 to 9 A confirmation tone sounds see below To store other numbers repeat steps 1 through 4 Note Numbers stored in the handset can only be dialed by the handset What the confirmation tone means 1 beep The new number is stored 2 beeps The number is the same as a previously stored one To erase a stored number 1 Press PROGR...

Страница 39: ...station number Dialing from the handset 1 Press SP PHONE 2 Using one touch dialing For upper stations 1 9 Press the desired direct call station key For lower stations 10 18 Press LOWER then press the desired direct call station key OR Using speed dialing Press DIRECTORY then press K and the desired 2 digit number 00 99 DIRECTORY Direct call stations LOWER SP PHONE Speed dial stations ...

Страница 40: ... N is displayed Press until the desired name is displayed OR Press or repeatedly until the desired name is displayed 3 Press START COPY SET The unit will start dialing SELECT INDEX Using the electronic telephone directory searching for a station name stored for automatic dialing The station names stored in the main unit s memory are automatically registered into the electronic telephone directory ...

Страница 41: ...if connected or local telephone company services such as call waiting For further details contact your local telephone company TONE FLASH and PAUSE buttons 9 PAUSE Telephone number Line access code International access code PAUSE PAUSE Example 2 If transmission errors occur when making an overseas transmission add two pauses at the end of the telephone number Note TONE FLASH and PAUSE can be store...

Страница 42: ...ing to TONE or PULSE by following the instructions below 1 Press MENU Display 2 Press K then A C 3 Press START COPY SET 4 Press or to select the desired setting 5 Press START COPY SET 6 Press MENU Note If you change to a different telephone company and this company has a different dialing mode service reset your dialing mode SETUP ITEM MODE AUTO Ÿÿ DIALING MODE SYSTEM SET UP 1 2 3 4 5 6 7 8 9 0 ST...

Страница 43: ... distinctive ring Press SP PHONE to start talking OR Press TALK on the handset to start talking If you initiate voice contact during transmission you can talk after all of the documents have been transmitted If you initiate voice contact during reception you can talk after the current page of the document is received VOICE STANDBY Receiving a request for voice contact If the other party initiates ...

Страница 44: ...h normal sized characters FINE For originals with small printing SUPER FINE For originals with minute printing HALF TONE For originals containing photographs shaded drawings etc Using the fine super fine or half tone setting will increase the transmission time If the resolution setting is changed during feeding it will be effective from the next sheet The super fine resolution only works with othe...

Страница 45: ...r upper stations 1 9 Press the desired direct call station key For lower stations 10 18 Press LOWER then press the desired direct call station key OR Using speed dialing Press DIRECTORY then press K and the desired 2 digit number 00 99 DIRECTORY FACE DOWN Direct call stations LOWER STOP Speed dial stations Fax auto redial If there is no answer or the line is busy the unit will automatically redial...

Страница 46: ...name starting with N Press F until the first station name starting with N is displayed Press until the desired name is displayed OR Press or repeatedly until the desired name is displayed 4 Press START COPY SET The unit will start dialing and send documents Index table SELECT INDEX STANDARD Sending using the electronic telephone directory searching for a station name stored for automatic dialing Y...

Страница 47: ...75 g m2 16 lb to 20 lb Note Remove clips staples or other similar fastening objects Check that ink paste or correction fluid has dried Do not send the following types of documents Use copies for fax transmission Chemically treated paper such as carbon or carbonless duplicating paper Electrostatically charged paper Heavily curled creased or torn paper Paper with a coated surface Paper with a faint ...

Страница 48: ... The report will not print pre selected setting 1 Press MENU Display 2 Press K then D 3 Press START COPY SET 4 Press or to select the desired setting 5 Press START COPY SET 6 Press MENU SETUP ITEM MODE OFF Ÿÿ TX REPORT MODE SYSTEM SET UP 1 2 3 4 5 6 7 8 9 0 START COPY SET MENU Dial keypad Sample of the transmission report Jan 20 1997 01 19PM NO OTHER FACSIMILE START TIME USAGE TIME MODE PAGES RESU...

Страница 49: ... Press MENU Display 2 Press K then B B 3 Press START COPY SET 4 Press or to select the desired setting 5 Press START COPY SET 6 Press MENU SETUP ITEM MODE ON Ÿÿ AUTO JOURNAL SYSTEM SET UP 1 2 3 4 5 6 7 8 9 0 START COPY SET MENU Dial keypad Sample of the journal report Jan 25 1997 05 22PM NO OTHER FACSIMILE START TIME USAGE TIME MODE PAGES RESULT UCODE 01 1234567 Jan 21 02 14PM 00 25 TX 01 OK 02 99...

Страница 50: ...u send Sample of a cover page 1 Press MENU four times Display 2 Press K then G 3 Press START COPY SET to start printing 4 After printing press MENU PRINTING FAX COVER PAGE PRINT LIST MENU START COPY SET Dial keypad FAX COVER PAGE DATE TO NAME FAX NO FROM NAME FAX NO Number of Pages including cover page Subject Notes ...

Страница 51: ...y start transmission SEND AT 11 00PM SETUP ITEM TIME 12 00AM NO MODE ON Ÿÿ MODE OFF Ÿÿ DELAYED XMT SYSTEM SET UP STANDARD Delayed transmission sending a fax at a specific time Using a built in clock this unit can send documents automatically at a specific time This allows you to take advantage of low cost calling hours offered by your telephone company The delayed transmission can be reserved to t...

Страница 52: ...ialing one touch dialing speed dialing or the electronic telephone directory 3 When using regular dialing press START COPY SET The documents will be fed into the unit and scanned into memory After storing all of the pages the unit will transmit the documents The amount of memory used will be shown as a percentage on the display Display Amount of memory used PAGES 01 05 Note The stored documents wi...

Страница 53: ...fore starting follow the steps below 1 Press MENU Display 2 Press K then B C 3 Press START COPY SET 4 Press or to select ON If this feature is not required select OFF 5 Press START COPY SET 6 Press MENU Note After transmission this feature will turn off automatically SETUP ITEM MODE ON Ÿÿ MODE OFF Ÿÿ OVERSEAS MODE SYSTEM SET UP 1 2 3 4 5 6 7 8 9 0 START COPY SET MENU Dial keypad Sending Faxes ...

Страница 54: ...transmit documents after fax reception is completed 1 Insert the documents FACE DOWN during fax reception 2 Enter the telephone number by using regular dialing one touch dialing speed dialing or the electronic telephone directory 3 Press START COPY SET Display XMT RSV ON Dial keypad FACE DOWN START COPY SET Sending Faxes Document feeder tray To cancel the reservation Remove the documents from the ...

Страница 55: ... the documents FACE DOWN Display 2 Press MENU six times 3 Press START COPY SET 4 Press or to select ON If this feature is not required select OFF 5 Press START COPY SET POLLED ON MODE ON Ÿÿ MODE OFF Ÿÿ POLLED STANDARD Note This feature will not work when the unit is set to the TEL mode The caller pays for the document transmission When delayed transmission see page 51 is set to ON transmit polling...

Страница 56: ... TEL MODE to TEL FAX MODE see page 64 When the unit rings you must answer all calls If you hear a fax calling tone slow beep or cannot hear the caller Press START COPY SET MANUAL RECEIVE When a fax call is detected the unit will receive fax documents without ringing When the unit rings answer the call using the handset or the SP PHONE button Fax call Voice call Voice fax call FAX AUTO RECEIVE AUTO...

Страница 57: ...ly answer all calls and only receive fax documents See page 59 The unit and telephone answering machine will work as follows When receiving voice calls The telephone answering machine will record voice messages automatically When receiving fax calls The facsimile unit will receive documents automatically See page 60 Fax only Telephone answering machine FAX AUTO RECEIVE ON Available when the FAX in...

Страница 58: ...cument For memory capacity see page 124 FAX IN MEMORY TEL mode answering all calls manually 1 When the unit rings press SP PHONE to answer the call 2 When document reception is required a slow beep is heard or no sound is heard press START COPY SET SP PHONE START COPY SET STOP The FAX indicator is off TALK J K I Receiving Faxes Note If you do not answer the line by 15 rings the unit will temporari...

Страница 59: ...cator is on 1 2 3 4 5 6 7 8 9 0 Setting the FAX ONLY mode ring count This feature determines the number of rings before the unit answers a call in the FAX ONLY mode You can choose from 1 to 4 rings Helpful hints To answer a call before the unit does increase the number of rings If you find receiving faxes from machines with the automatic transmission feature difficult decrease the number of rings ...

Страница 60: ...to less than 4 This will allow the answering machine to answer the line first 3 Record a greeting message referring to the example below This is your name business and or telephone number We are unable to answer the phone right now Please leave a message after the long beep To send a fax start transmission Thank you Peel off the tape on the EXT jack Note Do not pause for more than 4 seconds in the...

Страница 61: ...ode to the EXT TAM mode 1 Press MENU Display 2 Press K then E 3 Press START COPY SET 4 Press or to select EXT TAM To return to the FAX ONLY mode select FAXonly 5 Press START COPY SET 6 Press MENU SETUP ITEM MODE EXT TAM ML MODE FAXonly ML AUTO RECEIVE SYSTEM SET UP START COPY SET MENU Dial keypad The FAX indicator is on Note Every time the facsimile unit receives a document a silent pause or fax t...

Страница 62: ...nswering machine remote TAM activation ID Set the same remote access code on the answering machine to the facsimile unit as the remote TAM activation ID Important This ID should be different from the fax activation code to prevent the facsimile unit from activating the fax function when you operate the answering machine from a remote location using the remote access code see page 68 1 Press MENU D...

Страница 63: ...fore the call is answered The unit will now distinguish between a voice and fax call by detecting the calling tone Fax call Voice call The unit will receive a document The unit will start to ring While ringing the unit will emit a different ring back tone to the calling party Answer the call If you do not answer the call by a preset number of rings the unit will switch to the fax Silent ring fax r...

Страница 64: ...sing the TEL FAX mode If an extension telephone is connected the facsimile unit and the extension telephone will ring as follows The extension telephone will ring twice TEL FAX ring count The facsimile unit will ring up to 3 times Silent fax recognition ring count 5 sec If a fax calling tone slow beep is detected the unit will automatically activate the fax function to receive documents without ri...

Страница 65: ... machines that do not send a calling tone 1 Press MENU Display 2 Press K then I 3 Press START COPY SET 4 Press or to select the desired number 5 Press START COPY SET 6 Press MENU SETUP ITEM RING 2 ML TEL FAX RING SYSTEM SET UP Note You may not be able to receive documents from some older facsimile machines if you increase the number of rings 1 2 3 4 5 6 7 8 9 0 START COPY SET MENU Dial keypad 1 Pr...

Страница 66: ... rings Other triple ring short short long rings To use a phone number as facsimile number When you use one of the phone numbers as a facsimile number program the ring pattern assigned to the facsimile number When the unit detects a call matching the selected distinctive ringing pattern it will activate depending on the receive mode setting When you subscribe to a distinctive ring service you can a...

Страница 67: ...annot hear voice press START COPY SET to receive documents TEL FAX mode When a call that matches your selected ringing pattern is detected the unit will automatically answer the line and activate the fax function to receive documents When a call having another ringing pattern is received the unit will ring until you answer the call FAX ONLY mode In this mode the unit will answer all calls automati...

Страница 68: ... tone telephone as the extension telephone and enter the fax activation code FIRMLY The fax activation code is set to U9 as a pre selected setting 1 When a call is received lift the handset of the extension telephone 2 When document reception is required a slow beep is heard or no sound is heard enter the fax activation code FIRMLY 3 Hang up the handset The facsimile unit is set to receive documen...

Страница 69: ...l and recover a document from another machine follow the steps below Make sure that no documents have been fed into your unit and that the other party s machine is ready for your call 1 Press MENU five times Display 2 Press START COPY SET 3 Enter the telephone number by using regular dialing one touch dialing speed dialing or the electronic telephone directory 4 Press START COPY SET NO POLLING MEN...

Страница 70: ... resolution or other nonstandard resolutions Sample of a paper save printout Note When a reduced document is longer than the recording paper it will be printed on two pages The continuation will be printed on the next page and there may be wasted space In this case paper and film will not be saved If you wish to fit the document onto one page set this feature to off and program a suitable reductio...

Страница 71: ...t will start printing 5 After printing press MENU Note You cannot select FINE SUPER FINE or HALF TONE resolution for this feature To make an enlarged copy of the whole page whose length is as long as or shorter than the installed paper proceed as follows First insert the top half of the original document into the feeder tray and copy Then turn the original around and insert the bottom half of the ...

Страница 72: ... C F 3 Press START COPY SET 4 Press or to select the desired setting If this feature is not required select OFF 5 Press START COPY SET 6 Press MENU SETUP ITEM MODE 92 Ÿÿ RX REDUCTION SYSTEM SET UP Letter 216 q 279 mm 81 2w q 11w Legal 216 q 356 mm 81 2w q 14w A4 210 q 297 mm May not be available in the United States Note This feature is not available when the film paper save reception feature is s...

Страница 73: ...o receive documents from stations that do not send a calling tone after dialing activate this feature If you use a single cassette tape to give greeting messages and record incoming messages deactivate this feature 1 Press MENU Display 2 Press K then D 3 Press START COPY SET 4 Press or to select the desired setting 5 Press START COPY SET 6 Press MENU SETUP ITEM MODE ON Ÿÿ SILENT DETECT SYSTEM SET ...

Страница 74: ... COPY SET 6 Press MENU SETUP ITEM MODE ON Ÿÿ FRIENDLY RCV SYSTEM SET UP 1 2 3 4 5 6 7 8 9 0 START COPY SET MENU Dial keypad Receiving Faxes Setting the memory reception alert When received documents are stored into memory the unit will alert you with beep tones If you hear slow beeps clear the printing problem or supply paper to print the stored documents The beep tones will stop 1 Press MENU Disp...

Страница 75: ...ress REDIAL PAUSE more than once at the end of your telephone number to extend the paging time If you wish to display a message on your pager enter the message after your pager number and pause s Programming methods may vary depending on the pager company Contact your pager company for details You can enter a total of 46 digits and or pauses 7 Press START COPY SET 8 Press MENU Note This feature is...

Страница 76: ...ng regular film 100 m roll the unit will also print a report FILM NEAR EMPTY 1 Press MENU Display 2 Press K then G I 3 Press START COPY SET 4 Press or to select the desired setting If this feature is not required select OFF 5 Press START COPY SET 6 Press MENU SETUP ITEM MODE ON Ÿÿ FILM DETECTION SYSTEM SET UP 1 2 3 4 5 6 7 8 9 0 START COPY SET MENU Dial keypad Receiving Faxes ...

Страница 77: ...th of the document guides 4 Press RESOLUTION repeatedly to the desired setting if needed see page 44 5 Press START COPY SET The unit will start printing STOP START COPY SET To stop copying Press STOP Note When copying the unit will automatically select FINE resolution You can make or receive a voice call while making a copy FACE DOWN RESOLUTION Document guides Document feeder tray Copying ...

Страница 78: ...g paper and original document Recommended reduction rate 1 Press MENU Display 2 Press K then C E 3 Press START COPY SET 4 Press or to select the desired setting If this feature is not required select OFF 5 Press START COPY SET 6 Press MENU Note If the appropriate reduction rate is not programmed the document may be divided and the top of the second sheet will be deleted SETUP ITEM MODE OFF Ÿÿ COPY...

Страница 79: ...cations DX 33Mhz minimum recommended Microsoft Windows 3 1 3 11 or Windows 95 Hard Disk drive with at least fourteen 14 MB of available storage RS232C Serial Port Note The unit cannot print on envelopes If your PC has a 9 pin com port RS232C cable Included To COM port 25 Pin Male 25 Pin Adaptor Included 9 Pin Female If your PC has a 25 pin com port 9 Pin Female RS232C cable Included 25 Pin Male To...

Страница 80: ...ou to launch any Windows application with a single mouse click Send From Fax Enables you to fax a paper document placed on the facsimile Address Book Enables you to list your personal information database of fax and phone numbers Finder Enables you to access your faxes and scanned documents by File Name and Key phrases Message Center Enables you to manage all incoming and outgoing fax messages and...

Страница 81: ...ws 3 1 3 11 or Windows 95 See pages 83 and 84 Printing received documents See page 89 Fax functions Personal information database for fax and phone numbers See page 82 Sending documents See pages 85 and 86 Receiving faxes on your PC See page 87 Viewing faxes on your screen See page 88 Faxing a document from the facsimile unit using the PC See page 90 Scanner functions Using your fax machine as a s...

Страница 82: ...er the File Name Enter the Address Book name Click the OK button The Address Book is made To make an entry in the Address Book 1 Click the Open button The open dialog box will be displayed Fig 3 2 Select the desired Address Book and click the OK button 3 Enter or edit the Name Company Fax No Phone No and Notes 4 Click the Add button Fig 4 The entry will be added to the Address Book Broadcast When ...

Страница 83: ... Open the document you wish to print 2 Select Print from the File menu The Print dialog box will appear 3 Select Panasonic MFC Print from the Name field in the Printer group Fig 1 4 Set the Page range and enter the number of collated copies 5 Select the Properties button The Panasonic MFC Print dialog box will appear Fig 2 6 Set the Page Size Resolution and Orientation Then click the OK button 7 C...

Страница 84: ...e Specific Printer field Fig 2 5 Select the Options button The Panasonic MFC Print dialog box will appear Fig 3 6 Set the Page Size Resolution and Orientation Then click the OK button 7 Click the OK button in the Print Setup dialog box 8 Click the OK button in the Print dialog box Fig 1 Fig 2 Fig 3 Using as a printer cont Printing documents from Windows 3 1 3 11 For example to print from Microsoft...

Страница 85: ... appear Fig 2 4 Set the Page Size Resolution and Orientation Then click the OK button 5 Click the OK button in the Print dialog box The Fax Send dialog box will appear Fig 3 6 Enter the name and fax number from the keyboard or select the desired entry in the address book currently displayed in the Address Book name box 7 Select the Start button in the Fax Send dialog box Note If the line is busy o...

Страница 86: ...ppear Fig 3 8 Enter the name and fax number from the keyboard or select the desired entry in the address book currently displayed in the Address Book name box 9 Select the Start button in the Fax Send dialog box Note If the line is busy or there is no answer the Message Center Outbox application will automatically redial the number up to 5 times To cancel transmission after dialing Press STOP on t...

Страница 87: ...reen 2 Select the Inbox window from the Message Center window The Inbox window displays the current status of all facsimiles distributed to you in the Inbox queue Viewing the list of faxes received All faxes received by your PC are listed in the Inbox window in the Message Center application Inbox allows you to view print or save faxes and append your faxes to other saved fax documents Date and Ti...

Страница 88: ...w will display the selected fax VIEW button PREVIEW button To preview the first page of the received fax 1 Select the fax you wish to view from the Inbox window Fig 1 2 Select Preview from the File menu of the Message Center Inbox window or click the PREVIEW button on the toolbar The Preview window will display the first page of the selected fax Fig 3 Note If you are using Windows 3 1 3 11 the dia...

Страница 89: ...eld then select the OK button The Inbox Print dialog box will appear Fig 4 7 Select the range of faxes you want to print from the Inbox Print group A Select Print Selected to print the facsimiles you selected B Select Print Unprinted to print all the unprinted facsimiles C Select Print All to print all the facsimiles 8 If you want to delete the selected faxes after they have been printed select th...

Страница 90: ...ppear Fig 2 3 Enter the name and fax number from the keyboard or select the desired entry in the address book currently displayed in the Address Book name box 4 You can access the Address Book application by selecting Addr Bk or the Address Book menu The Address Book application window will appear 5 If you accessed the Address Book application select Exit from the File menu 6 Select the Start butt...

Страница 91: ...tensity and optimize for the type of document you are scanning 5 Select Scan The scanned document is displayed in the Viewer application window 6 Select Save As from the File menu The Save As dialog box will appear Fig 4 7 Enter the file name in the File name text box and then select the drive and directory where you want to store the document 8 Select the OK button Note Text editing cannot be per...

Страница 92: ...A D 3 Press START COPY SET 4 Press or to select OFF To turn on the PC LINK on the facsimile unit select ON 5 Press START COPY SET 6 Press MENU SETUP ITEM MODE ON Ÿÿ PC LINK SYSTEM SET UP 1 2 3 4 5 6 7 8 9 0 START COPY SET MENU Dial keypad To turn off the PC LINK on the facsimile unit When this feature is off any operation from your PC like fax transmission reception scanning printing or copying is...

Страница 93: ...izing the image to the size of the window Zooming in a specified area of the image Making a Copy Making multiple copies Reducing enlarging your copy Setting up your Copier Choosing a printer Changing address books Copying Information into the clipboard Dialing a voice number Pasting information into your address book Printing an address book entry or the entire book Saving the address book as a fi...

Страница 94: ... facsimiles Changing the destination fax number or delivery schedule Unsuccessful dialing attempts Canceling Faxes Pausing and Resuming sending facsimiles Deleting facsimiles Monitoring the Fax line status Viewing the Outbox queue Outbox Activity Log Adding a current addressee to an Address Book Changing Address Books Choosing a Resolution Phone Number addressing your fax Sending a fax to multiple...

Страница 95: ...ment p 109 A transmission or reception error occurred because of a problem with the other party s machine Check with the other party The document was not received due to memory being full The document was not fed into the unit properly Try again The receiving unit was busy or ran out of recording paper Try again The START COPY SET button was pressed when the document was not set properly Set the d...

Страница 96: ...e on page 108 Do not install folded or heavily curled paper in the paper tray The unit has a document s in memory See the other message s instructions to print out the document s The film is empty Replace the film or film cartridge with a new one p 110 111 The film is slack Tighten it see step 8 on page 111 and install again The remaining film can print approx 15 pages of letter size documents Pre...

Страница 97: ... document into two or more sheets and try again There is too much paper on the paper stacker Remove the printed paper If the display message still remains after removing the paper a paper jam may have occurred Remove the jammed paper see When paper has jammed near the recording paper exit on page 108 The starter film is empty Replace the film or film cartridge with a new one p 110 111 A transmissi...

Страница 98: ...ired If the working telephone does not operate properly contact your telephone company Check the settings see pages 27 and 28 Charge the battery fully see pages 27 and 28 Clean the charge contacts and charge again see page 115 The ringer volume is set to OFF Adjust to a suitable level see page 29 The ringer volume is set to OFF Press LOUD RINGER when the TALK BATT LOW indicator light is off If thi...

Страница 99: ...3 Add two pauses at the end of the telephone number see page 41 You cannot store a number while the unit is in the talk speakerphone or intercom mode Do not pause for over 30 seconds while storing To answer a call press TALK or SP PHONE The program will be canceled Store the number again The handset is too far from the main unit or is engaged in an outside call Charge the battery fully or replace ...

Страница 100: ... Hammermillg jet PRINT for clearer printing The receiving reduction rate is not programmed correctly Program the proper reduction rate see page 72 CAUSE REMEDY PROBLEM Fax reception PROBLEM CAUSE REMEDY The glass or rollers are dirty Please clean them see page 114 The thermal head is dirty Please clean it see page 114 The film is not inserted correctly Insert it correctly see pages 110 and 111 The...

Страница 101: ...ed Activate this feature see page 73 Check that the answering machine is turned on and connected to the facsimile unit properly see page 60 Set the number of rings on the answering machine to 1 or 2 The remote access code on your answering machine is the same as your fax activation code Set a different number for each code You did not program your remote TAM activation ID in your facsimile unit co...

Страница 102: ...tall the MFC software by following the operating instructions or label on the floppy disk The disks or disk driver are not normal Check them using the scan disk command refer to your Windows user manual Or try another disk to confirm that there is no problem with the disk drive You installed the Multi Function Center software in a compressed drive Use other drive or reduce the compression of the c...

Страница 103: ...Print Incoming Faxes in the Receive dialog box of the Inbox properties Set the desired printer as default in the Print Settings box or select the desired printer in the Print dialog box See the Viewer instructions in the operating instructions or help list There is not enough hard disk capacity Delete unnecessary applications or data The MFC scan program was activated when other applications were ...

Страница 104: ...rding paper is not fed into the unit properly or has jammed near the recording paper entrance To clear see page 108 Paper jam under the film cartridge or too much paper on the paper stacker When this digit is 1 the recording paper jammed under the film cartridge or there is too much paper on the paper stacker Clear the jammed paper p 107 or remove the printed paper Cover open When this digit is 1 ...

Страница 105: ...m When this digit is 1 the document is jammed Remove the jammed document p 109 Cover open When this digit is 1 the top cover is open Close it For example If 1 appears in the 8 digit code see the corresponding instructions and solve the problem e g When Scanner not ready Error code 00010000 is displayed on the Status Log window Cause remedy The top cover is open Close it 0 0 0 0 0 Operations ...

Страница 106: ...re transmission will be attempted soon after power is restored If an external telephone telephone answering machine is connected to the unit you can use it during a power failure Power down report The power down report will be automatically printed out after power is restored This report will not print out when there are no documents stored in memory Sample of the power down report POWER DOWN AT J...

Страница 107: ...8 When paper has jammed under the film cartridge The display will show the following message Remove the jammed paper as follows PAPER JAMMED 1 Slide the front cover open lever forward to unlock the front cover and lift to open 3 Remove the jammed recording paper 4 If the film is slack tighten it by winding the bottom side gears 2 Remove the film cartridge Front cover open lever Front cover Film ca...

Страница 108: ... display will show the following message Remove the jammed paper as follows CHECK PAPER 1 Tilt the unit up and push the jammed recording paper out through the triangular window on the bottom of the unit 2 Remove the jammed recording paper from the recording paper exit If you cannot remove the jammed paper remove it by following steps 1 4 on page 107 Triangular window 5 Replace the film cartridge b...

Страница 109: ...e the front cover open lever forward to unlock the front cover and lift to open 2 Shift the position of the lever by using an instrument with a pointed end like a clip or ball point pen Position A When documents do not feed Position B Standard position pre selected Position C When documents multiple feed 3 Close the front cover securely by pushing down on both ends Front cover open lever Front cov...

Страница 110: ...ew film or film cartridge To order replacement parts see page 7 FILM EMPTY FILM NEAR EMPTY 1 Slide the front cover open lever forward to unlock the front cover and lift to open 2 Remove the film cartridge If you have purchased a film cartridge Model no KX FA135 for replacement skip to step 9 To replace only the film go to step 3 3 Unlock the four gears by A pulling the top side gears blue and gree...

Страница 111: ...ard until they lock into place If the film is slack tighten it by winding the bottom side gears 19 Insert the film cartridge by matching the blue label on the cartridge with that on the unit 10 Close the front cover securely by pushing down on both ends The unit will check if the film is installed correctly The following message will be displayed Display If the following message is displayed the f...

Страница 112: ...ver 2 Insert the spare battery in the main unit observing the proper polarity then close the battery cover on the main unit The SPARE CHARGE indicator lights Note The spare battery is always being charged in the main unit while the power cord is connected The battery cannot be overcharged Attention The product you have purchased is powered by a nickel cadmium battery which is recyclable At the end...

Страница 113: ...r polarity 4 Insert the spare battery in the handset observing the proper polarity When finished replace the battery cover on the cordless handset A B Note If the TALK BATT LOW indicator flashes slowly even when the handset battery has been fully charged it is time to replace the battery with a new one Remember to fully charge the new battery after battery replacement Please use only a Panasonic P...

Страница 114: ...ne line cord Sub roller Rubber flap White plate Document feeder rollers Glass Front cover open lever Caution Do not use paper products such as paper towels or tissues to clean the inside of the unit Cleaning the thermal head If dirty patterns or black bands appear on a copied or received document clean the thermal head Caution To prevent a malfunction due to static electricity do not use a dry clo...

Страница 115: ...ance Call 1 800 435 7329 Cleaning the charge contacts Clean the main unit and the handset charge contacts with a dry soft cloth once a month or the battery may not charge properly Charge contacts Charge contacts Cleaning ...

Страница 116: ...e selected setting DARKER Used when the display contrast is too light 1 Press MENU Display 2 Press K then C I 3 Press START COPY SET 4 Press or to select the desired setting 5 Press START COPY SET 6 Press MENU SETUP ITEM MODE NORMAL Ÿÿ LCD CONTRAST SYSTEM SET UP 1 2 3 4 5 6 7 8 9 0 START COPY SET MENU Dial keypad ...

Страница 117: ...R ON OFF ON OFF ON OFF ON OFF ON OFF ON OFF YES NO ON OFF OFF ON 3 rings OFF OFF OFF 92 NORMAL ON ON CODE U9 ON ON OFF ON NO 49 53 51 34 65 67 70 71 78 72 116 73 68 74 74 75 76 118 Page 23 24 25 48 61 59 64 65 62 42 92 52 Preselected setting Available settings Code Feature 01 02 03 04 05 07 08 09 12 13 14 15 SET DATE TIME YOUR LOGO YOUR TELEPHONE NUMBER PRINT TRANSMISSION REPORT AUTO RECEIVE MODE ...

Страница 118: ...tial settings 1 Press MENU Display 2 Press K then H 3 Press START COPY SET 4 Press or to select YES 5 Press START COPY SET If this feature is not required press STOP 6 Press START COPY SET again for confirmation 7 Press MENU RESET COMPLETED RESET OK RESET YES Ÿÿ RESET NO Ÿÿ SET DEFAULT SYSTEM SET UP Dial keypad MENU STOP START COPY SET ...

Страница 119: ...also can be printed manually You can change the setting of the journal auto print feature see page 49 Printer test list allows you to check the print quality of your unit If the test print has a dirty pattern or blurred points or lines clean the thermal head see page 114 Transmission report provides you with a printed record of the fax transmission result see pages 48 Caller list is useful for kee...

Страница 120: ... any customer terminal equipment incompatible with telephone company communications facilities or require modification or alteration of such terminal equipment or otherwise materially affect its use or performance the customer shall be given adequate notice in writing to allow the customer an opportunity to maintain uninterrupted service CAUTION Any changes or modifications not expressly approved ...

Страница 121: ...ring normal use and when applicable does not cover the print and ink cartridge the toner cartridge and drum unit or the film cartridge The warranty does not cover damages which occur in shipment or failures which are caused by products not supplied by the warrantor or failures which result from accident misuse abuse neglect mishandling faulty installation misapplication set up adjustments improper...

Страница 122: ...nly MICHIGAN 37048 Van Dyke Avenue Sterling Heights MI 48312 Phone 810 939 2060 Fax 810 939 2638 MINNESOTA 7850 12th Avenue South Airport Business Center Bloomington MN 55425 Phone 612 854 8624 Fax 612 854 2089 OHIO 2236 Waycross Road Cincinnati OH 45240 Phone 513 851 4180 Fax 513 851 8443 PENNSYLVANIA 2221 Cabot Boulevard West Suite B Langhorne PA 19047 Phone 215 741 0661 Fax 215 741 0521 Chartie...

Страница 123: ...icenter When you ship the product Carefully pack your unit preferably in the original carton Attach a letter detailing the symptom or problem to the outside of the carton Send the unit to an authorized service center prepaid and adequately insured Do not send your unit to the Panasonic Consumer Electronics Company or to any executive or regional sales offices These locations do not repair consumer...

Страница 124: ... 57 8wq1413 16wq1331 32w 15 Mass Weight Approx 5 2 kg 11 4 lb 16 Power Consumption Standby Approx 7 0 W Transmission Approx 16 W Reception Approx 38 W Copy Approx 52 W Maximum Approx 160 W 17 Power Supply 120 V AC 60 Hz This unit will not function at 50 Hz 18 Memory Capacity Approx 28 pages memory reception Approx 25 pages memory transmission Handset 1 Operating Environment 5 C 35 C 41 F 95 F 45 8...

Страница 125: ...Name Telephone No 1 2 3 4 5 6 7 8 9 10 LOWER 1 11 LOWER 2 12 LOWER 3 13 LOWER 4 14 LOWER 5 15 LOWER 6 16 LOWER 7 17 LOWER 8 18 LOWER 9 Place to write information you have stored in automatic dialing Memory station list for the handset Name Telephone No Station No Name Telephone No Station No 0 1 2 3 4 5 6 7 8 9 125 ...

Страница 126: ...eed dialing list for the main unit Station No Name Telephone No Station No Name Telephone No Station No Name Telephone No 00 01 02 03 04 05 06 07 08 09 10 11 12 13 14 15 16 17 18 19 20 21 22 23 24 25 26 27 28 29 30 31 32 33 68 69 70 71 72 73 74 75 76 77 78 79 80 81 82 83 84 85 86 87 88 89 90 91 92 93 94 95 96 97 98 99 ...

Страница 127: ...RRR 58 74 H HELP button RRRRRRRRRRRRR 22 HYPHEN key RRRRRRRRRRRR 24 I INSERT key RRRRRRRRRRRRR 24 INTERCOM button RRRRRRRRRR 35 J Jam RRRRRRRRRRR 107 108 109 Journal auto printRRRRRRRRRRR 49 Journal report RRRRRRRRRR 49 119 L Launch pad RRRRRRRRRRR 80 94 LOCATOR INTERCOM button RRRRR 35 Logo RRRRRRRRRRRRRRRR 24 LOUD RINGER button RRRRRRRR 29 LOWER key RRRRRRRRRRR 37 39 M MANUAL RECEIVE mode RRRRR ...

Страница 128: ...hase must be included with the returned product Any unit that is replaced by Panasonic and not shipped with proper proof of purchase by you will be subject to a minimum 100 00 charge The original unit must be properly packaged in the same manner as the replacement unit utilizing the packing materials provided Damage due to improper or inadequate packing will be charged to you as an out of warranty...

Отзывы: