


59
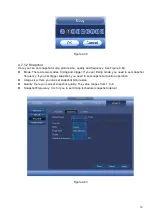
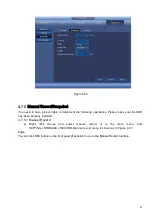
4.7.3.2 Motion Detect Snapshot
a) From Main menu->SETTING->REMOTE->ENCODE->Snapshot, you can go to snapshot
interface. See Figure 4-54.
b) In Figure 4-54, select trigger snapshot from the dropdown list and then set picture size, quality
and snapshot frequency. Click Save button to save current setup.
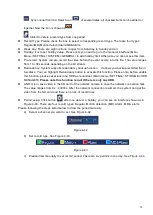
c) From Main menu->SETTING->EVENT->DETECT, here you can select motion detect type,
motion detect channel and then check the enable box. Please refer to chapter 4.7.3.1.
d) Click Save button to complete motion detect setup.
Figure 4-54
4.7.4
Alarm Record/Snapshot
4.7.4.1 Alarm Record
a) Before you set alarm setup information, please go to chapter 1 to connect alarm input and
alarm output cable (such as light, siren and etc).
b) The record priority is: Alarm>Motion detect>Regular.
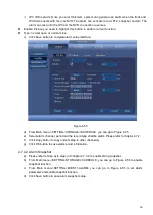
In the main menu, from SETTING->EVENT-> ALARM, you can see alarm setup interface. See Figure
4-55.
Alarm in: Here is for you to select channel number.
Event type: There are four types. Local input/network input/IPC external/IPC offline alarm.
Local input alarm: The alarm signal system detects from the alarm input port.
Network input alarm: It is the alarm signal from the network.
IPC external alarm: It is the on-off alarm signal from the front-end device and can activate the
local NVR.
Содержание k-nl304k
Страница 1: ...Network Disk Recorder User s Manual Model No K NL304K K NL308K K NL316K Version 1 0 5 ...
Страница 32: ...23 The following figure is based on our K NL316K product Figure 3 2 ...
Страница 50: ...41 Figure 4 25 ...
Страница 67: ...58 Figure 4 52 Figure 4 53 ...
Страница 88: ...79 Figure 4 71 Figure 4 72 ...
Страница 89: ...80 Figure 4 73 Figure 4 74 ...
Страница 94: ...85 Figure 4 78 Figure 4 79 ...
Страница 95: ...86 Figure 4 80 Figure 4 81 ...
Страница 96: ...87 Figure 4 82 Figure 4 83 ...
Страница 99: ...90 Figure 4 86 Figure 4 87 ...
Страница 114: ...105 send rate and receive rate at the top panel Figure 4 105 ...
Страница 116: ...107 Figure 4 107 In Figure 4 107 click one HDD item the S M A R T interface is shown as in Figure 4 108 Figure 4 108 ...
Страница 119: ...110 Figure 4 111 Figure 4 112 ...
Страница 129: ...120 Figure 4 125 Figure 4 126 ...
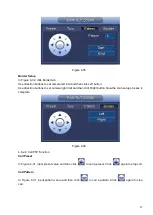
Страница 142: ...133 Figure 5 11 You can click this icon to display or hide the PTZ control platform 3D Intelligent Positioning Key ...
Страница 164: ...155 Figure 5 38 Figure 5 39 Figure 5 40 ...
Страница 172: ...163 Figure 5 51 Figure 5 52 Figure 5 53 Figure 5 54 ...