


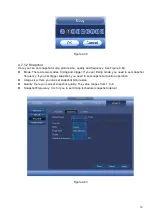


52
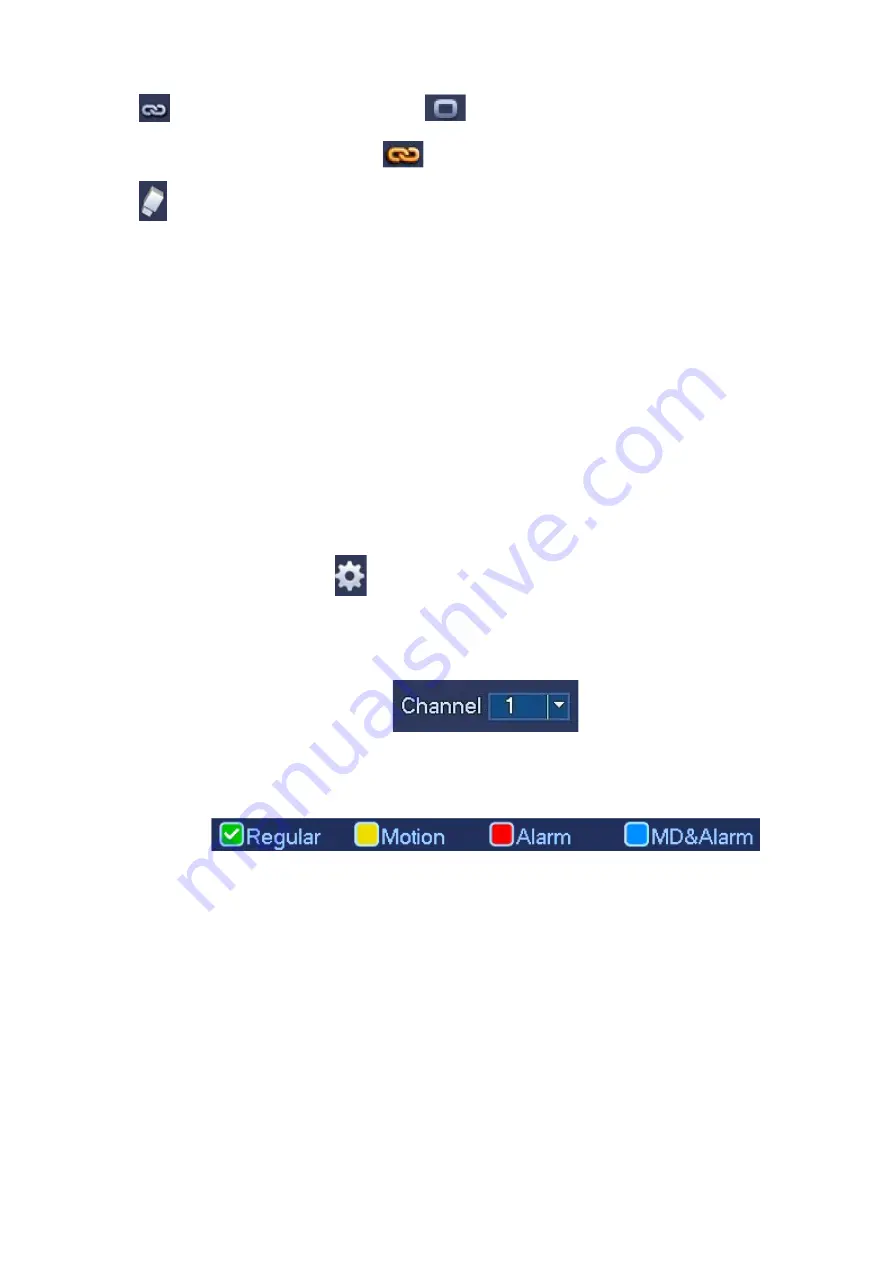
: Sync connection icon. Select icon
of several dates, all checked items can be edited or
together. Now the icon is shown as
.
: Click it to delete a record type from one period.
Record Type: Please check the box to select corresponding record type. There are four types:
Regular/MD (Motion detect)/Alarm/MD&Alarm.
Week day: There are eight options: ranges from Saturday to Sunday and all.
Holiday: It is to set holiday setup. Please note you need to go to the General interface (Main
Menu->SETTING->SYSTEM->GENERAL) to add holiday first. Otherwise you cannot see this item.
Pre-record: System can pre-record the video before the event occurs into the file. The value ranges
from 1 to 30 seconds depending on the bit stream.
Redundancy: System supports redundancy backup function. It allows you backup recorded file in
two disks. You can highlight Redundancy button to activate this function. Please note, before enable
this function, please set at least one HDD as redundant. (Main menu->SETTING->STORAGE->HDD
MANAGER).
Please note this function is null if there is only one HDD.
ANR: It is to save video to the SD card of the network camera in case the network connection fails.
The value ranges from 0s
~
43200s. After the network connection resumed, the system can get the
video from the SD card and there is no risk of record loss.
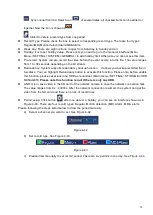
Period setup: Click button
after one date or a holiday, you can see an interface shown as in
Figure 4-46. There are four record types: Regular, Motion detection (MD), Alarm, MD & alarm.
Please following the steps listed below to draw the period manually.
a) Select a channel you want to set. See Figure 4-42.
Figure 4-42
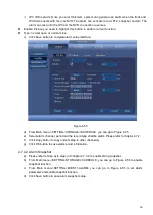
b) Set record type. See Figure 4-43.
Figure 4-43
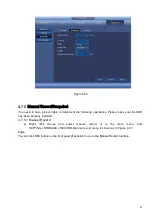
c) Please draw manually to set record period. There are six periods in one day. See Figure 4-44.
Содержание k-nl304k
Страница 1: ...Network Disk Recorder User s Manual Model No K NL304K K NL308K K NL316K Version 1 0 5 ...
Страница 32: ...23 The following figure is based on our K NL316K product Figure 3 2 ...
Страница 50: ...41 Figure 4 25 ...
Страница 67: ...58 Figure 4 52 Figure 4 53 ...
Страница 88: ...79 Figure 4 71 Figure 4 72 ...
Страница 89: ...80 Figure 4 73 Figure 4 74 ...
Страница 94: ...85 Figure 4 78 Figure 4 79 ...
Страница 95: ...86 Figure 4 80 Figure 4 81 ...
Страница 96: ...87 Figure 4 82 Figure 4 83 ...
Страница 99: ...90 Figure 4 86 Figure 4 87 ...
Страница 114: ...105 send rate and receive rate at the top panel Figure 4 105 ...
Страница 116: ...107 Figure 4 107 In Figure 4 107 click one HDD item the S M A R T interface is shown as in Figure 4 108 Figure 4 108 ...
Страница 119: ...110 Figure 4 111 Figure 4 112 ...
Страница 129: ...120 Figure 4 125 Figure 4 126 ...
Страница 142: ...133 Figure 5 11 You can click this icon to display or hide the PTZ control platform 3D Intelligent Positioning Key ...
Страница 164: ...155 Figure 5 38 Figure 5 39 Figure 5 40 ...
Страница 172: ...163 Figure 5 51 Figure 5 52 Figure 5 53 Figure 5 54 ...