


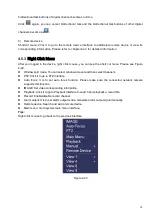


37
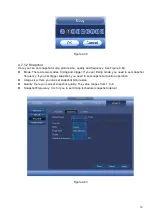
Figure 4-19 Digital Channel
1) Realtime playback
It is to playback the previous 5-60 minutes record of current channel.
Please go to the Main menu->SETTING->SYSTEM->GENERAL to set real-time playback time.
System may pop up a dialogue box if there is no such record in current channel.
2) Digital zoom
It is to zoom in specified zone of current channel. It supports zoom in function of multiple-channel.
Click button
, the button is shown as
.
There are two ways for you to zoom in.
Drag the mouse to select a zone, you can view an interface show as Figure 4-20.
Figure 4-20
Put the middle button at the centre of the zone you want to zoom in, and move the mouse, you
can view an interface shown as in Figure 4-21.
Figure 4-21
Right click mouse to cancel zoom and go back to the original interface.
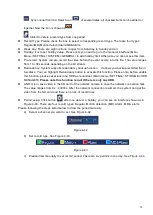
3) Manual record function
It is to backup the video of current channel to the USB device. System cannot backup the video of
multiple-channel at the same time.
Click button
, system begins recording. Click it again, system stops recoridng. You can find the
record file on the flash disk.
4) Manual Snapshot
Click
to snapshot 1-5 times. The snapshot file is saved on the USB device or HDD. You can go to
the Playback interface (chapter 4.8) to view.
5) Bidirectional talk
If the connected front-end device supports bidirectional talk function, you can click this button. Click
button
to start bidirectional talk function the icon now is shown as
. Now the rest
Содержание k-nl304k
Страница 1: ...Network Disk Recorder User s Manual Model No K NL304K K NL308K K NL316K Version 1 0 5 ...
Страница 32: ...23 The following figure is based on our K NL316K product Figure 3 2 ...
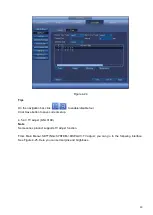
Страница 50: ...41 Figure 4 25 ...
Страница 67: ...58 Figure 4 52 Figure 4 53 ...
Страница 88: ...79 Figure 4 71 Figure 4 72 ...
Страница 89: ...80 Figure 4 73 Figure 4 74 ...
Страница 94: ...85 Figure 4 78 Figure 4 79 ...
Страница 95: ...86 Figure 4 80 Figure 4 81 ...
Страница 96: ...87 Figure 4 82 Figure 4 83 ...
Страница 99: ...90 Figure 4 86 Figure 4 87 ...
Страница 114: ...105 send rate and receive rate at the top panel Figure 4 105 ...
Страница 116: ...107 Figure 4 107 In Figure 4 107 click one HDD item the S M A R T interface is shown as in Figure 4 108 Figure 4 108 ...
Страница 119: ...110 Figure 4 111 Figure 4 112 ...
Страница 129: ...120 Figure 4 125 Figure 4 126 ...
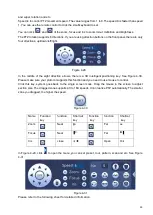
Страница 142: ...133 Figure 5 11 You can click this icon to display or hide the PTZ control platform 3D Intelligent Positioning Key ...
Страница 164: ...155 Figure 5 38 Figure 5 39 Figure 5 40 ...
Страница 172: ...163 Figure 5 51 Figure 5 52 Figure 5 53 Figure 5 54 ...