


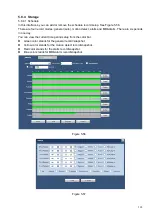


170
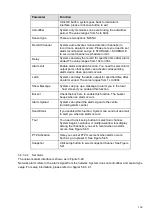
HDD Full
Here is for you to select working mode when hard disk is full. There are
two options: stop recording or overwrite. If current working HDD is
overwritten or the current HDD is full while the next HDD is no empty,
then system stops recording, If the current HDD is full and then next HDD
is not empty, then system overwrites the previous files.
Pack
Duration
Here is for you to specify record duration. The value ranges from 1 to 120
minutes. Default value is 60 minutes.
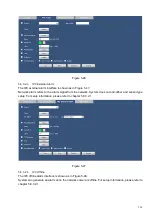
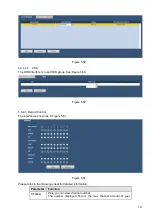
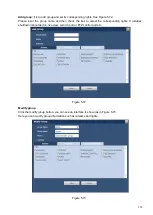
5.8.5.1.2 Date & time
The date and time interface is shown as in Figure 5-66
Figure 5-66
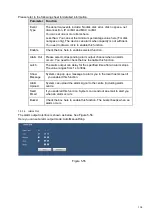
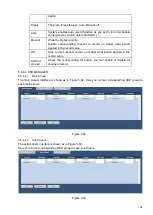
Please refer to the following sheet for detailed information.
Parameter
Function
Date Format
Here you can select date format from the dropdown list.
Time Format
There are two options: 24-H and 12-H.
Time Zone
The time zone of the device.
System Time It is to set system time. It becomes valid after you set.
Sync PC
You can click this button to save the system time as your PC current
time.
DST
Here you can set day night save time begin time and end time. You can
set according to the date format or according to the week format.
NTP
You can check the box to enable NTP function.
Server
You can set the time server address.
Port
It is to set the time server port.
Interval
It is to set the sync periods between the device and the time server.
Содержание k-nl304k
Страница 1: ...Network Disk Recorder User s Manual Model No K NL304K K NL308K K NL316K Version 1 0 5 ...
Страница 32: ...23 The following figure is based on our K NL316K product Figure 3 2 ...
Страница 50: ...41 Figure 4 25 ...
Страница 67: ...58 Figure 4 52 Figure 4 53 ...
Страница 88: ...79 Figure 4 71 Figure 4 72 ...
Страница 89: ...80 Figure 4 73 Figure 4 74 ...
Страница 94: ...85 Figure 4 78 Figure 4 79 ...
Страница 95: ...86 Figure 4 80 Figure 4 81 ...
Страница 96: ...87 Figure 4 82 Figure 4 83 ...
Страница 99: ...90 Figure 4 86 Figure 4 87 ...
Страница 114: ...105 send rate and receive rate at the top panel Figure 4 105 ...
Страница 116: ...107 Figure 4 107 In Figure 4 107 click one HDD item the S M A R T interface is shown as in Figure 4 108 Figure 4 108 ...
Страница 119: ...110 Figure 4 111 Figure 4 112 ...
Страница 129: ...120 Figure 4 125 Figure 4 126 ...
Страница 142: ...133 Figure 5 11 You can click this icon to display or hide the PTZ control platform 3D Intelligent Positioning Key ...
Страница 164: ...155 Figure 5 38 Figure 5 39 Figure 5 40 ...
Страница 172: ...163 Figure 5 51 Figure 5 52 Figure 5 53 Figure 5 54 ...