


48
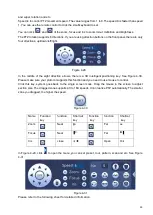
Call Tour
In Figure 4-31, input tour value and then click
to call a tour. Click again
to stop call.
Call Scan
In Figure 4-31, input autoscan value and then click
to call a tour. Click again
to stop
call.
Autopan
In Figure 4-31, click
to enable the camera to rotate.
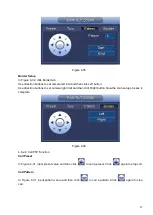
System supports preset, tour, pattern, scan, rotate, light and etc function.
Note:
Preset, tour and pattern all need the value to be the control parameters. You can define it as you
require.
You need to refer to your camera user
’
s manual for Aux definition. In some cases, it can be used for
special process.
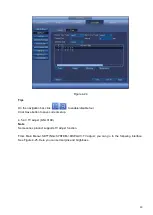
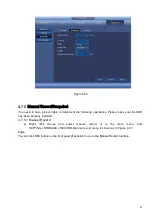
Aux
Click
, system goes to the following interface. The options here are defined by the protocol. The aux
number is corresponding to the aux on-off button of the decoder. See Figure 4-37.
Figure 4-37
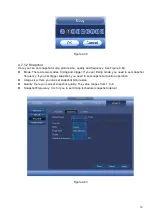
4.7
Record and Snapshot
The record/snapshot priority is: ALARM->MOTION DETECT->SCHEDULE.
4.7.1
ENCODE
4.7.1.1 Encode
Encode setting is to set IPC encode mode, resolution, bit stream type and etc
From Main menu->SETTING->REMOTE->ENCODE, you can see the following interface. See Figure
4-38.
Channel: Select the channel you want.
Содержание k-nl304k
Страница 1: ...Network Disk Recorder User s Manual Model No K NL304K K NL308K K NL316K Version 1 0 5 ...
Страница 32: ...23 The following figure is based on our K NL316K product Figure 3 2 ...
Страница 50: ...41 Figure 4 25 ...
Страница 67: ...58 Figure 4 52 Figure 4 53 ...
Страница 88: ...79 Figure 4 71 Figure 4 72 ...
Страница 89: ...80 Figure 4 73 Figure 4 74 ...
Страница 94: ...85 Figure 4 78 Figure 4 79 ...
Страница 95: ...86 Figure 4 80 Figure 4 81 ...
Страница 96: ...87 Figure 4 82 Figure 4 83 ...
Страница 99: ...90 Figure 4 86 Figure 4 87 ...
Страница 114: ...105 send rate and receive rate at the top panel Figure 4 105 ...
Страница 116: ...107 Figure 4 107 In Figure 4 107 click one HDD item the S M A R T interface is shown as in Figure 4 108 Figure 4 108 ...
Страница 119: ...110 Figure 4 111 Figure 4 112 ...
Страница 129: ...120 Figure 4 125 Figure 4 126 ...
Страница 142: ...133 Figure 5 11 You can click this icon to display or hide the PTZ control platform 3D Intelligent Positioning Key ...
Страница 164: ...155 Figure 5 38 Figure 5 39 Figure 5 40 ...
Страница 172: ...163 Figure 5 51 Figure 5 52 Figure 5 53 Figure 5 54 ...