Chapter 5 Shooting
—
Audio input
- 125 -
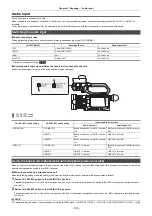
Using audio equipment/external microphone (XLR, 3-pin)
1
Attach the handle unit to the unit.
2
Connect an audio device or an external microphone to the <INPUT 1>/<INPUT 2> terminal.
3
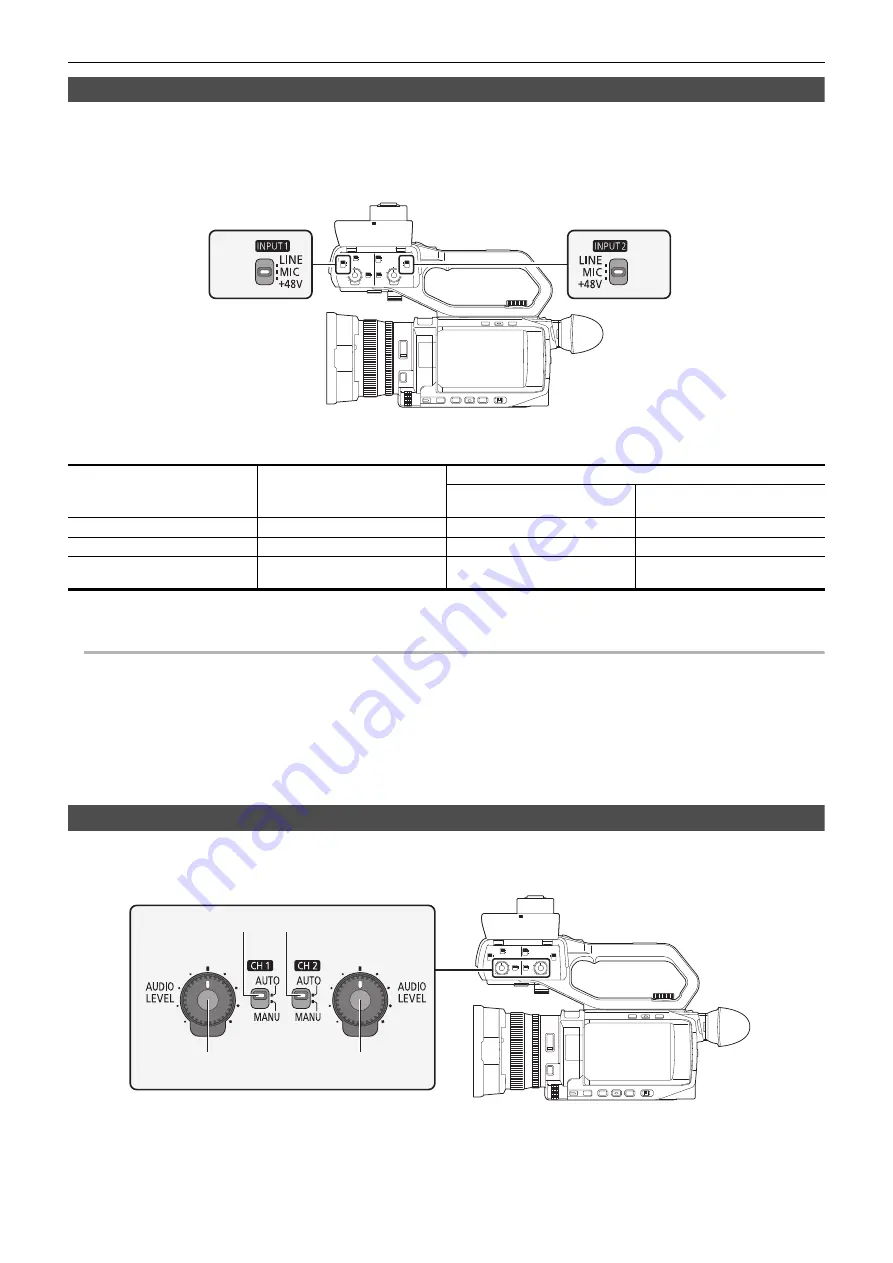
Switch the connected audio input with the <INPUT1>/<INPUT2> switch.
*1 Factory setting: [
j
50dB]
*2 Factory setting: [0dB]
@
NOTE
0
When using a Unidirectional microphone AG-MC200G (optional), set [INPUT1 MIC LEVEL]/[INPUT2 MIC LEVEL] to [
j
50dB].
0
When the handle unit is detached, audio input switches to the built-in microphone/external microphone (stereo mini jack).
0
After detaching the external microphone (XLR, 3-pin), switch the CH1 SELECT/CH2 SELECT switch to <INT/MIC (L)> or <INT/MIC (R)> to set the input
signal to the built-in microphone. No audio will be recorded if you continue to record as is.
¥
When connecting equipment that does not support
i
48 V power supply, set the <INPUT1>/<INPUT2> switch to <LINE> or <MIC>. If set to
<
i
48V>, this unit or the connected equipment may malfunction.
0
If an abnormality occurs with the
i
48 V power supply, the power of this unit will turn off.
0
Using a phantom microphone shortens the battery time.
0
When noise from unconnected terminals is bothersome, set the <INPUT1>/<INPUT2> switch to <LINE>.
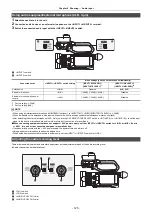
Adjusting the audio recording level
There are manual adjustment and automatic adjustment as the adjustment method of the audio recording level.
≥
Audio channel can be individually set.
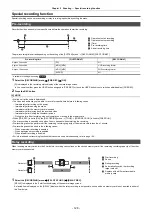
A
<INPUT1> switch
B
<INPUT2> switch
Connected device
<INPUT1>/<INPUT2> switch setting
Menu settings (you can set each channel individually)
[INPUT1 MIC LEVEL]/
[INPUT2 MIC LEVEL]
*1
[INPUT1 LINE LEVEL]/
[INPUT2 LINE LEVEL]
*2
Audio device
<LINE>
Disabled
[4dB], [0dB]
External microphone
<MIC>
[
j
40dB], [
j
50dB], [
j
60dB]
Disabled
External microphone (with power
supply)
<
i
48V>
[
j
40dB], [
j
50dB], [
j
60dB]
Disabled
A
<CH1> switch
B
<CH2> switch
C
<AUDIO LEVEL CH1> dial
D
<AUDIO LEVEL CH2> dial
Содержание AG-CX7
Страница 8: ...Chapter 1 Overview Before using the unit read this chapter ...
Страница 16: ...Chapter 2 Description of Parts This chapter describes the names functions and operations of parts on the unit ...
Страница 155: ...Chapter 7 Output and Screen Display This chapter describes the screen displayed on the output video and LCD monitor ...
Страница 166: ...Chapter 8 Connecting to External Devices This chapter describes the external devices that can be connected to the unit ...
Страница 172: ...Chapter 9 Network Connection This chapter describes how to use the unit by connecting to a network ...
Страница 188: ...Chapter 10 Notes Maintenance of the unit or frequently asked questions are described ...
Страница 199: ...Chapter 11 Specification This chapter describes the specifications of this product ...
Страница 208: ... Panasonic Corporation 2020 Panasonic Corporation Web site http www panasonic com ...

