background image

Step 3: 


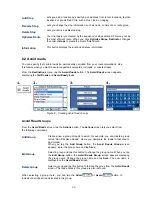
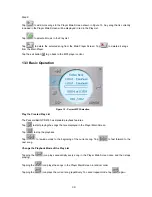
Tap 

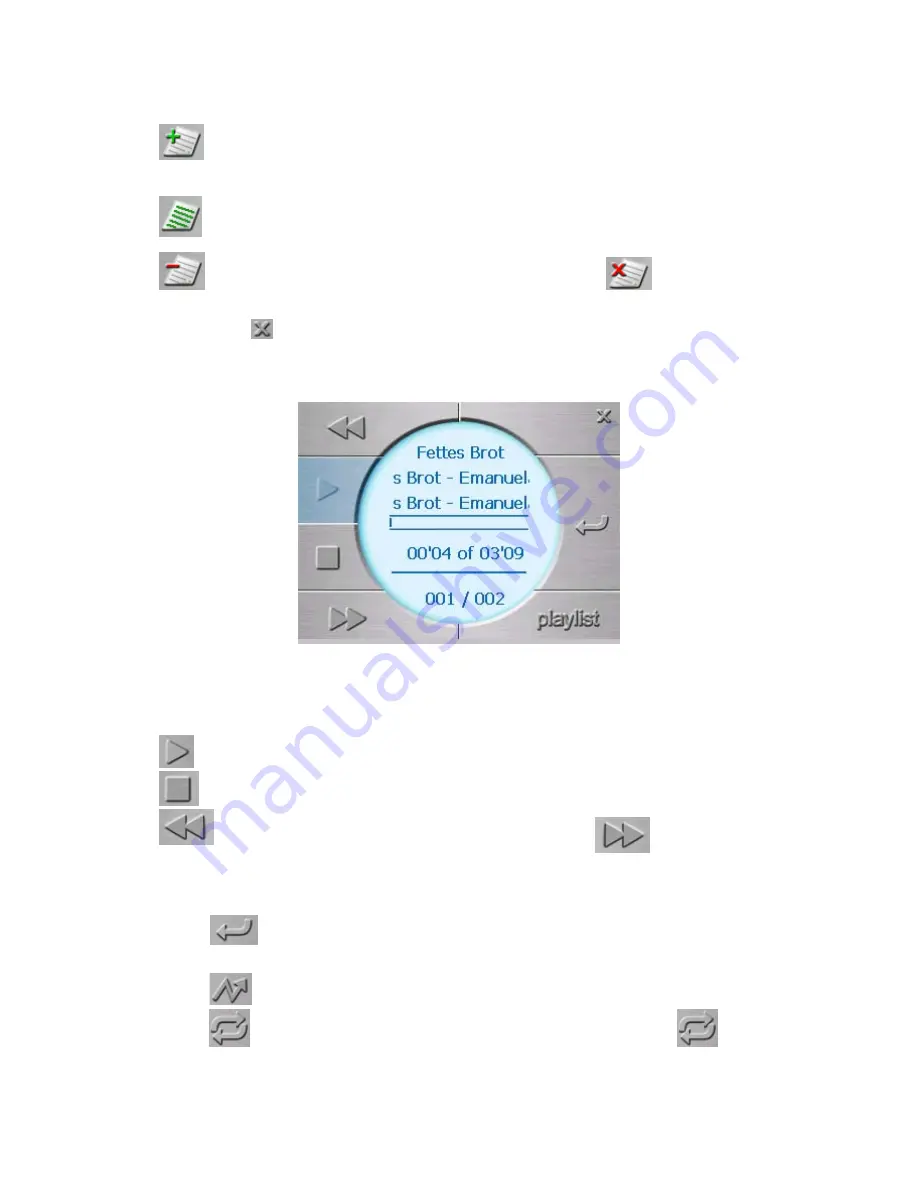
 to add more songs to the Player Main Screen shown in Figure 13. Any song that is currently 

included in the Player Main Screen will be displayed in red in the Play List.   


Tap 

 to select all music in the Play List.   


Tap 

 to delete the selected song from the Main Player Screen. Tap 

 to delete all songs 

from the Main Player.  


Tap the exit button 

 to go back to the MP3 player control. 


13.3 Basic Operation 


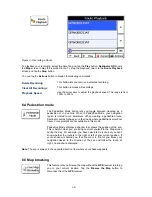
 Figure 15 - Current MP3 Selection 


Play the Created Play List 


The Packard Bell GPS 400 has standard playback features:  

Tap 

 to start playing the songs that are displayed in the Player Main Screen. 

Tap 

 to stop the playback. 

Tap 

 to rewind quickly to the beginning of the current song. Tap 

 to fast forward to the 

next song.   


Change the Playback Mode of the Play List 


Tapping the 

 icon plays sequentially every song in the Player Main Screen once and then stops 

playing.  


Tapping the 

 icon plays the songs in the Player Main Screen in random order. 

Tapping the 

 icon plays the current song repetitively. To cancel repeat mode, tap 

 again. 


48 

Содержание GPS 400

Страница 1: ...PACKARD BELL GPS 400 USER S GUIDE ...

Страница 2: ...r to promote reuse recycling other forms of recovery and to reduce the quantity of waste to be eliminated with a view to reducing landfill This concerns your computer and all its accessories such as a keyboard mouse remote control speakers etc When you dispose of such products please follow the guidance of your municipal authority and or ask your retailer when purchasing a new product Battery noti...

Страница 3: ...ND Features 13 5 3 Tutorial 14 Chapter 6 Getting to know your GPS 400 14 6 1 What s on the map 14 6 2 GPS not found 15 6 3 Map views 16 6 4 Point on the map 17 6 5 Menus 17 Destination menu 17 Option menu 18 Settings menu 19 6 6 Screens buttons 20 6 7 Cycling through screens 20 Chapter 7 Searching for a location 21 7 1 Enter address 21 Address Modes 21 Address Actions 22 Go to your destination 23 ...

Страница 4: ... 41 Chapter 11 Maps 42 11 1 Map Screen Interface 42 11 2 Installing a Map 42 11 3 Map Cutter Screen Interface 42 11 4 Focus the Map 43 Focus the Map by Route 44 11 5 Cut Map 45 11 6 Load Map 45 11 7 Remove Map 45 Chapter 12 Importing a Favorite 46 12 1 Favorites Importing File Structure 46 12 2 Importing a CSV file 46 Chapter 13 MP3 Player 47 13 1 Overview 47 13 2 Creating a Play list 47 13 3 Basi...

Страница 5: ...on software Companion CD DV Quick Start Guide 1 2 Features Plug and play GPS device ch screen 3 5 TFT LCD colour tou SD MMC card reader d with country map 256 512 MB MMC card provide MP3 player and Photo viewer III C card eable Li Ion 2 100 mAh Supports Windows 2000 XP High quality loudspeaker GPS Module SiRF Star Processor 266MHz Memory 64MB internal memory 256 512 MB MM Battery Integrated rechar...

Страница 6: ...to connect to your computer 11 Power Switch full reset Use this switch to cut all power to the device Note that this also resets the device s memory You will have to perform the first start process again calibrate screen settings acquire GPS connection etc 12 Reset button Restart your device in case it stops responding or becomes unstable 13 External GPS antenna connector MMCX If your car has a he...

Страница 7: ...1 Connect the small end of the supplied USB cable to your GPS 400 and the other to one of your computer s USB ports 2 Insert the Companion CD DVD into your computer 3 Click on the Driver button to install Auto Scan for driver 4 Click on the Microsoft ActiveSync button to install Microsoft ActiveSync 4 1 5 Follow the onscreen instructions and select Files in the Synchronisation Settings window 6 Yo...

Страница 8: ... additional strain on the battery Several partial discharges with frequent recharges are better for lithium ion than one deep one When the battery is too low be sure to charge it in time Otherwise the device may automatically turn off and cannot be turned on If your device becomes fully discharged and cannot be started follow the procedure below 1 Connect the device to the AC adapter for at least ...

Страница 9: ...neously This procedure will restore the factory default settings of the device Switching the device off and then on with the power switch will also result in a cold boot Standby button Reset button Down button 3 2 Technical Support For answers to common questions and quick assistance see the Destinator FAQ for Registered Users online at http www destinatoreurope com click Community login and choos...

Страница 10: ...ion mount gooseneck firmly to the windscreen 4 Attach the GPS 400 to the car holder kit position the bottom of the GPS 400 first then tilt the top of the GPS 400 back into position Pull the top clip until it clicks into place Twist the gooseneck to adjust the position of the GPS 400 so that you can see the screen comfortably 5 If you wish to charge the GPS 400 while in your car connect the DC powe...

Страница 11: ...11 ...

Страница 12: ...12 ...

Страница 13: ...display your photos The MP3 Player lets you download your favourite songs from an SD or CF card and create a play list The Photo Viewer function lets you download and view your digital photos on the Packard Bell GPS 400 device Figure 1 Main Menu 5 2 Destinator ND Features Destinator provides the following features for easy navigation Lets you differentiate between car and pedestrian navigation Abl...

Страница 14: ... you can tap the Tutorial button to open the Destinator Guide Tour program The Guided Tour is an excellent way of becoming familiar with the different navigation features available Chapter 6 Getting to know your GPS 400 6 1 What s on the map When you first turn on your the screen appears GPS 400 Main Map You can use the icons displayed on this screen to plan and view your route Directions Bar GPS ...

Страница 15: ...ays the remaining travel distance and travel time estimated time of arrival and speed and altitude and street name and address number When you have calculated a route the Directions bar displays information about your next turn Click this bar for a complete list of turn by turn directions 6 2 GPS not found When you first start your navigation device you will hear the message Signal too low This me...

Страница 16: ...e Day View or Night View provide you with a three dimensional map for day or night driving For an example refer to Figure 5 3D Day Mode Map View and Figure 6 3D Night Mode Map View From the Options menu click the 3D Mode button to view a three dimensional map If the map already appears in three dimensions 2D Mode is displayed on the toggle button You can click the Night Mode button to display the ...

Страница 17: ...t you want to return you later Set as Origin This button lets you designate the selected point as the starting point and not the designation This is helpful when you want to calculate a route from a point other than your current location Figure 7 Point on the Map Option 6 5 Menus You can press the Menu button from the Main Map screen to display the three main Destinator menus as shown below Figure...

Страница 18: ...current navigation The Turn by Turn button lets you display the complete step by step directions to your destination The Select Map button lets you choose among different maps on your memory card Option menu This menu provides the following options The Avoid Roads button lets you avoid a road type such as toll roads or selected streets The Multi Stop Planner button lets you designate several stops...

Страница 19: ...wing options The Map Settings button lets you specify map orientation font and zoom features The Quick Nav Settings button lets you specify an address or place to which you can navigate with a single tap on the Quick Nav button The GPS button lets you configure the GPS settings The Prompts button lets you specify the types of voice or visual prompts that you want to use The System button lets you ...

Страница 20: ...ed destination The Actions button provides a list of command options available for the selected address or place The Hide Display Keyboard toggle button lets you show or remove the keyboard The Save OK or Done buttons confirm your value preferences and returns you to the menu or map 6 7 Cycling through screens Every navigation function in the system such as Address POI or My Favorites consists of ...

Страница 21: ...ore words The Scroll buttons let you move up or down the list of address items such as city or street names The Hide Display Keyboard toggle button lets you extend or shorten the address list by hiding or displaying the keyboard The Select key lets you display lowercase and numeric characters The Erase key lets you delete the last character in an address field You can change your address search me...

Страница 22: ...le zip codes In other maps You can select another map of a country that you can travel to by vehicle This feature is available only when you have the following maps installed Another map of countries on the same continent as the selected map The map of the major roads for the continent that connects one map to another for example the major roads of Europe For example if you are in Paris and you wa...

Страница 23: ... tap the Back button and change your address entries 1 2 3 Figure 11 Calculate your Destination If the destination is correct you can instruct Destinator how to calculate your route by tapping either the Faster or Shorter button as described below This option selects the route that takes less time Faster is the default value This option selects the route that is the shorter distance The shorter ro...

Страница 24: ...ng commands Set as Origin Lets you designate the selected address as the route origin You would use this command when calculating a route from a point other than your current location Note You are still receiving the GPS signal Add to My Favorites Lets you add an address to your list of favorite locations Delete Item Lets you delete a recent location Clear List Lets you clear all locations in the ...

Страница 25: ...roup When you tap this button the Favorites Group screen appears Enter the group name and select an icon to identify the group as shown below Figure 14 Create Favorites Group The icon identifies all destinations located in that group as displayed on the map Edit Group When you tap this button the Favorites Group screen appears with the name and selected image of the highlighted group You can chang...

Страница 26: ...aces when you come within close proximity to them You are going on a trip and friends have recommended certain restaurants that are on your route You can create a group called Restaurants and enter the restaurant addresses As you take your trip an alert will go off when you come within range of these restaurants Notes Favorite Alert settings affect all Favorites Groups The 2nd Alert must be set to...

Страница 27: ...at you have entered 7 4 Points of Interest POI The POI list is a collection of hundreds of interesting or useful places organized by easy to find categories For example you can use Destinator to guide you to a mall hotel restaurant or gas station From the Destinations menu tap the Points of Interest button The POI screen appears You can find a category by tapping the Hide Display Keyboard button a...

Страница 28: ...soline Station may have many subcategories each representing a particular brand name The same is also true for Hotels Restaurants have subcategories that represent different types of food such as American Italian and French as shown below Figure 18 POI Subcategories Search near a location You can tap the Near button to determine the location area where you want to search for a specific place such ...

Страница 29: ...ify a search radius Destinator searches the whole map Show or Hide Symbol on Map Lets you customize your POI list by showing or hiding the POI category symbols that you don t want When you hide a category a red mark appears This mark only means that the category symbol does not appear on your map The category locations are still available to you You can always show a hidden category symbol by sele...

Страница 30: ...a destination has been set 7 6 Turn by turn list After you have entered a destination and calculated a route the Directions bar appears at the bottom of the Map screen displaying the following information The next turn direction The distance to the next turn The street name of the next turn When you tap the Directions bar or click the Turn by Turn button Destinator displays a complete set of turn ...

Страница 31: ... route may take longer 7 7 Select Map This feature lets you change the currently selected map to another map saved on your SD memory card You can tap the Select Map button from the Options menu to display the maps saved on your SD memory card The Select Map screen displays map details and version numbers The map currently used appears at the top of the list 1 2 Figure 4 Select a Map The following ...

Страница 32: ... on Map screen provides you with the following route types Faster and Shorter You can select Shorter to calculate a route with the shorter physical distance between your current location and the selected designation When you tap the GO button Destinator automatically calculates the faster route Defining Route Groups A Route Group represents a group of stops From the Multistop Planner screen select...

Страница 33: ... tap Save 1 2 3 Figure 7 Specifying a Stop When in the Stops screen you can use the following commands You can use the Move Up or Move Down buttons to change the order of your itinerary Shows the stop destination on the map and lets you select a route type Faster or Shorter Tap GO to calculate the stop destination Select the Show button to view the selected stop destination on the map Stop Actions...

Страница 34: ...screen appears displaying the Toll Roads and Avoid Road groups 1 2 3 4 Figure 8 Creating Avoid Road Groups Avoid Road Groups From the Avoid Roads screen tap the Actions button The Actions screen lets you select from the following commands Add Group Create a new a group of roads to avoid For example you can create a group called San Francisco Roads where you designate the roads in that area to be a...

Страница 35: ...ame the road and select a different group When you have made your changes tap Save Delete Road Select a road and tap this button to remove the road from your group Destinator no longer recognizes the removed entry as a road to avoid Show on Map Lets you show the map with the displayed destination for you to review before creating a route Information This button displays the location s address info...

Страница 36: ...to ten kilometers When creating a pedestrian route Destinator avoids highways or other roads where pedestrians would not travel Voice prompts are not available in this mode Pedestrian Mode displays a shadow that shows the position of the sun This is helpful when you are trying to orient yourself to the Map screen during the day For example you have calculated a route but you don t know whether the...

Страница 37: ... at slower speeds displaying a smaller map area If you manually change the zoom the Automatic Zoom returns to its system level after several seconds of inactivity Use Larger Print This option increases the size of street names to make the map easier to read 9 2 Quick navigation You can define the Quick Nav location by selecting either the To Predefined Address or To Nearest POI Category in the Qui...

Страница 38: ...tatus You can tap the GPS Status button from the Settings menu to display the following information Longitude The angular distance east or west on the earth s surface as measured in degrees from the meridian of a particular point to the prime meridian of Greenwich England Latitude The angular distance measured north of south from the equator of a point on the earth s surface Speed The rate of move...

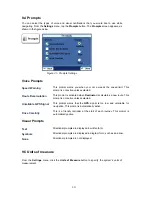
Страница 39: ...ator recalculates a new route This prompt is not active unless selected Unreliable GPS Signal This prompt warns that the GPS signal is too low and unreliable for navigation This prompt is automatically active Drive Carefully This is a friendly reminder at the start of each journey This prompt is automatically active Visual Prompts Text Directional prompts are displayed in written form Symbols Dire...

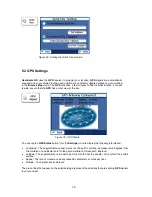
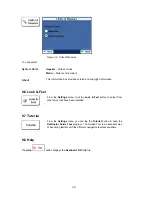
Страница 40: ...Feel From the Settings menu click the Look Feel button to select from other skins that have been installed 9 7 Tutorial From the Settings menu you can tap the Tutorial button to open the Destinator Guide Tour program The Guided Tour is an excellent way of becoming familiar with the different navigation features available 9 8 Help The Help button displays the Destinator ND Help file 40 ...

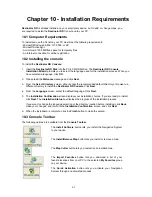
Страница 41: ...ry to install the Destinator ND Console Click Next 4 From the Language screen select the default language Click Next 5 The Installation Confirmation screen displays your installation choices If you are ready to install click Next The Installation Status box displays the progress of the installation process If you want to change the language selection or the directory location before installing cli...

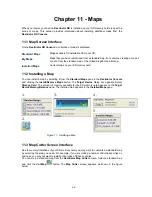
Страница 42: ...lecting it from the Standard Maps pane in the Destinator Console and clicking the Install Remove Maps button The Target Device dialog box appears Select Storage Card The amount of memory available for the SD memory card appears on the Target Device Memory Balance pane The installed map appears in the Installed Maps pane 1 2 3 4 5 Figure 11 Installing a Map 11 3 Map Cutter Screen Interface Due to m...

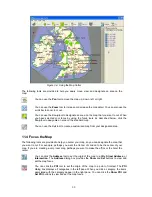
Страница 43: ...1 4 Focus the Map The following tools are provided to help you center your map so you can designate the area that you want to cut For example perhaps you want the Center of London to be the center of your map If you are creating a very local map perhaps you want to make the office or the hotel the center You can click the Address tool to set the origin of the map to a City Street Address or Inters...

Страница 44: ...he Route pane appears Use the Address and POI tools to set route points Click the Create Route button Your route is highlighted in blue Click the Cut Map tool 1 2 3 4 5 6 Figure 12 Create Map by Route The following commands are described below Click this button to center the map on the selected point Click this button to delete the selected point Click this button to delete all selected points Cli...

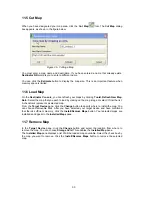
Страница 45: ...n the map image or select it from the list A checkmark represents a selected map From the Target Device pane click the Change button to specify where to install the map You can choose Removable Disk After you have selected your target device and have confirmed that there s sufficient memory click the Install Remove Maps button Your selected maps are installed and appear in the Installed Maps pane ...

Страница 46: ...others are string values If a string value contains a comma the field must have quotation marks The csv file contains the values in a table as a series of ASCII text lines organized so that each column value is separated by a comma from the next column s value and each row starts a new line 12 2 Importing a CSV file To import a csv file On the Destinator Console click on a Standard Map This will e...

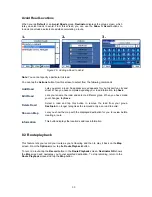
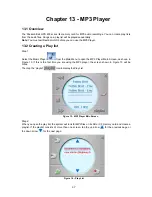
Страница 47: ...r from the Main Menu to open the MP3 Player Main Screen as shown in Figure 13 If this is the first time you are using the MP3 player the screen shown in Figure 13 will be blank Then tap the playlist icon to display the Play List Figure 13 MP3 Player Main Screen Step 2 When you open the play list the system will look for MP3 files on its SD or CF memory card and create a playlist If the playlist co...

Страница 48: ...15 Current MP3 Selection Play the Created Play List The Packard Bell GPS 400 has standard playback features Tap to start playing the songs that are displayed in the Player Main Screen Tap to stop the playback Tap to rewind quickly to the beginning of the current song Tap to fast forward to the next song Change the Playback Mode of the Play List Tapping the icon plays sequentially every song in the...

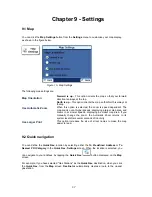
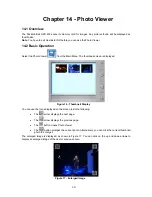
Страница 49: ...reen is displayed Figure 16 Thumbnail Display You can use the icons displayed on the screen to do the following The arrow displays the next page The arrow displays the previous page The button closes Photo Viewer The button enlarges the current photo Alternatively you can click the current thumbnail photo to enlarge it The enlarged image is displayed as shown in Figure 17 You can click on the up a...

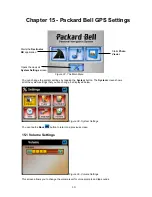
Страница 50: ...an change the system settings by tapping the System button The System screen shows all of the system settings that you can change as displayed below Figure 38 System Settings You can tap the Back button to return to a previous screen 15 1 Volume Settings Figure 39 Volume Settings This screen allows you to change the volume level for voice prompts and tap sounds 50 ...

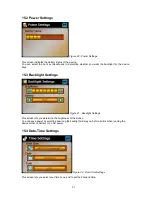
Страница 51: ...device keys 15 3 Backlight Settings Figure 41 Backlight Settings This screen lets you determine the brightness of the screen You can save power by selecting how long the backlight will stay on before it dims when running the device either on battery or on AC power 15 4 Date Time Settings Figure 42 Date Time Settings This screen lets you select your time zone and to set the date and time 51 ...

Страница 52: ...gure 43 Language Settings This screen allows you to select the language to be used for screen displays and voice prompts 15 6 System Information Figure 44 System Information This screen displays information about the device 52 ...

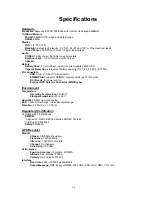
Страница 53: ...ot supports SD MMC memory cards up to 1G bytes DC IN Jack for power source External GPS Antenna Connector MMCX type Environment Temperature Operating Temperature 0 to 40 C Storage temperature 20 to 60 C Humidity 20 95 non condensing ESD 8kv air discharge 4kv direct discharge Vibration 2 60 Grms 5 500 Hz Regulatory Certification Complies with CE standards EMI RFI In Emission Radio R TTE directive 9...

Страница 54: ...on with such third party information or use thereof or the inability to use by any party or in connection with any failure or performance error omission interruption defect delay in operation or transmission computer virus or line or system failure even if PACKARD BELL or its affiliates are advised of the possibility of such damages losses or expenses The access by any user to any hyperlinks to in...

Отзывы: