


_
_
_
_
OEV262H
2
. L
o
ca
tio
n
an
d Fu
nct
ion
o
f P
a
rts an
d Con
tr
o
ls
2
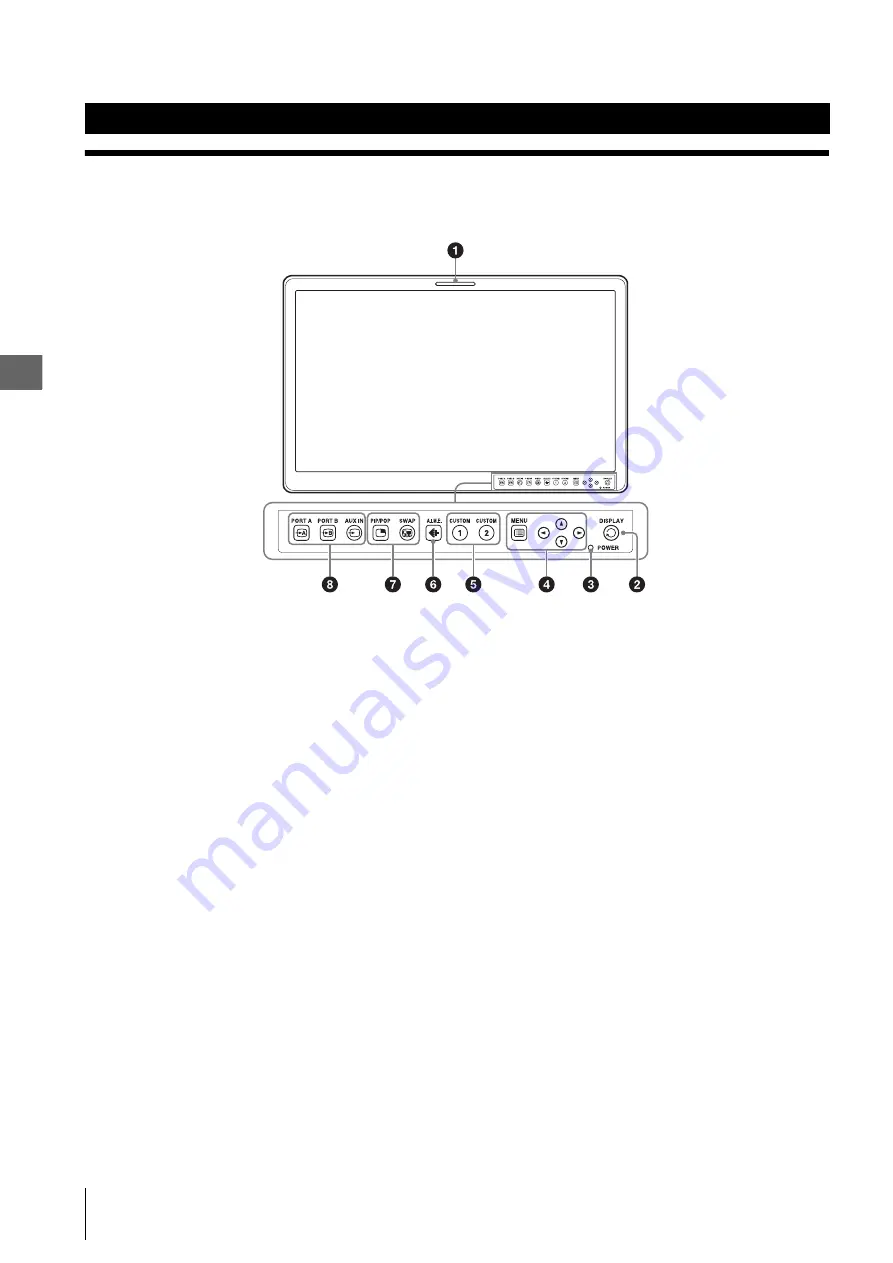
2.1 Front Panel
14
2.1 Front Panel
a
Tally lamp
The tally lamp lights in green according to the setting of
PARALLEL REMOTE in the REMOTE menu.
b
DISPLAY button
Press to display the buttons on the front panel. Press
again to clear.
c
Power indicator
When the power is turned on, the power indicator lights
in green.
d
OSD menu operation buttons
Displays or sets the on-screen menu.
MENU button
Press to display the on-screen menu.
Press again to clear the menu.
v
/
V
buttons
Press to select the items.
b
/
B
buttons
Press to select the items and setting values.
e
CUSTOM button
Turns on or off the assigned function. You can adjust the
assigned function by pressing the b/B buttons.
The following functions are assigned in the default
setting.
CUSTOM 1
: Contrast
CUSTOM 2
: Brightness
You can assign the following functions by using the
Custom Button setting in the System Configuration or
Initial Setup menu (pages 31, 32).
Scan Size, Flip, POP Sub Screen Position, APA,
Gamma, Mono, Phase, Chroma, Brightness, Contrast
f
A.I.M.E. button
Adjusts the A.I.M.E. setting by pressing the b/B buttons.
g
Multi-image display setting buttons
Press to display the multi-image display or switch the
multi-image display mode.
PIP/POP
: For displaying the multi-image display or
switching the multi-image display mode.
SWAP
: For swapping between the main display and
the sub display.
2. Location and Function of Parts and Controls
Содержание OEV262H
Страница 2: ...OEV262H 2...
Страница 53: ...OEV262H...
Страница 54: ...OEV262H...
Страница 56: ...4 446 574 13 1 Printed in Taiwan RA0072 01...


