


Page 3-15
OLYMPIC AUTO-LENGTH
™
Service
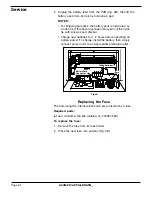
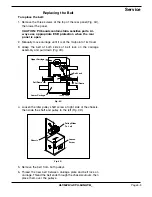
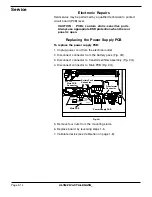
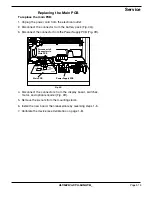
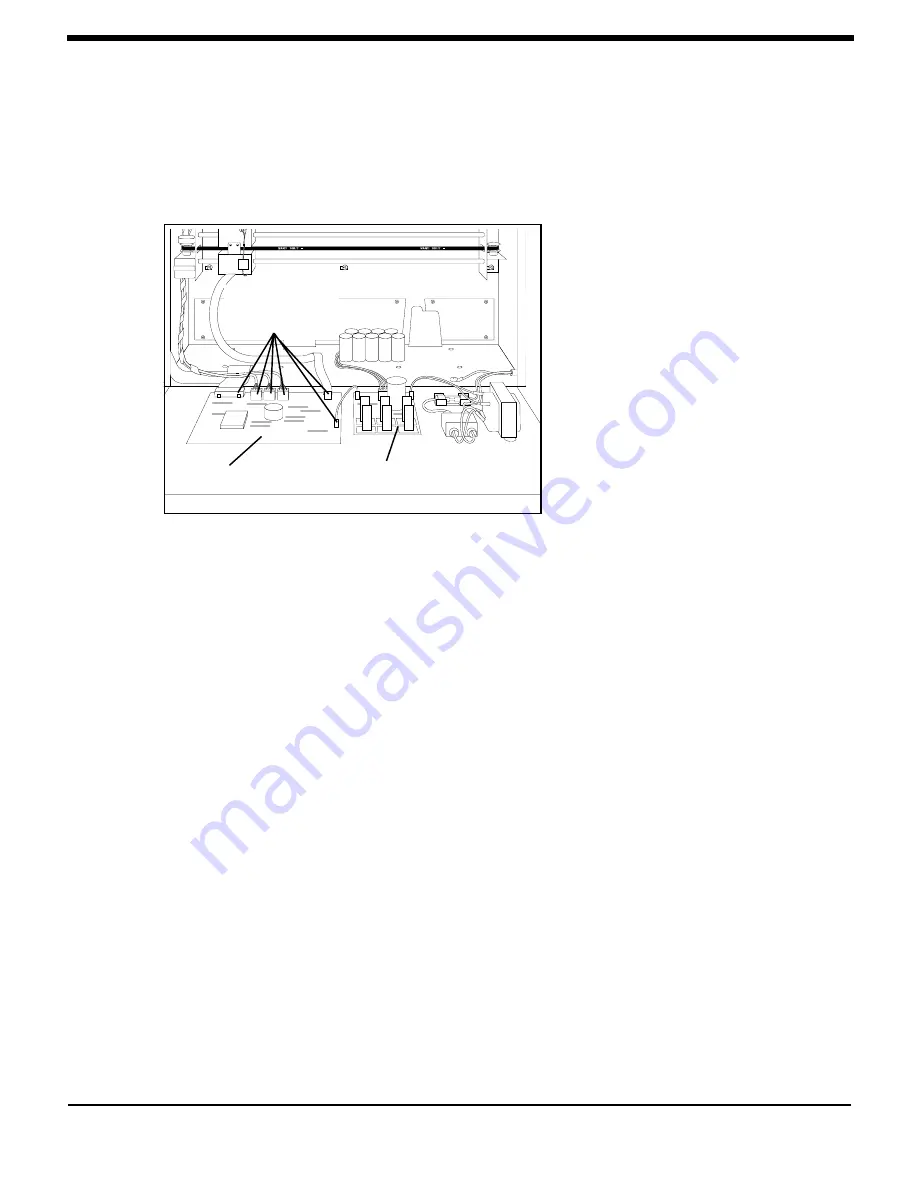
Replacing the Main PCB
To replace the main PCB:
1. Unplug the power cord from the electrical outlet.
2. Disconnect the connector from the battery pack (
Fig. 3Q
).
3. Disconnect the connector from the Power Supply PCB (
Fig. 3R
).
Fig. 3R
Main PCB
Disconnect all
Connectors to
Main PCB
Power Supply PCB
4. Disconnect the connectors from the display board, switches,
motor, and optical encoder (
Fig. 3R
).
5. Remove the six nuts from the mounting studs.
6. Install the new board, then reassemble by reversing steps 1–5.
7. Calibrate the device (see
Calibration
on page 1-8).
Содержание AUTO-LENGTH 20
Страница 2: ...OLYMPICAUTO LENGTH ...
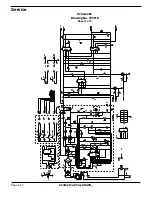
Страница 39: ...Page 3 19 OLYMPIC AUTO LENGTH Service Auto Length 120 Vac 60 Hz WiringDiagram Drawing No 700215 Rev B ...
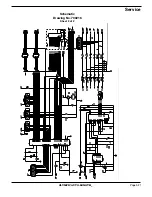
Страница 40: ...Page 3 20 OLYMPIC AUTO LENGTH Service Schematic Drawing No 700216 Sheet 1 of 2 ...
Страница 41: ...Page 3 21 OLYMPIC AUTO LENGTH Service Schematic Drawing No 700216 Sheet 2 of 2 ...


