


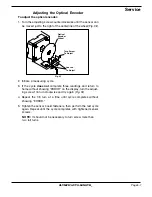


Page 3-8
OLYMPIC AUTO-LENGTH
™
Service
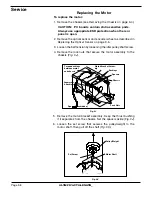
Replacing the Motor
To replace the motor:
1. Remove the chassis (see
Removing the Chassis
on page 3-4).
CAUTION: PC boards contain static-sensitive parts.
Always use appropriate ESD protection when the rear
panel is open.
2. Remove the optical sensor and encoder wheel as described in
Replacing the Optical Sensor
on page 3-6.
3. Loosen the belt tension by loosening the idler pulley shaft screw.
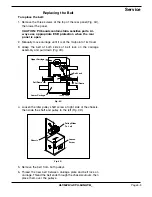
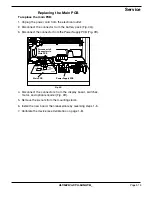
4. Remove the lock nuts that secure the motor assembly to the
chassis (
Fig. 3J
).
Fig. 3J
Grommets
& Bushings
Torque bushings
between motor
and chassis
Spacers (one hidden)
Lock Nuts
Chassis
Spacers
Bushings
Motor/Bracket Assem-
bly
Motor Shaft
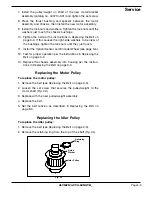
Pulley/Weight
Set Screw
Fig. 3K
5. Remove the motor/bracket assembly. Keep the thrust bushing
if it separates from the chassis. Set the spacers aside (
Fig. 3J
)
6. Loosen the set screw that secures the pulley/weight to the
motor shaft, then pull off the shaft (
Fig. 3K
).
Содержание AUTO-LENGTH 20
Страница 2: ...OLYMPICAUTO LENGTH ...
Страница 39: ...Page 3 19 OLYMPIC AUTO LENGTH Service Auto Length 120 Vac 60 Hz WiringDiagram Drawing No 700215 Rev B ...
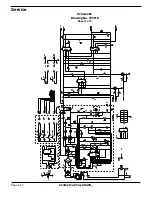
Страница 40: ...Page 3 20 OLYMPIC AUTO LENGTH Service Schematic Drawing No 700216 Sheet 1 of 2 ...
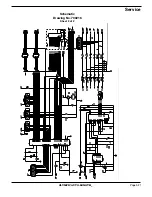
Страница 41: ...Page 3 21 OLYMPIC AUTO LENGTH Service Schematic Drawing No 700216 Sheet 2 of 2 ...


