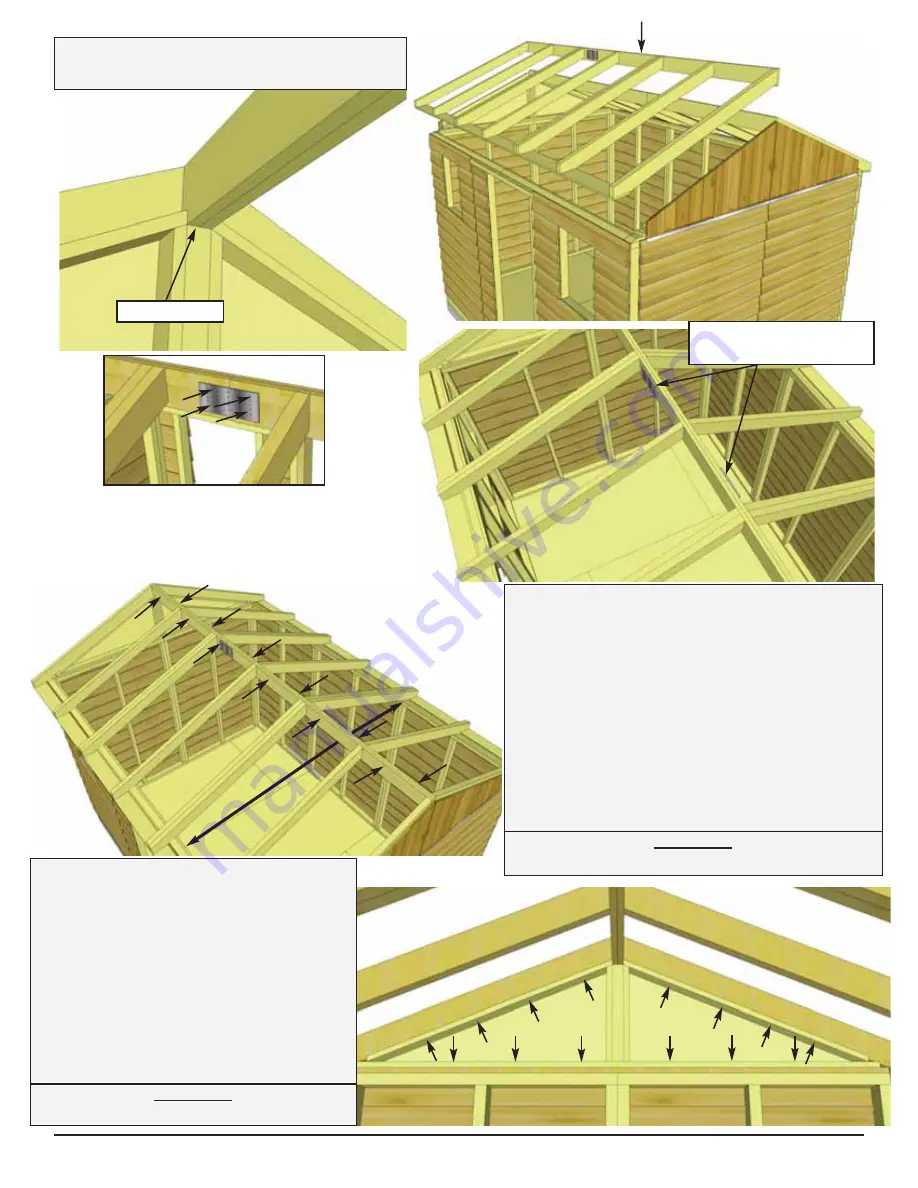
Gable Notch
Ridge Board
35.
Place front completed Rafter Section
on gable walls as per
Steps 32 - 34.
36.
At the peak, align Ridge Boards so they
are flush together and secure them with
12 - 1 1/4” Screws
.
Important:
If there is a gap between Ridge
Boards, have a helper push the front and rear
walls closer together from outside. Walls
should be 91” apart at top from inside of wall
plate to opposite wall plate. To completely
secure Ridge Boards, place
1 1/4” Screws
into
any of the remaining metal Ridge Board
Connector holes. Complete both sides.
Hardware
S2
- 1 1/4” Screws
x 20 total (approx.)
37.
With both Ridge Boards connected,
completely secure Gable framing to
walls and rafters. Use
4 - 2” Screws
per
Rafter. Use an additional
6 - 2” Screws
to secure Gable to wall.
Note: you may have to remove the
2 temporary screws in Gable from
Step 27 and reposition Gable for best
fit prior to completing Gable
attachment.
Hardware
S3
- 2” Screws
x 28 total
Offsetting Metal Ridge
Board Connectors.
91” Across
Toll Free 1-888-658-1658 www.outdoorlivingtoday.com [email protected]
Page 23


