


CX2032 MFP User’s Guide
Installing upgrades
134
8.
When the MFP is ready, print a menu map as follows:
Control
menu_oda.jpg
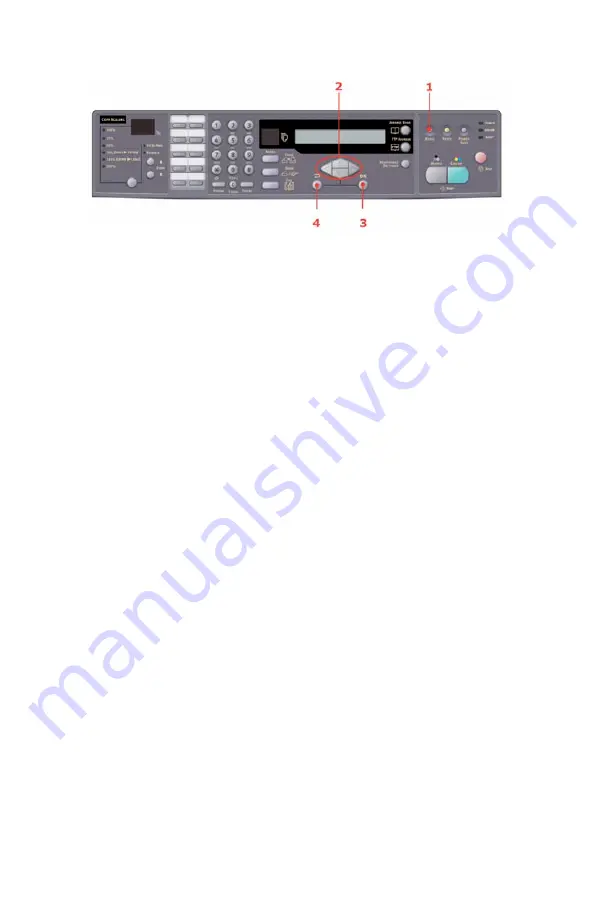
(a)
Press
Menu
(1) on the scanner control panel.
(b)
Using the
UP
/
DOWN
arrow keys (2), navigate to the
Report Print menu and press
OK
(3) once for the menu
map.
(c)
Press
OK
(3) again to print the menu map.
(d)
When the menu map is printed, press
Return
(4) to exit the
menu system.
9.
Examine the first page of the menu map.
Near the top of the page, between the two horizontal lines, you
will see the current MFP configuration. This should now indicate
that the hard disk unit is installed.
All that remains is to configure the Windows printer driver so that it
knows the hard disk unit has been fitted, and the additional features can
be made available immediately.


