


4
3
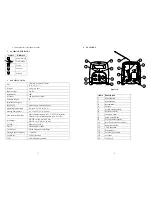
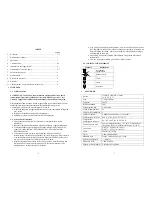
SPEZIFIKATIONEN
Abmessungen
152 X 165 X 178mm
(6” X 6,5” X 7”)
Gewicht
1,2 kg (2,6lbs)
Eingangs-
spannung
24 VDC
Nennleistung 10
W
Drucklufteingang
100 psi ( 6,9 bar) max.
Verunreinigungs-
grad
II
Installations-
kategorie
I
Einsatz in
Innenräumen
Aufstellungshöhe bis zu 2.000 m (6.562 ft)
Betriebstemperatur
0 °C bis 40 °C (32 °F bis 104°F)
Lagertemperatur
-10 °C bis 60 °C (14 °F bis 140 °F)
Max. relative
Feuchtigkeit
80 % für Temperaturen bis 31 °C (87,8 °F), linear
abnehmend bis auf 50 % bei 40 °C (104 °F)
Druckluftausgang
DX-350 = 0-100 psi (0- 6,9 bar)
DX-355 = 0-15 psi (0-1,03 bar)
Rückhaltevakuum
406 mm (16”) Hg
Timer 0,008-60,0
Sekunden
Zyklusbetrieb
Zeiteinstellmodus , mit Unterbrechung, Spülen,
(
Lern)-
Modus
Wiederholto/-
0,001%
Zyklen-
geschwindigkeit
1.200 Zyklen/Minute;
LCD
20 X 4 Displaysegmente
5
4
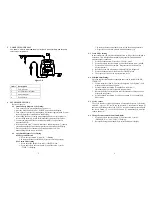
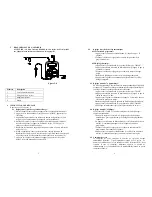
HAUPTKOMPONENTEN
Abb. 1.0
Positionen Beschreibung
1
Ein-/Aus-Taste
2
Modustaste
3
Programmauswahl-Taste
4
Display
5
Druckluftregler
6
Ausgang für gepulste Luft
7
Einstellung Rückhaltevacuum
8
Regler zur Einstellung des ausgewählten Programms
9
Fußschalterbuchse
10
Schlauchhalter für Kartuschenadapter
11
Netzbuchse
12
I/O Anschluss
13
Abluftöffnung
14
Zusätzlicher Druckluftausgang
15
Drucklufteingang
16
Kabelsicherung
3
7
8
6
5
2
1
4
9
15
16
14
13
10
12
11


