3-4 Aria 1.2 Release Manual
101–1477–001
Edition 2
8. Disconnect the TELCO cable from the card to be replaced.
9. Unscrew the captive thumb screws at the top and bottom of the card.
10. Remove the card by pulling up on its upper card extractor and pushing down on its lower
card extractor. Only handle the sheet-metal stiffener attached to the card and the card’s top
and bottom edges. Do not touch the components or the edge connectors. Place the removed
card in an antistatic bag. Do not attempt to repair it.
(If the removed card is not going to be replaced at this time, make sure that the fields in all
columns of menu 4.1 for all ports on this card are set to N.)
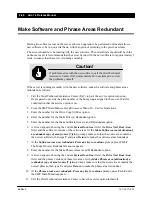
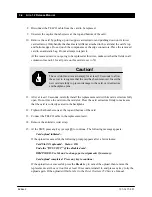
Caution!
The card slot must remain empty for at least 30 seconds to allow
the server to recognize that the card has been removed. Insert the
new card carefully to prevent damage to the card, card extractors,
and backplane pins.
11. After at least 30 seconds, carefully install the replacement card with its card extractors fully
open. Do not force the card into the card slot. Press the card extractors firmly to make sure
that the card is correctly seated in the backplane.
12. Tighten the thumb screws at the top and bottom of the card.
13. Connect the TELCO cable to the replacement card.
14. Remove the antistatic wrist strap.
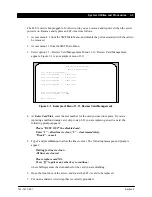
15. At the SMT, press any key (except Q) to continue. The following message appears:
Card upload initiated...
If the upload is successful, the following prompt appears after a few minutes:
Card Slot XX uploaded. Status: OK
Undo the “BUSY OUT” of the disabled card.
REMINDER: Use Menu 4 to change port assignments if necessary.
Card upload completed. Press any key to continue:
If the upload is not successful, press the Break key to cancel the upload, then remove the
replacement card. Leave it out for at least 30 seconds, reinstall it, and press any key to try the
upload again. If the upload still fails, refer to the Octel Overture 250 Service Manual.

