


10
Registering/Settings
10-26
CS172
Registering the program
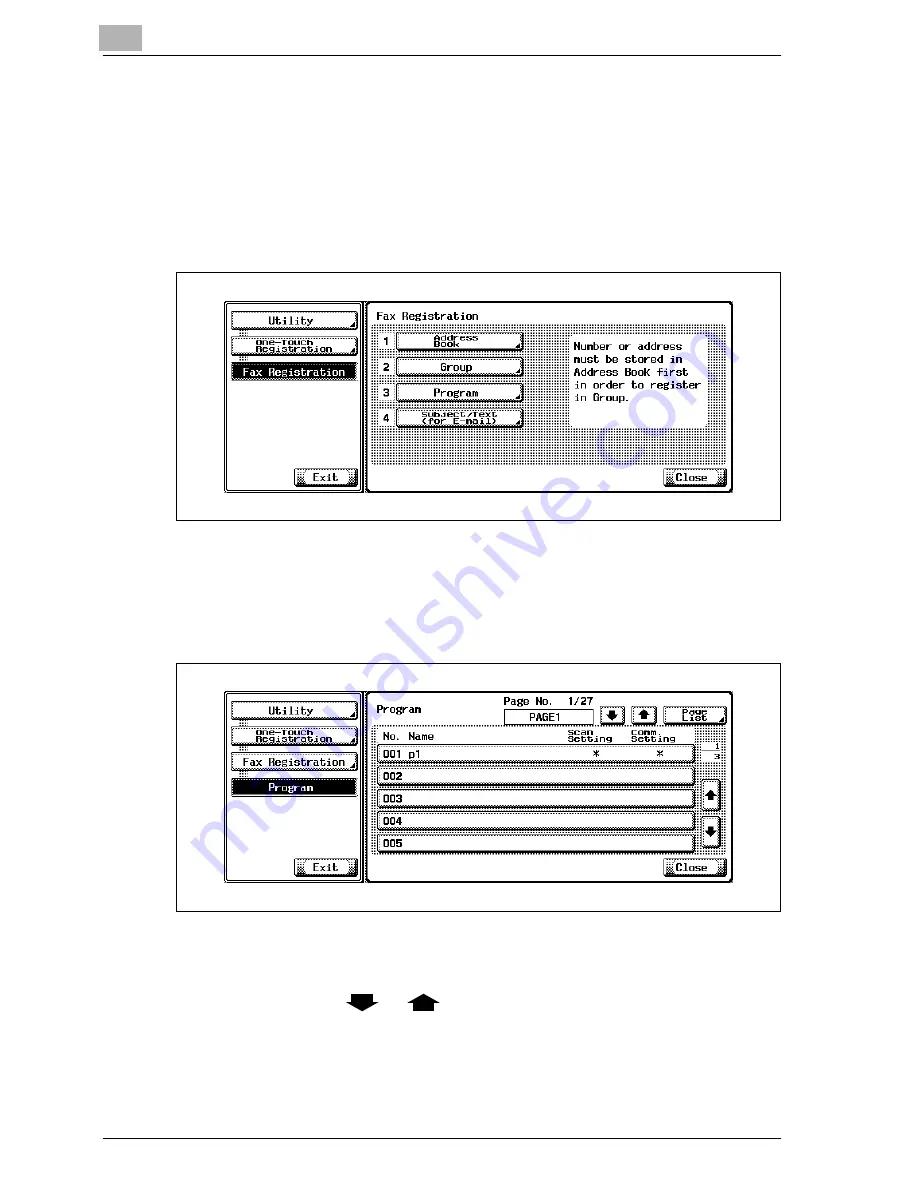
The procedure for registering the Program is as follows.
1
See "Displaying the fax registration screen" on page 10-3, to display
the Fax Registration screen.
2
Press [Program].
–
In the Utility Mode, it is also possible to enter a number displayed
in the key through the keypad for selection. In the case of
[Program], enter the "3" on the keypad.
3
Select the Program you want to register and then press [Edit].
–
Display of [Scan Setting] and [Comm. Setting]
–
Setting Value:ONOFF
Not registered
–
Display:* -
(Space)
–
If you press
or
in the left-hand side of [Page List], you can
change the page to display. 15 every destination per page of
destination are displayed.
–
If you press [Page List], you can specify the display of a Program
list per page.
Содержание CS172 FK-502
Страница 1: ...Oc CS172 FK 502 User Manual Facsimile Operations...
Страница 14: ...Contents 12 CS172...
Страница 15: ...1 Introduction...
Страница 16: ......
Страница 40: ...1 Introduction 1 26 CS172...
Страница 41: ...2 Before use...
Страница 42: ......
Страница 68: ...2 Before use 2 28 CS172...
Страница 69: ...3 Transmission...
Страница 70: ......
Страница 127: ...4 Reception...
Страница 128: ......
Страница 146: ...4 Reception 4 20 CS172...
Страница 147: ...5 Troubleshooting...
Страница 148: ......
Страница 154: ...5 Troubleshooting 5 8 CS172...
Страница 155: ...6 Specifications...
Страница 156: ......
Страница 158: ...6 Specifications 6 4 CS172...
Страница 159: ...7 Transmission applications...
Страница 160: ......
Страница 211: ...8 Useful functions for reception...
Страница 212: ......
Страница 220: ...8 Useful functions for reception 8 10 CS172...
Страница 221: ...9 Polling...
Страница 222: ......
Страница 237: ...10 Registering Settings...
Страница 238: ......
Страница 240: ...10 Registering Settings 10 4 CS172 3 Press Fax Fax Registration screen appears...
Страница 286: ...10 Registering Settings 10 50 CS172 3 Press User Box 4 Press Public Personal User Box 5 Press New...
Страница 290: ...10 Registering Settings 10 54 CS172 3 Press User Box 4 Press Bulletin Board User Box 5 Press New...
Страница 294: ...10 Registering Settings 10 58 CS172 3 Press User Box 4 Press Relay User Box 5 Press New...
Страница 298: ...10 Registering Settings 10 62 CS172...
Страница 299: ...11 Utility mode...
Страница 300: ......
Страница 303: ...Utility mode 11 CS172 11 5 Exiting from administrator setting 1 Press Exit on the sub area...
Страница 316: ...11 Utility mode 11 18 CS172 6 Press Close The value of the parameter is changed 7 Press Exit on the sub area...
Страница 319: ...Utility mode 11 CS172 11 21 6 Press Close The value of the parameter is changed 7 Press Exit on the sub area...
Страница 324: ...11 Utility mode 11 26 CS172 6 Press Close The value of the parameter is changed 7 Press Exit on the sub area...
Страница 371: ...Utility mode 11 CS172 11 73 6 Press Close The value of the parameter is changed 7 Press Exit on the sub area...
Страница 384: ...11 Utility mode 11 86 CS172...
Страница 385: ...12 Explanation of reports and lists...
Страница 386: ......
Страница 393: ...Explanation of reports and lists 12 CS172 12 9 Detail Some items may not be indicated depending on the optional settings...
Страница 438: ...12 Explanation of reports and lists 12 54 CS172 The actual reports may be different from the reports in this manual...
Страница 442: ...12 Explanation of reports and lists 12 58 CS172...
Страница 443: ...13 Web Connection...
Страница 444: ......
Страница 450: ...13 Web Connection 13 8 CS172 The user is logged off and the Login page appears...
Страница 452: ...13 Web Connection 13 10 CS172 2 Click Login The User mode page appears...
Страница 454: ...13 Web Connection 13 12 CS172 2 Click Login The User mode page appears...
Страница 458: ...13 Web Connection 13 16 CS172 4 Enter the settings and click Apply 5 Click OK Registration is performed...
Страница 462: ...13 Web Connection 13 20 CS172 3 To delete click the OK 4 Click OK An address is deleted...
Страница 465: ...Web Connection 13 CS172 13 23 7 Click OK Registration is performed...
Страница 467: ...Web Connection 13 CS172 13 25 3 Select the transmission mode and then click Next...
Страница 468: ...13 Web Connection 13 26 CS172 4 Enter the Settings and click Apply...
Страница 492: ...13 Web Connection 13 50 CS172 3 Enter the password and then click OK 4 Confirm the contents in the box...
Страница 494: ...13 Web Connection 13 52 CS172...
Страница 495: ...14 Appendix...
Страница 496: ......
Страница 499: ...Appendix 14 CS172 14 5 The following procedure describes how to type using E Mail address input screen...


