


NXP Semiconductors
KTFRDMMC36XSDEVBUG
FRDM-MC36XSD-EVB evaluation board
KTFRDMMC36XSDEVBUG
All information provided in this document is subject to legal disclaimers.
© NXP B.V. 2016. All rights reserved
User guide
Rev. 1.0 — 30 August 2016
23 / 34
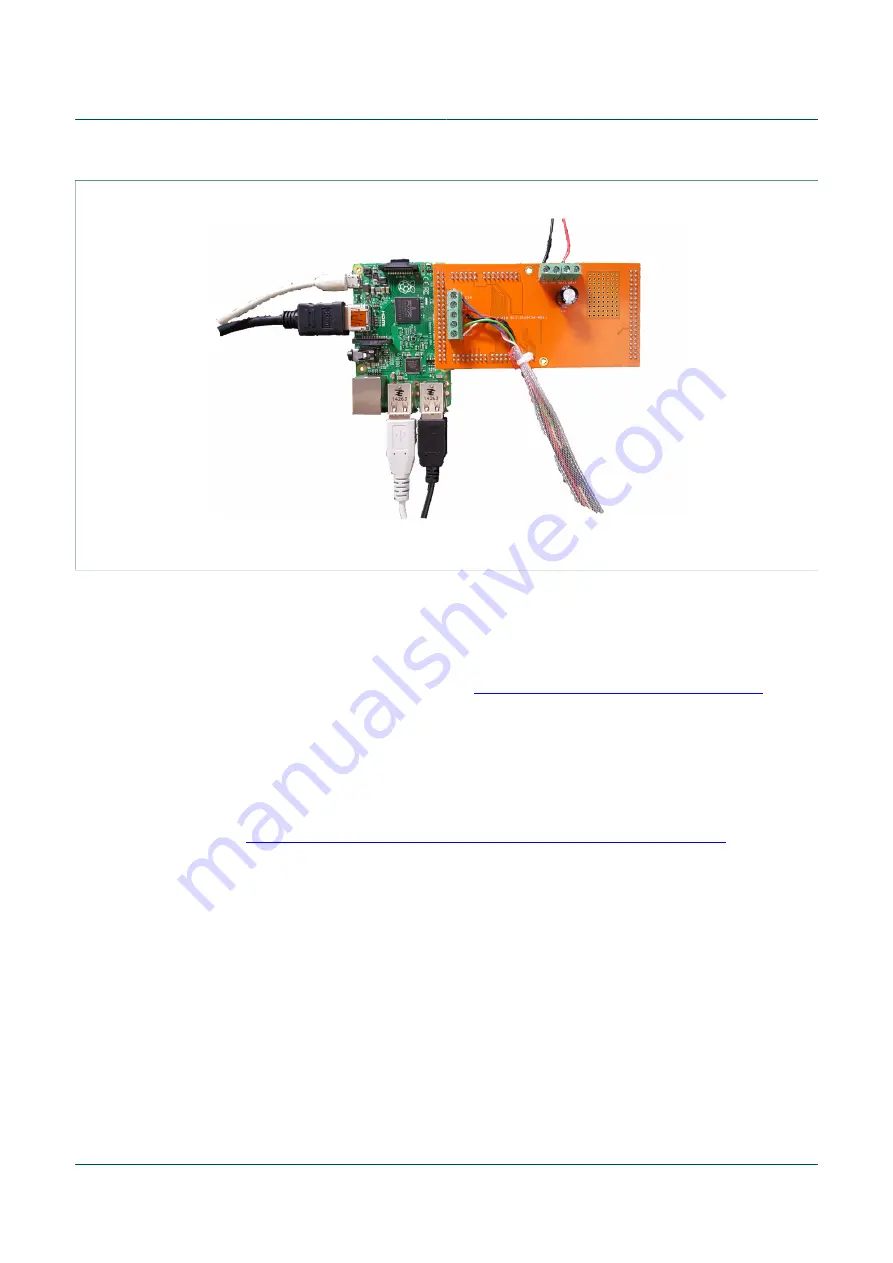
aaa-024258
5.0 V to 36 V
power supply
Mini USB
5.0 V supply
HDMI cable
to screen
Mouse and
keyboard
Power loads
Figure 13. FRDM-MC36XSD-EVB configured for use with Raspberry Pi board
7.3 Setting up the Raspberry Pi software
The procedure for setting up the software that supports using the FRDM-MC36XSD-EVB
with a Raspberry Pi 2 Model B board is as follows:
1. Got to the Tool Summary Page at
http://www.nxp.com/FRDM-MC36XSD-EVB
and click on the
Jump Start
icon. Locate and download the zip file named
Rpi_save_HSSwitch_20160121.zip
. This file contains a microcode image of the
Raspbian operating system and a Python demo file that illustrates the functionality of
the FRDM-MC36XSD-EVB with Raspberry Pi.
2. Unzip the file. The resulting image file appears with the name
Rpi_save_HSSwitch_20160121.img
.
3. Flash the image to an 8 GB SD card. To flash the image, follow the instructions at:
https://www.raspberrypi.org/documentation/installation/installing-images/
4. Insert the SD card into the Raspberry Pi SD slot (located on the back of the board).
Power up the board by inserting a powered USB cable into the Micro USB port on the
Raspberry Pi.
5. If a login is required, use: Username =
Pi
Password =
raspberry
.
Open a terminal window and enter the following command to run the Python code:
sudo
python Highside_switch.py