


NXP Semiconductors
KTFRDMMC36XSDEVBUG
FRDM-MC36XSD-EVB evaluation board
KTFRDMMC36XSDEVBUG
All information provided in this document is subject to legal disclaimers.
© NXP B.V. 2016. All rights reserved
User guide
Rev. 1.0 — 30 August 2016
19 / 34
1. With a Standard A /Mini B USB cable, connect the Standard A plug into the PC and
the Mini-B plug into the
SDA
port on the FRDM-KL25Z.
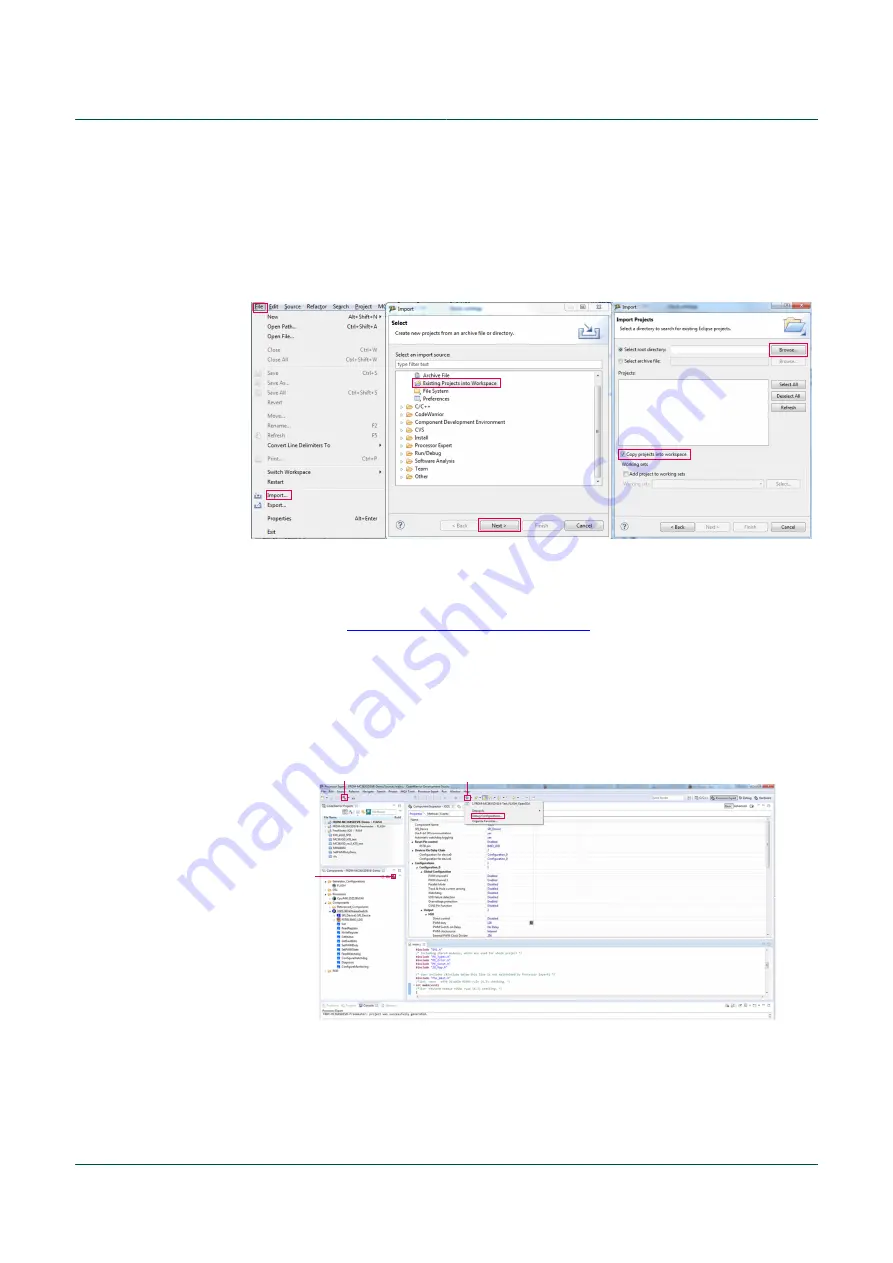
2. Open CodeWarrior on the computer.
3. From the CodeWarrior menu bar, select File>>Import.
4. In the
Select
window, click
Existing Projects into Workspace
, then click
Next
.
aaa-024253
5. In the
Import Projects
window, assure that the
Select root directory
option is
selected. In the corresponding box, select the FRDM-MC36XSDEVB-Demo project
Section 6.3 "Setting up the software"
. Then click
Finish
. With the
demo project open in CodeWarrior, do the following:
a. In the CodeWarrior Components panel, click on the
Generate Processor Expert
code icon.
b. In the CodeWarrior menu bar, click on the
Build
icon.
c. From the
Debug
menu, click
Debug Configurations
. Locate and select the file
FRDM-MC36XSDEVB-Demo_FLASH_OpenSDA. Then click the
Debug
button.
aaa-024254
a
b
c
This example project toggles the different outputs at 1 Hz frequency. The user can
modify main.c to customize the code, use some of the functions listed under the
XSD1:36VeXtremeSwitch component or configure the different properties set during
initialization.