


NXP Semiconductors
KTFRDMMC36XSDEVBUG
FRDM-MC36XSD-EVB evaluation board
KTFRDMMC36XSDEVBUG
All information provided in this document is subject to legal disclaimers.
© NXP B.V. 2016. All rights reserved
User guide
Rev. 1.0 — 30 August 2016
22 / 34
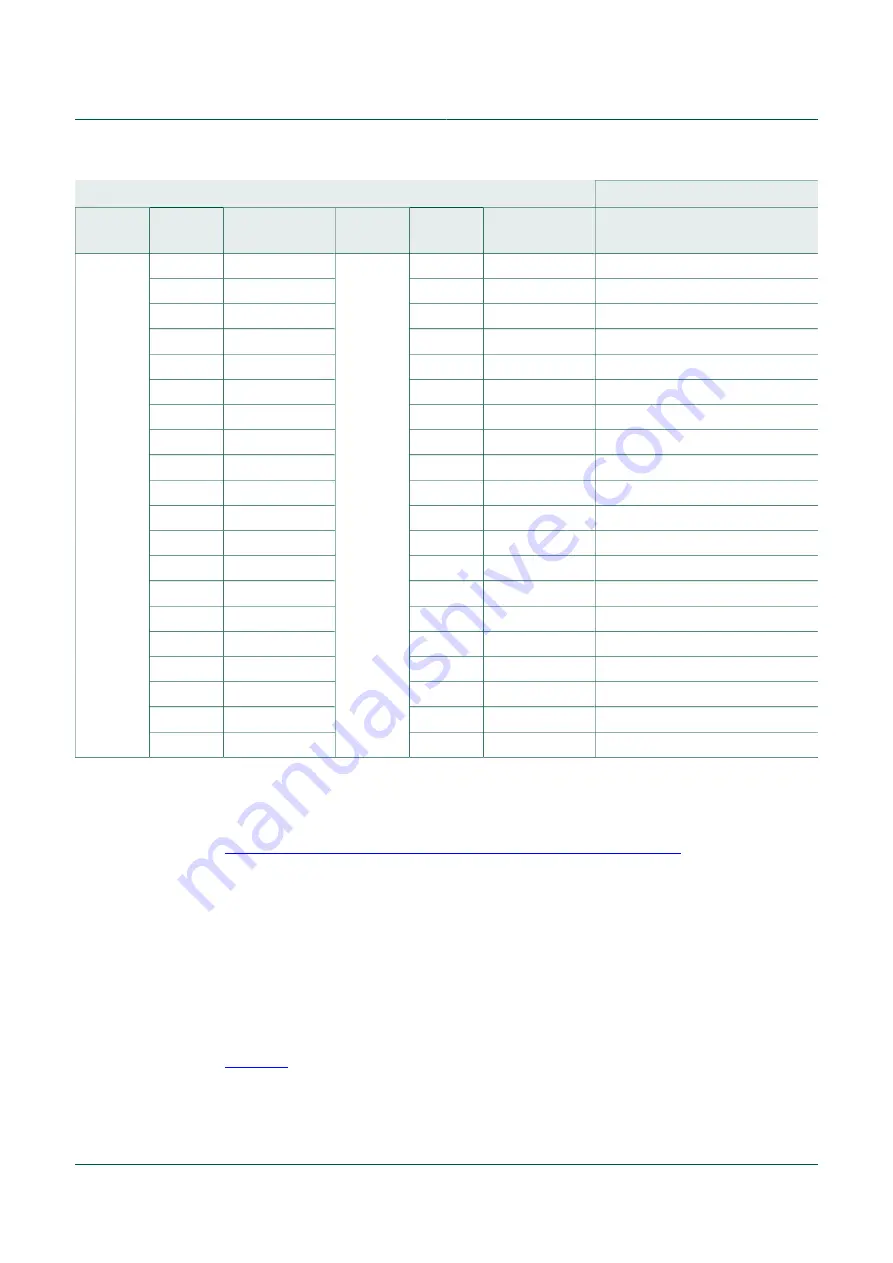
Raspberry Pi
FRDM-MC36XSD-EVB
Header
Pin
Hardware
name
Header
Pin
Hardware
name
Description
21
GPIO9
21
SPI_MISO
Master Input, Slave Output
22
GPIO25
22
FSB
Fault status to report faults
23
GPIO11
23
SPI_CLK
Clock for SPI
24
GPIO8
24
SPI_CS
Chip select bar pin
25
GND
25
GND
Gnd
26
GPIO7
26
—
No connection
27
ID_SD
27
—
No connection
28
ID_SC
28
—
No connection
29
GPIO5
29
—
No connection
30
GND
30
GND
Gnd
31
GPIO6
31
—
No connection
32
GPIO12
32
CLOCK
Input clock
33
GPIO13
33
—
No connection
34
GND
34
GND
Gnd
35
GPIO19
35
—
No connection
36
GPIO16
36
—
No connection
37
GPIO26
37
—
No connection
38
GPIO20
38
—
No connection
39
GND
39
GND
No connection
40
GPIO21
40
—
No connection
7.2 Configuring the hardware with Raspberry Pi
With the FRDM-MC36XSD-EVB mounted to the Raspberry Pi board as described in
Section 7.1 "Connecting Raspberry Pi to the FRDM-MC36XSD-EVB"
, make the following
connections:
On the FRDM-MC36XSD-EVB:
1. Connect 5.0 V to 36 V DC power supply to connector J24.
2. Connect up to four loads to connector J26.
On the Raspberry Pi board:
1. Connect an HDMI-compatible monitor to the HDMI port.
2. Connect the USB mouse and keyboard to one of the USB connectors.
3. Connect a 5.0 V 2.0 A power supply to the Micro-USB Power port.
illustrates the hardware configuration with the Raspberry Pi board.