NTI RACKMUX-V17-N-8USBHD-IP RACKMOUNT DRAWER WITH USB KVM SWITCH AND KVM ON IP
10
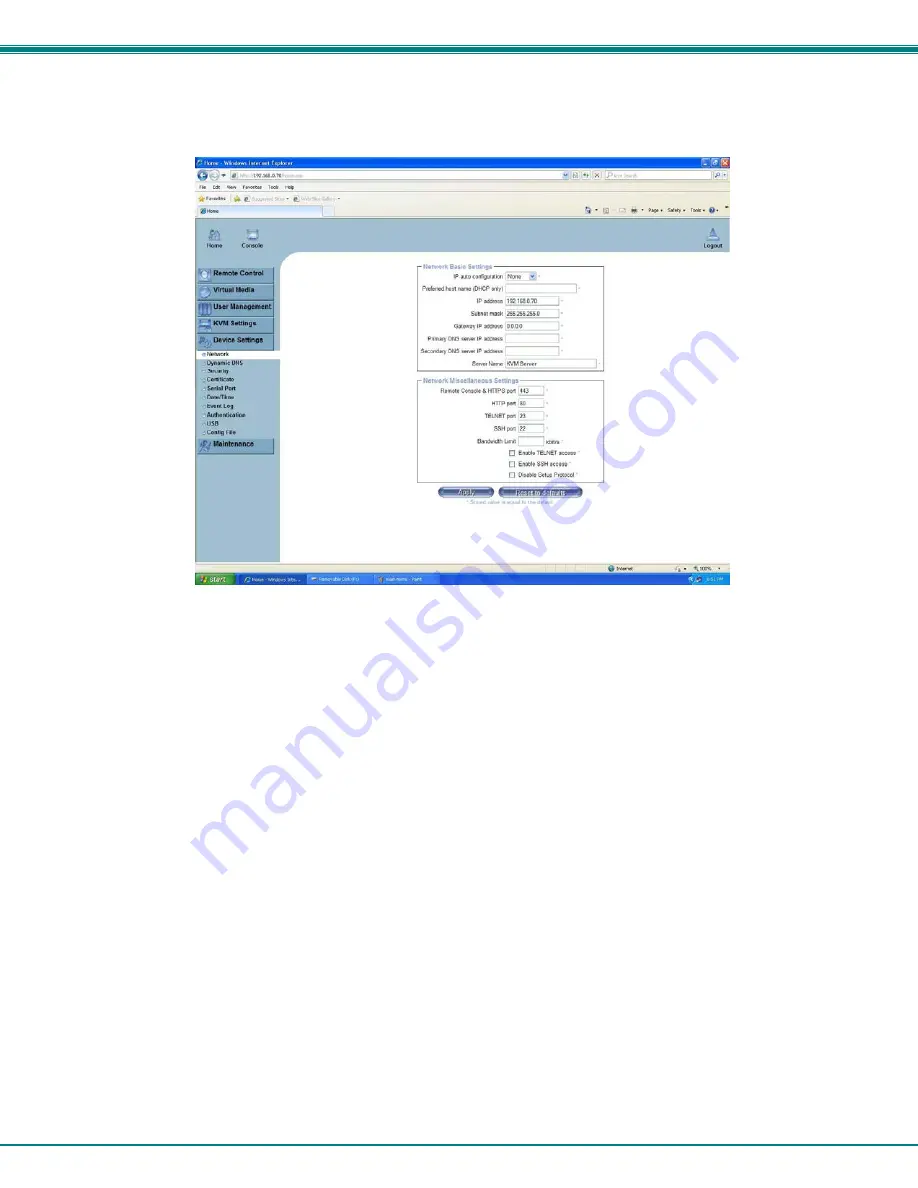
5. The KVM on IP will open the main menu. If you wish to change the network configuration, go to “
Device Settings
”, and then
“
Network
” to open the network configuration settings page for the KVM on IP. If you don’t need to change the network settings,
skip directly to step 10.
Figure 13- Network Configuration screen
6. Enter the desired network connection settings (IP address, subnet mask, gateway) as compatible with your network.
Make note of these settings in case you need them later.
7. With the settings updated, press
“
Apply
”
to implement the changes in the KVM on IP. Your browser connection to the KVM
on IP is no longer valid.
8. To restore connection to the KVM on IP, change the IP address on the PC back to an address compatible with your network
and now also compatible with the KVM on IP.
Having configured the KVM on IP to be compatible with your network, you can now make a direct cable connection (crossover
adapter not needed) to your network through a router or switch.
9. Enter the new IP address in the browser URL address block. Log back into the KVM on IP.
10. With a proper login, a window
“
Remote Console Preview
”
will be displayed. Click on the link
“C
lick to open
”
.


