background image

NTI RACKMUX-V

15/17

  RACKMOUNT LCD MONITOR WITH KEYBOARD AND MOUSE 


26


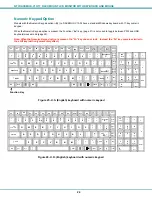
KOREAN KEYBOARD OPTION 

This RACKMUX may include an optional keyboard with special characters on the keys unique to the Korean language.      If so, 
the firmware in the drawer provides special functions to be used for switching between typing in English, “Alternate Language 1” 
(as configured in your Windows operating system) and “Alternate Language 2”.    

 
For this application, we will assume that Alternate Language 1 is configured for Korean characters (Hangeul) and Alternate 
Language 2 is for Chinese characters (Hanja).   
 

Alternate Language 1 

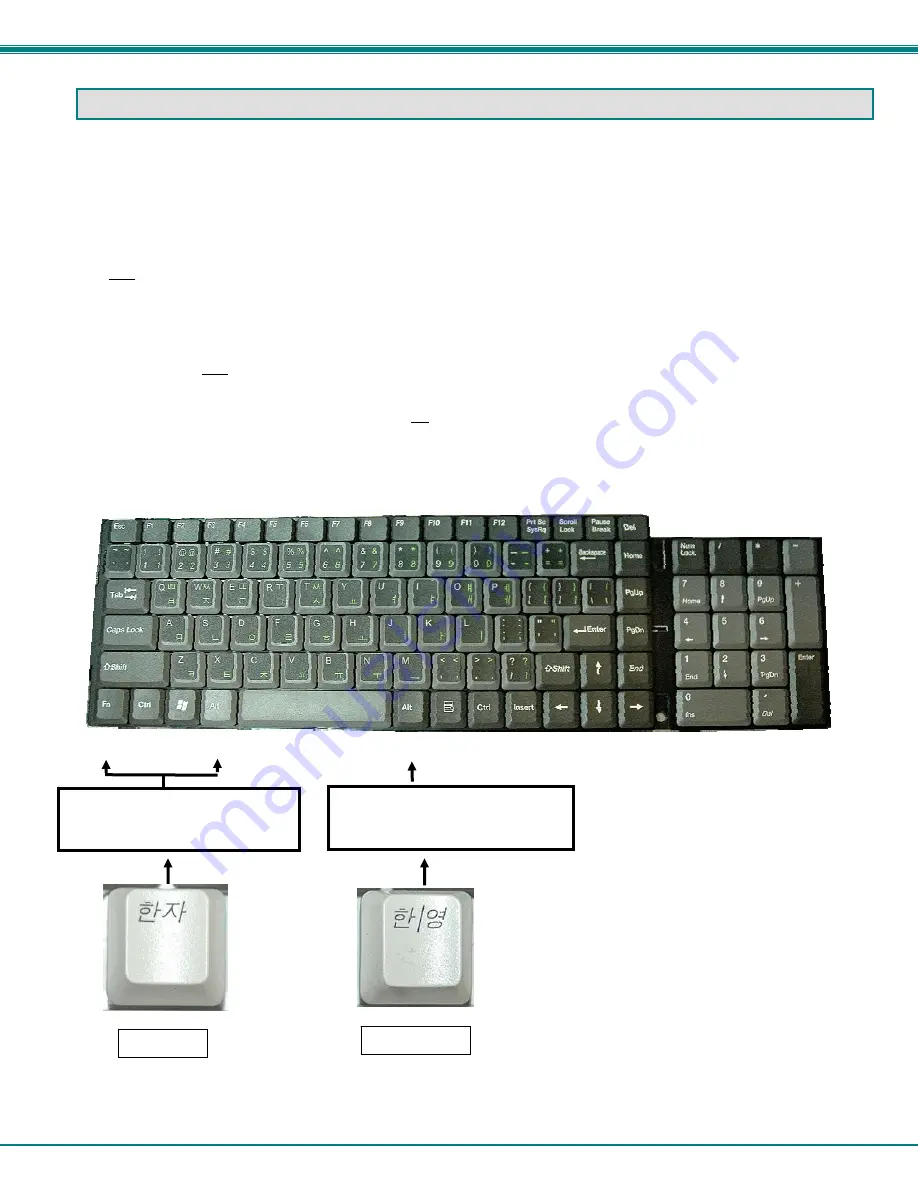
To switch between typing characters in English and typing in the language configured as “Alternate Language 1” (Korean),  press 
the right hand  <

Alt

> key on the keyboard.    To switch back to typing characters in English,   press the right hand  <

Alt

> key 

again.   
 

Alternate Language 2 

To use the “Alternate Language 2” character conversion pop-up function as configured in your Windows operating system,   
 

1. press the right hand  <

Alt

> key to switch to “Alternate Language 1” (same as Hangeul key on Korean keyboard), 

    then   
2. key in the Korean character to be converted to Chinese 
3. press and hold the <

Fn

> key, then press the left hand <

Alt

> key and release both.  (Pressing these keys substitutes for 

the Hanja key on a Korean keyboard)   


If the character entered has a Chinese equivalent, a popup will be presented for you to select the desired character to be 
substituted.    If there is no Chinese equivalent, no popup will be presented.  
 
To make the pop-up menu re-appear, enter another Korean character sequence and repeat the <

Fn

> + <

Alt

> key sequence.  


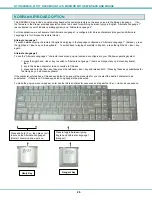
Press and hold <Fn>, then press <Alt> 
to access the Alternate Language 2 
(Hanja) conversion pop-up menu 

Press to toggle between typing  
English and Alternate Language 1 
(Hangeul) 

Hanja Key 

Hangeul Key

Содержание RACKMUX-D17

Страница 1: ...MAN047 Rev Date 6 08 2015 RACKMUX V15 17 RACKMUX D17 Rackmount Drawer with Keyboard LCD Monitor and Mouse Installation and Operation Manual RACKMUX Series RACKMUX V17 N Front and Rear View...

Страница 2: ...of Network Technologies Inc 1275 Danner Drive Aurora Ohio 44202 CHANGES The material in this guide is for information only and is subject to change without notice Network Technologies Inc reserves th...

Страница 3: ...htness Contrast Menu 16 Color Menu 16 Position Menu 16 Setup Menu 17 OSD Control Menu DVI Model D17 17 OSD Main Menu 17 Brightness Contrast Menu 18 Setup Menu 18 OSD Control Menu 17 Inch Hi Resolution...

Страница 4: ...MUX with DVI video support 9 Figure 13 Connect a USB 1 1 device to the front optional 9 Figure 14 Connect Remote PC to KVM on IP at LAN port 10 Figure 15 Remote Console Preview 11 Figure 16 Login Scre...

Страница 5: ...uchpad Support for PS2 and USB connections for the keyboard and mouse Support for VGA 15 or 17 model or single link DVI signals 17 model only Front access USB port for easy accessory USB 1 1 device co...

Страница 6: ...controlling the computer 14 Keylock to prevent unauthorized use of the RACKMUX 15 Auto Shut OFF switch automatically shuts OFF the LCD display when the monitor is folded down 16 keyboard for manual da...

Страница 7: ...in the rear bracket Apply the nuts supplied to the studs but do not tighten the nuts yet FYI There are 4 mounting studs provided on each side of the RACKMUX Depending on the depth of the rack and dist...

Страница 8: ...install the rails you will need only a tape measure and Phillips screwdriver 2 Unpack the left and right rail assemblies Each are labeled Right Front and Left Front to indicate their intended positio...

Страница 9: ...e end with the label Left Front mounts to the front rack support 5 Install two 10 32 x 3 4 pan head screws in the rear of each rail assembly as shown below Do not tighten at the time Figure 4 Install...

Страница 10: ...he front of the rack support View of rail guide from the backside of the rail Figure 6 Slide the RACKMUX into the rails 8 Apply four more 10 32 x 3 4 pan head machine screws two for each through the h...

Страница 11: ...ounting bracket kit NTI RL T15 TEL is to be used secure the short and long brackets to each side of the drawer as shown in Figure 9 Apply 2 nuts supplied per bracket to secure the brackets to the draw...

Страница 12: ...y be connected to either a PS 2 or a USB CPU with a VGA video port To connect to a PS 2 CPU use a VEXT 6 MM cable and VVKINT 6 MM cable as shown in Figure 10 To connect to a USB CPU use the VEXT 6 MM...

Страница 13: ...ry Any low or full speed USB device may be connected to this port to be used This port is fully compliant with USB standard 1 1 Note In order for the optional USB device port to be usable the USB port...

Страница 14: ...tch cable and crossover adapter have been included for this purpose Figure 14 Connect Remote PC to KVM on IP at LAN port 2 The default IP address of the KVM on IP is 192 168 0 70 If 192 168 70 is not...

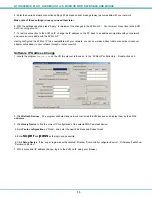
Страница 15: ...opens is a virtual PC that enables you to control the RACKMUX just as if you were actually at the keyboard of the RACKMUX Using the mouse switch between the virtual PC and your actual computer interf...

Страница 16: ...ent A link to the web page from which it can be downloaded and installed is provided on the Product Manual CD in addition to a Windows compatible copy of the application itself 2 Open a browser window...

Страница 17: ...now make a direct cable connection crossover adapter not needed to your network through a router or switch Software IP Address Change 1 Locate the program psetup exe on the CD this manual is found on...

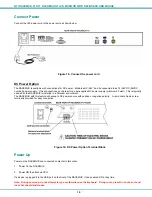
Страница 18: ...y used when the RACKMUX is installed in a Telecom environment The RACKMUX with this feature will accept a DC power source with positive or negative polarity A removable 3 pole screw terminal is provid...

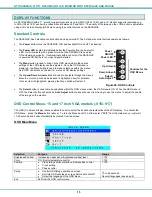
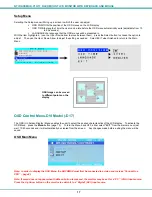
Страница 19: ...sed to navigate through the menus Move the cursor up or down as desired to highlight an item for selection Once an item is highlighted pressing the Menu button will select it Figure 20 OSD Controls Th...

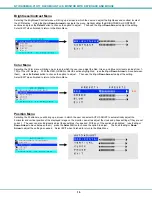
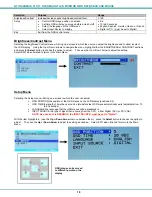
Страница 20: ...display With the RED GREEN or BLUE sections highlighted use the Up or Down Arrow to move between them press the Select button to choose the option to adjust Then use the Up or Down Arrow to adjust the...

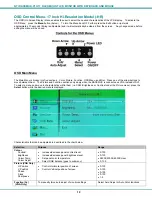
Страница 21: ...nished to return to the Main Menu OSD Control Menu DVI Model D17 The OSD On Screen Display Menu enables the user to select the desired characteristics of the LCD display To activate the OSD Menu press...

Страница 22: ...ither the BRIGHTNESS or CONTRAST sections and press the Select button to choose the option to adjust Then use the Up or Down Arrow to adjust the setting Select EXIT when finished to return to the Main...

Страница 23: ...Function sections only apply when the RACKMUX is connected as VGA instead of DVI To select a menu and move to characteristics within them i e CSM Brightness or Contrast under the Picture menu press t...

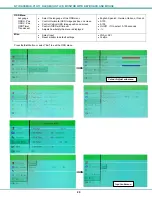
Страница 24: ...age position on screen Control Vertical OSD Image position on screen Control if OSD will time out Adjusts how boldly the menu is displayed English Spanish German Italian or French 0 100 0 100 On Off I...

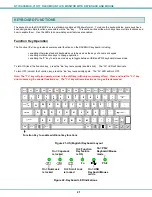
Страница 25: ...Function key press the Fn key twice quickly double click The Fn LED will illuminate To turn OFF unlock the Function key press the Fn key twice quickly again The Fn LED will turn OFF Note The Fn key wi...

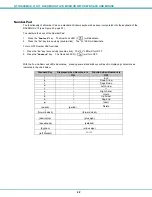
Страница 26: ...FF Number Pad functions 1 Press the Fn key twice quickly double click The Fn LED will turn OFF 2 Press the NumLock key The NumLock LED will turn OFF With the Fn and NumLock LEDs illuminated pressing s...

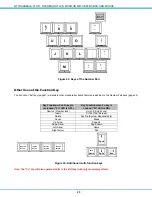
Страница 27: ...OFF Key Function when Fn key is Locked Fn LED is ON Numlck Number lock Scr Lck Scroll Lock Insert Prt Sc Print Screen Delete Sys Rq System Requirements Pause Break Up Arrow Page Up Down Arrow Page Dow...

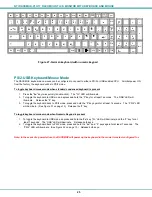
Страница 28: ...h keyboard with numeric keypad Figure 26 U K English keyboard with numeric keypad Esc F1 F2 F3 F4 F5 F6 F7 F8 F9 F10 F11 F12 PrtSc Delete SysRq Pause Break Scroll Lock Backspace 0 9 8 7 6 5 4 3 2 1 Ta...

Страница 29: ...7 seconds The PS 2 LED will illuminate See Figure 22 on page 13 Release the T key To toggle keyboard mouse mode when Numeric Keypad is present 1 To toggle the keyboard to USB mode depress and hold the...

Страница 30: ...English press the right hand Alt key again Alternate Language 2 To use the Alternate Language 2 character conversion pop up function as configured in your Windows operating system 1 press the right h...

Страница 31: ...r electrical shock Always unplug this product before cleaning it Do not use any liquid or aerosol cleaners to clean it Do not install or use this product near water Be sure to mount this product on a...

Страница 32: ...ponse Time 16ms Viewing Angle Horizontal 140 Vertical 125 Typ Optimum Viewing Direction 6 o clock Backlight Unit 2x CCFLs Top Bottom edge light Operating Lamp Life 30 000 40 000 hrs Contrast Ratio 500...

Страница 33: ...y Select when in Menu Auto Adjust not in menu LED Indicates Operation Status Green Power ON Video Input OK Red Suspend Stand by or Input Out of Range Keyboard No Of Keys 83 Keys US 84 keys German Fren...

Страница 34: ...Toggle the keyboard mode from PS 2 default to USB A If keyboard works in PS 2 mode and not USB USB cable is incorrectly connected B If keyboard works in USB mode and not PS 2 PS 2 cable is incorrectl...

Отзывы: