NTI RACKMUX-V
15/17
RACKMOUNT LCD MONITOR WITH KEYBOARD AND MOUSE
14
Connect Power
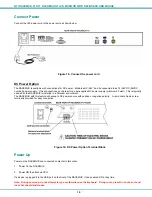
Connect the IEC power cord to the power port as shown below.
Figure 18- Connect the power cord
DC Power Option
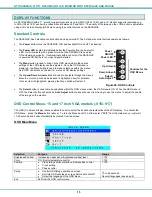
The RACKMUX is available with connections for DC power. Models with “-24V” can be connected to an 18~36VDC (24VDC
nominal) power supply. It has connections on the rear for a user-supplied DC power supply (minimum 30 watt). This is typically
used when the RACKMUX is installed in a Telecom environment.
The RACKMUX with this feature will accept a DC power source with positive or negative polarity. A removable 3-pole screw
terminal is provided for easy connection.
Figure 19- DC Power Option Terminal Block
Power Up
Power up the RACKMUX and connected computer in this order.
1.
Power On the RACKMUX
2.
Power ON the attached CPU.
If a device is plugged into the USB port on the front of the RACKMUX, it can powered-ON at any time.
Note: During power-up, do not attempt to type or otherwise use the keyboard. Doing so may result in boot errors and
loss of keyboard and mouse.

