OY NORDIC SPA LTD | Tehdaskatu 7, 24100 Salo | www.novitek.fi
5
EN
3 X 16 A, 400V
1 X 16 A, 230V
EXCLUSIVE
STANDARD
SELECT
INSTALLATION AND STARTUP
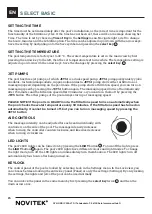
1. Turn the jets clockwise, until they are open.
2.
Before using the pool, check that all the threaded connections of the pumps are fi rmly secured.
The threaded connections may come loose during transportation.
3.
Fill the pool with water through the fi ltration opening (with a garden hose, for example) up until
the LED-lights, so that air locks are not formed in the piping. See the instructions for fi lling the
pool.
4.
Only turn on power to the pool once it is fi lled up.
5. After power is turned on, the pool display will show setup data, after this the text
Priming Mode
shows at the bottom of the screen. This initialization will last 4–5 minutes.
6. If the error message
The water fl ow is low
, shows on the display within the fi rst few minutes, it
indicates that there is air in the pump. In this case, see the instructions for clearing an air lock.
7. Turn on the pumps and check that water is coming out of all jets.
STARTUP
PLEASE NOTE! Do not connect power to the pool until it is fi lled with water!
The electrical installation may only be carried out by a licensed electrician.
The pool is hooked up to an electrical connection according to the table below. The electrical
connection must be protected with a ground fault circuit interrupter. The electric supply can be drilled
through any corner of the pool’s siding or a moving strap groove in the pool base. The side behind
which the control panel is located is marked on the pool.
ELECTRICAL INSTALLATION
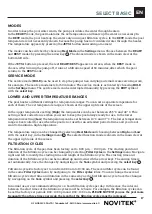
An air lock causes the jets to malfunction. An air lock is often caused by fi lling the pool too quickly,
which results in air being trapped in the piping. This prevents the pump from prefi lling and the water
from circulating properly.
INSTRUCTIONS FOR CLEARING AN AIR LOCK
1.
1. Open the service hatch and turn the threaded connection on top of
the pump slightly open.
2. When water starts coming out, tighten the connection and turn
on the pump. The pump will pump for a moment, after which the
water will start to fl ow properly.
3. Dry any spilled water and close the service hatch. Your outdoor
spa pool is ready for use.
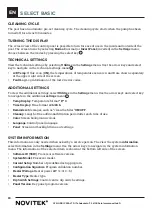
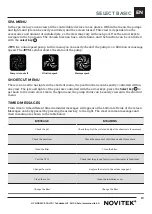
PLEASE NOTE! The wires must be stripped to a length of approx . 20 mm, and the earth
connection must be completed appropriately .
The electrical wiring instructions are marked on the
inside of the control panel next to the terminal block.
1. Make sure that the pool is fi lled with water up
until the LED-lights.
2. Open the service hatch to access the control
panel.
3. Connect the power cable to the control panel.
4. Close the service hatch.
ELECTRICAL
CONNECTION


