


DO NOT connect the 4-pin power plug only - the motherboard
may overheat under heavy usage.
▪
Ensure to connect the 8-pin power plug, or connect both the
8-pin and 4-pin power plugs.
▪
For a fully configured system, we recommend that you use a power
supply unit (PSU) that complies with ATX 12 V Specification 2.0 (or
later version) and provides a minimum power of 350 W.
▪
We recommend that you use a PSU with a higher power output
when configuring a system with more power-consuming devices.
The system may become unstable or may not boot up if the power
is inadequate.
▪
If you want to use two or more high-end PCI Express x16 cards,
use a PSU with 1000W power or above to ensure the system
stability.
▪
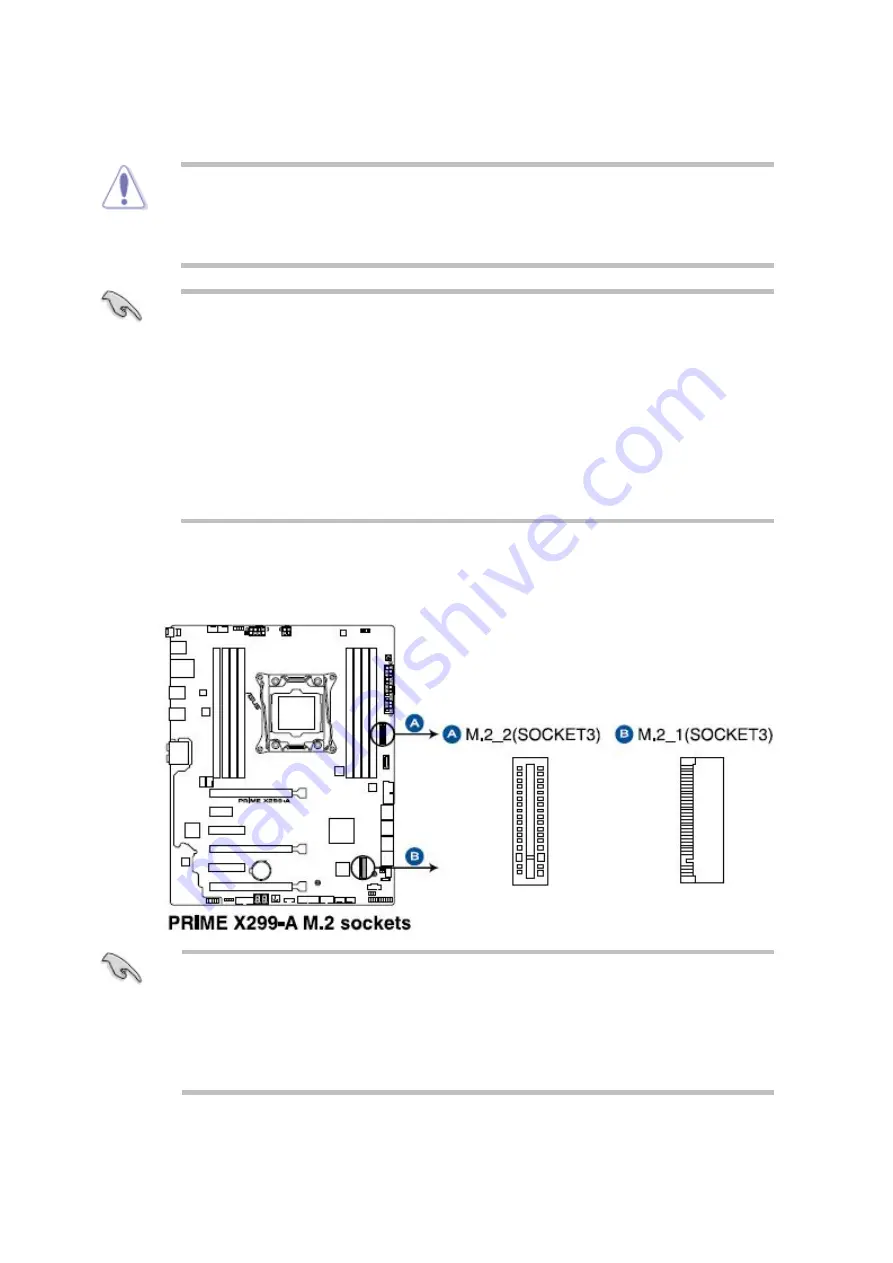
M.2 sockets (M.2_1(Socket 3); M.2_2(Socket 3))
These sockets allow you to install M.2 SSD modules (purchased separately).
This socket support IRST (Intel Rapid Storage Technology).
▪
M.2_1 socket supports PCIe 3.0 x 4 and SATA mode M Key design
and type 2242/2260/2280 storage devices.
▪
M.2_2 socket supports PCIe 3.0 x 4 M Key design and type
2242/2260/2280/22110 PCIe storage devices.
▪
Содержание Spirit X299-AS
Страница 1: ...Spirit X299 AS User Guide Revision 2 0 August 2018...
Страница 10: ...Removing the Case Cover Unlatch the cover and open the case from the back 1 Slide the side cover back 2...
Страница 11: ...Lift the three tabs as illustrated and pull back the front bezel 3 That opens the front of the case 4...
Страница 18: ...Specifications Summary Asus Desktop Board Prime X299 A specifications summary...
Страница 19: ......
Страница 20: ......
Страница 21: ......
Страница 22: ......
Страница 23: ......
Страница 26: ...Asus Motherboard Components...
Страница 50: ...Q Code table...
Страница 51: ......
Страница 52: ......
Страница 56: ......
Страница 59: ...3 Situate mounting ring according to diagram 4 Place special screw extenders into mounting ring...
Страница 61: ...7 Twist reservoir counterclockwise 8 Screw reservoir mounting ring assembly onto motherboard...
Страница 62: ...9 Attach cable connector from reservoir to fan assembly 10 Attach hoses from reservoir...
Страница 65: ......
Страница 76: ...Slide the optical drive out of the assembly 4...


