25
Getting to Know Nikon Capture 4 Editor
Lost Highlights and Shadows
Areas of the image in which details in the high end or low ends of the tone range may have
been lost (“lost” highlights or shadows) can be identifi ed by locating pixels with the maximum
or minimum value for one or more channel. This information can be used when using color
balance (
66) or adjusting the white point or black point to capture the optimal amount of
detail without sacrifi cing contrast (
51).
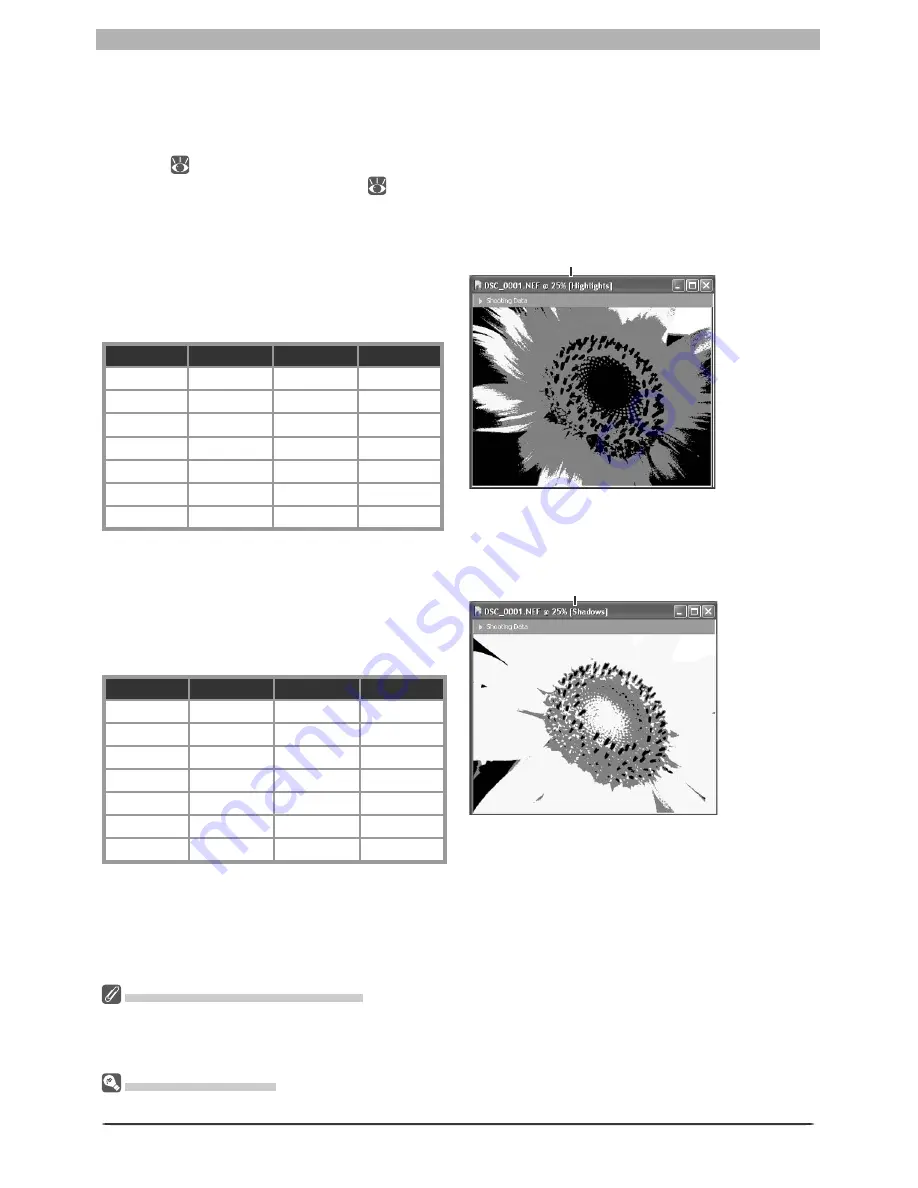
Show Lost Highlights
When
Show Lost Highlights
is selected in
the
Image
menu, “lost” highlights (pixels
with a value of 255 for one or more channel)
are shown in color (see table below). Other
pixels are shown in black.
R
G
B
Shown in
“Lost”
“Lost”
“Lost”
White
“Lost”
“Lost”
Not “lost”
Yellow
“Lost”
Not “lost”
“Lost”
Magenta
Not “lost”
“Lost”
“Lost”
Cyan
“Lost”
Not “lost” Not “lost”
Red
Not “lost”
“Lost”
Not “lost”
Green
Not “lost” Not “lost”
“Lost”
Blue
“Lost” Highlights and Shadows
Before saving images in a format other than NEF, adjust settings to avoid “losing” highlights or shadows
in large areas of the image. Information lost through editing can not be recovered once an image is
saved in a format other than NEF.
Keyboard Shortcuts
Press L to view or hide lost highlights, S to view or hide lost shadows.
“Highlights” displayed in image
window title bar
Show Lost Shadows
When
Show Lost Shadows
is selected in
the
Image
menu, “lost” shadows (pixels
with a value of 0 for one or more channel)
are shown in color (see table below). Other
pixels are shown in white.
R
G
B
Shown in
“Lost”
“Lost”
“Lost”
Black
“Lost”
“Lost”
Not “lost”
Blue
“Lost”
Not “lost”
“Lost”
Green
Not “lost”
“Lost”
“Lost”
Red
“Lost”
Not “lost” Not “lost”
Cyan
Not “lost”
“Lost”
Not “lost”
Magenta
Not “lost” Not “lost”
“Lost”
Yellow
“Shadows” displayed in image
window title bar
Содержание 4DIF
Страница 1: ...En Ver 4 4 En Ver 4 4 ...
Страница 10: ...6 ...


