DioView 100
– User’s Guide
DioView 100
- User’s Guide
Page 21 of 22
Nexdio Co., Ltd.
6.9 Saving your Voice Memos in your PC
(1) Connect the
DioView 100
to your PC with the provided USB cable.
(2) Turn on the
DioView 100
.
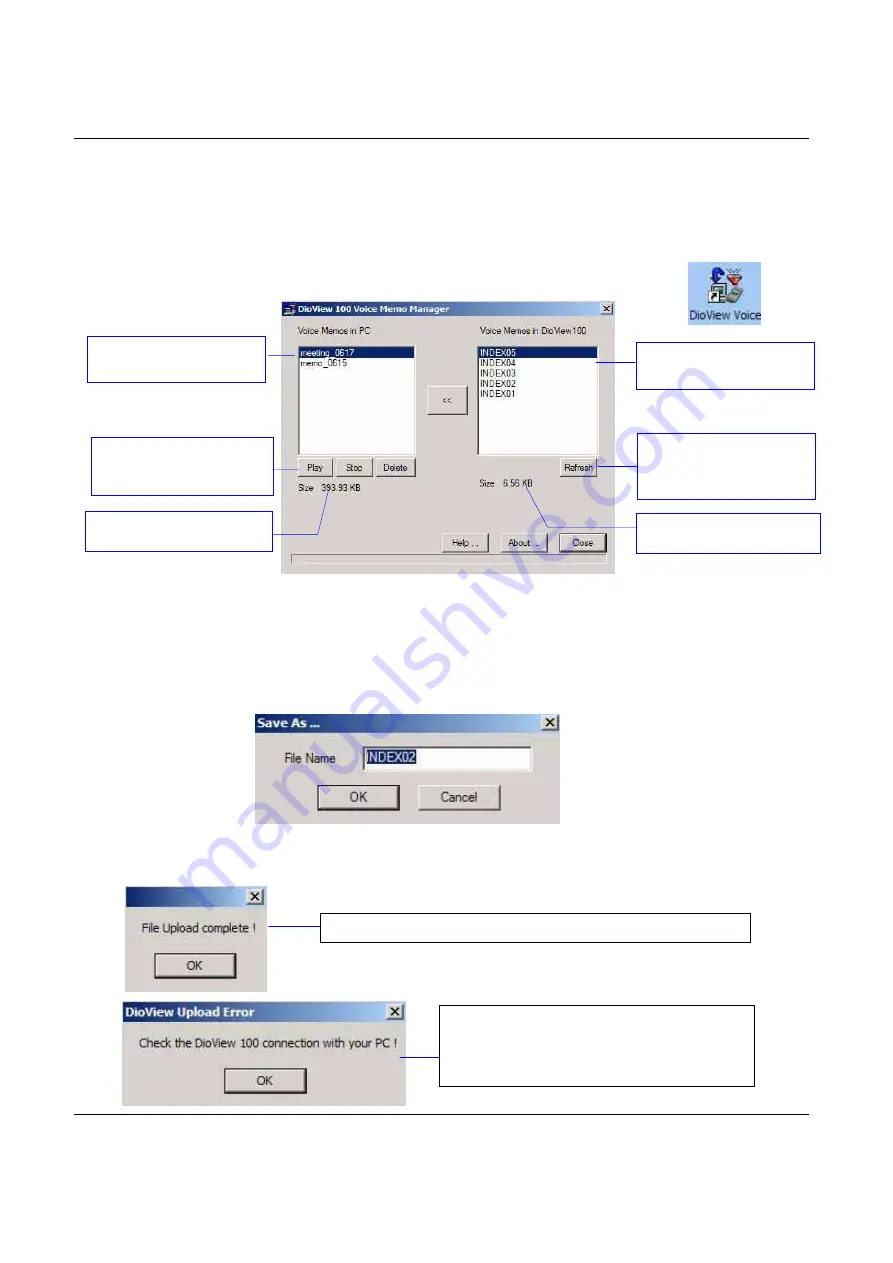
(3) Open the “DioView 100 Voice Memo Manager” program by clicking the “DioView Voice” shortcut
icon on the desktop of your PC.
(4) The “DioView 100 Voice Memo Manager “dialog box” will appear as below.
(5) Click the “Refresh” button to update the Voice Memo list in the
DioView 100
.
(6) Select a Voice Memo Index and Click the “<<” button to save it into your PC.
(7) The “Save As…” dialog box will pop-up, then you can rename the audio file (Less than 12
characters) that you want to save in your PC and then click “
OK
”
(8) The Voice Memo Files will be saved at the default directory in your PC as “C:\Prorgam
Files\Nexdio\DioView\DVWAV\”.
Voice Memo List in the
DioView 100
Refresh:
Update the
Voice Memo List in the
DioView 100
Saved Voice Memo List
in your PC
Size of the selected Voice
Memo file in your PC
Play, Stop or Delete
for
the saved Voice Memo in
your PC
Size of the selected Voice
Memo file in the DioView
SUCCESS!
in uploading a voice memo file into your
PC.
FAIL!
in uploading a voice memo file into
your
PC.
Please check the USB connection between
your PC and DioView 100 and try again.


