DioView 100
– User’s Guide
DioView 100
- User’s Guide
Page 17 of 22
Nexdio Co., Ltd.
6.7 Setting up the
DioView 100
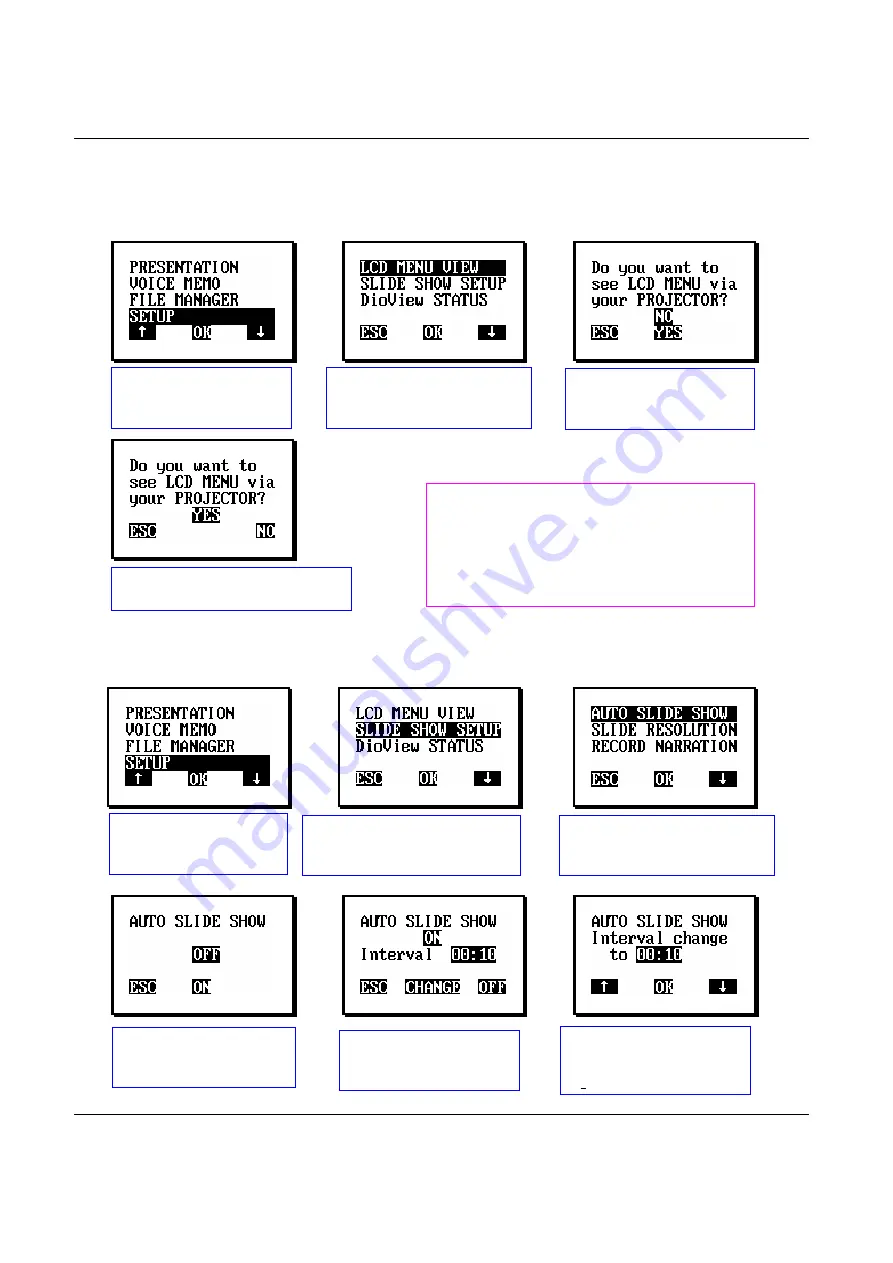
1) Viewing the LCD Menu on the Projector screen
♦
For your convenience, view the
DioView 100
’s LCD Menu on the projector or monitor screen.
(“NO” is set by default for better battery performance)
[OK]
[OK]
2) Setting up the Slide Show
♦
Setting the Auto Slide Show
[OK]
[OK]
[OK]
[OK]
[OK]
[OK]
Select
SETUP
on the
menu screen and press
[OK]
Select
LCD MENU VIEW
on the menu screen and
press
[OK]
Press
[OK] (
YES
)
to see
the LCD menu via the
Display Device
ESC
:
Back to the menu screen
NO
:
Cancel
Select
SETUP
on the
menu screen and press
[OK]
Select
SLIDE SHOW SETUP
on the menu screen and press
[OK]
Select
AUTO SLIDE SHOW
on the menu screen and press
[OK]
Press
[OK] (
ON
)
to
conduct the AUTO SLIDE
SHOW
Press
[OK] (
CHANGE
)
to change the interval
between slides
▲
:
Increase the interval
OK
: Save the interval
▼
: Decrease the interval
<Useful Hint>
This, “LCD MENU VIEW” via the
projector’s screen, will be helpful when
utilizing the
DioView 100
in a low-lighted or
dark setting. But this may reduce the
battery life up to 30%.


