XPS-RL
Quick Start
If you don’t want to connect the XPS-RL controller through a Corporate Network you
may skip to Section 2.6: “Configuring the Controller”.
NOTE
If you want to change the IP address of the XPS-RL controller, follow the
explanation in the next section. It is necessary to keep using the gray cross-over
Ethernet cable to connect the XPS-RL controller directly to the PC.
2.5.4
Connecting the XPS-RL to a Corporate Network using Static IP Configuration
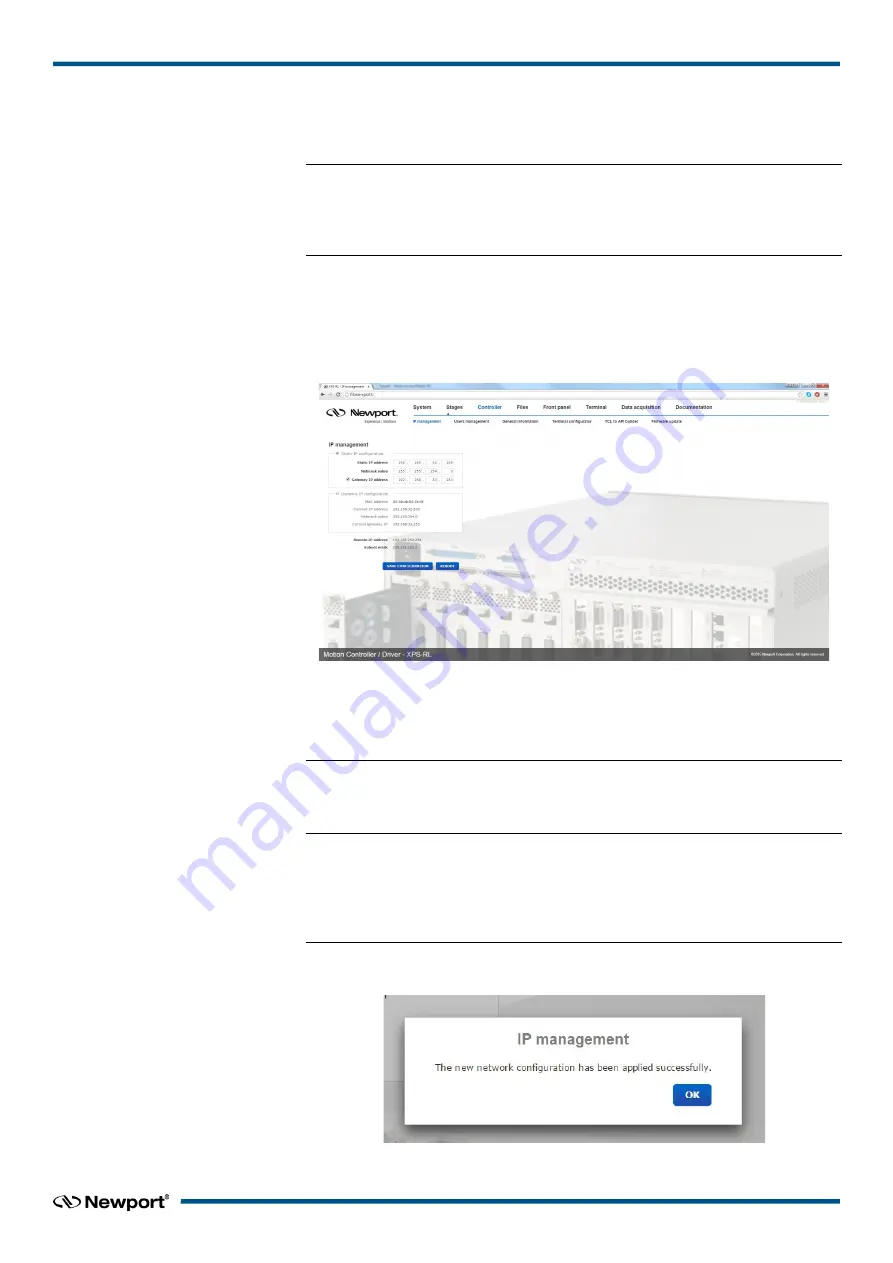
Once you are logged in using the previously described steps for direct connection, you
can change the IP configuration of the controller in order to connect the XPS-RL over a
Network. Select “
Controller
” of the web-site and select the sub-menu “
IP
management
”.
The Static IP address, the Netmask value and the Gateway IP address must be provided
by your Network Administrator to avoid network conflicts. Once you have these
addresses, you can input them in the IP configuration window as shown above. The
above shown addresses are only examples.
NOTE
To avoid conflict with the REMOTE Ethernet plug, the IP address must be
different from 192.168.254.
NOTE
For the majority of Networks, the setting above for the Netmask value will work.
However, for larger networks (200 computers or more), the Netmask value address
must be verified with the IT department. In most cases and for larger networks,
the Netmask value is set to 255.255.0.0.
Once the appropriate addresses for the Static IP configuration are set, click on “
SAVE
CONFIGURATION
” and the following screen appears:
Click “
OK
” and reboot the controller by clicking “
REBOOT
”.
11
EDH0367En1021 — 12/17


