The following instructions assume you are running Windows XP’s default
interface. If you are using the Classic interface (where the icons and menus
look like previous Windows versions), please follow the instructions for
Windows 2000.
1. Click the Start button, open the Control Panel. and click the Network and
Internet Connections icon. Then, click the Network Connections icon to
display the Network screen.
2. Select the Local Area
Connection icon for the
applicable Ethernet
adapter (usually it is the
first Local Area
Connection listed).
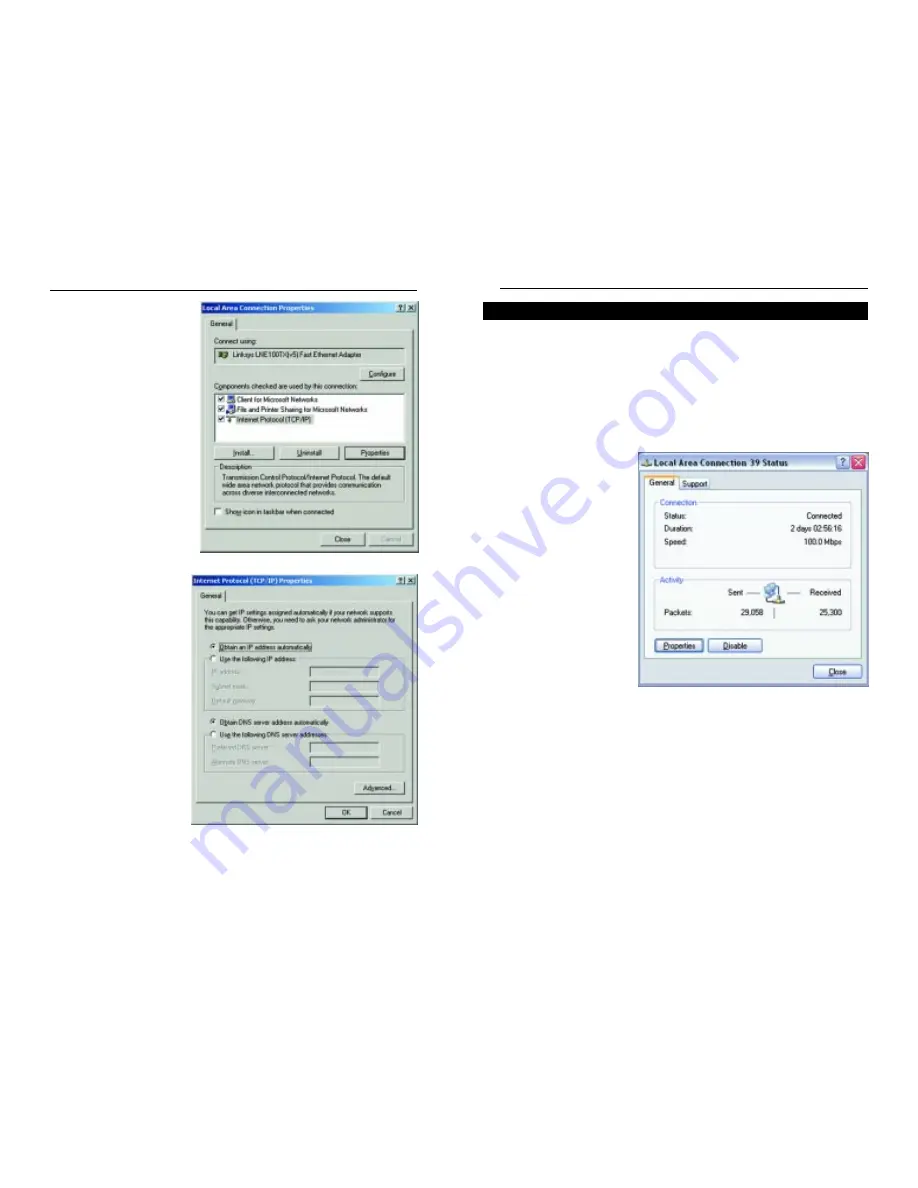
3. When the Local Area Connection Status screen appears, click the
Properties button. (See Figure 4-6.)
Configuring Windows XP PCs
Figure 4-6
4. Select Internet Protocol
(TCP/IP) (as shown in
Figure 4-4) and click the
Properties button.
5. Select Obtain an IP
address automatically
and verify that Obtain
DNS server address
automatically is selected
(as shown in Figure 4-5).
Then, click the OK but-
ton and click the OK but-
ton on the subsequent
screens to complete the
PC’s configuration.
Repeat steps 1-5 for each PC on your network. When all of your PCs are
configured, proceed to Chapter 6: The Router’s Web-based Utility.
Figure 4-4
Figure 4-5
Wireless Cable/DSL Router
Network Everywhere
®
Series
14
13
Содержание NWR04B
Страница 1: ......


