IP Setup and Network Address Translation 9-57
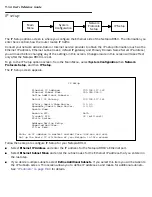
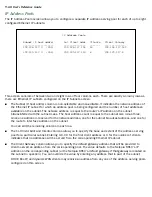
The Netopia R910 Router suppor ts multiple IP subnets on the Ethernet inter face. You may want to
configure multiple IP subnets to ser vice more hosts that are possible with your primar y subnet. It is not
always possible to obtain a larger subnet from your ISP. For example, if you already have a full Class C
subnet, your only option is multiple Class C subnets, since it is vir tually impossible to justify a Class A or
Class B assignment. This assumes that you are not using NAT.
If you are using NAT, you can use the reser ved Class A or Class B subnet.
■
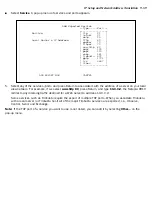
Select
Default IP Gateway
and enter the IP address for a default gateway. This can be the address of any
major router accessible to the Netopia R910.
A default gateway should be able to successfully route packets when the Netopia R910 cannot recognize
the intended recipient’s IP address. A typical example of a default gateway is the ISP’s router.
■
Select
Primary Domain Name Server
and enter the IP address for a domain name ser ver. The domain
name ser ver matches the alphabetic addresses favored by people (for example, robin.hood.com) to the IP
addresses actually used by IP routers (for example, 163.7.8.202).
■
If a secondar y DNS ser ver is available, select
Secondary Domain Name Server
and enter its IP address.
The secondar y DNS ser ver is used by the Netopia R910 when the primar y DNS ser ver is inaccessible.
Entering a secondar y DNS is useful but not necessar y.
■
Select
Domain Name
and enter your network’s domain name (for example, netopia.com).
■
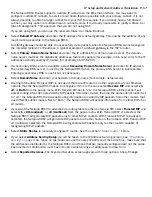
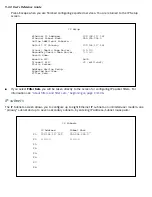
Routing Information Protocol (RIP) is needed if there are IP routers on other segments of your Ethernet
network that the Netopia R910 needs to recognize. If this is the case select
Receive RIP
and select
v1
,
v2
, or
Both
from the popup menu. With Receive RIP set to “v1,” the Netopia R910’s Ethernet por t will
accept routing information provided by RIP packets from other routers that use the same subnet mask. Set
to “v2,” the Netopia R910 will accept routing information provided by RIP packets from other routers that
use different subnet masks. Set to “Both,” the Netopia R910 will accept information from either RIP v1 or
v2 routers.
■
If you want the Netopia R910 to adver tise its routing table to other routers via RIP, select
Transmit RIP
and
select
v1
,
v2 (broadcast)
, or
v2 (multicast)
from the popup menu. With Transmit RIP v1 selected, the
Netopia R910 will generate RIP packets only to other RIP v1 routers. With Transmit RIP v2 (broadcast)
selected, the Netopia R910 will generate RIP packets to all other hosts on the network. With Transmit RIP
v2 (multicast) selected, the Netopia R910 will generate RIP packets only to other routers capable of
recognizing RIP v2 packets.
■
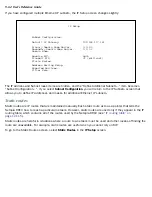
Select
Static Routes
to manually configure IP routes. See the section
“Static routes,”
below.
■
If you select
Address Serving Setup
you will be taken to the IP Address Ser ving screen (see
“IP address
ser ving” on page 9-66
. Since no two hosts can use the same IP address at the same time, make sure that
the addresses distributed by the Netopia R910, and those that are manually configured are not the same.
Each method of distribution must have its own exclusive range of addresses to draw from.
■
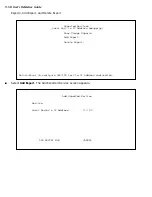
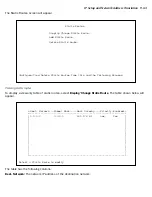
Select
Exported Services.
The Expor ted Ser vices screen appears with three options: Show/Change
Содержание R910
Страница 1: ...Netopia R910 Ethernet Router for DSL and Cable Modems User s Reference Guide ...
Страница 22: ...4 22 User s Reference Guide ...
Страница 30: ...5 30 User s Reference Guide ...
Страница 122: ...12 122 User s Reference Guide ...
Страница 172: ...A 172 User s Reference Guide ...
Страница 186: ...B 186 User s Reference Guide ...
Страница 200: ...E 200 User s Reference Guide ...
Страница 204: ...F 204 User s Reference Guide ...


