


User’s Manual
60
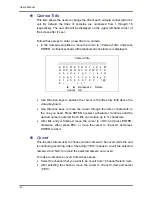
From the Record Setup menu, move the cursor to <Circular Recording> and press ENTER,
then select <ON> / <OFF> using UP / DOWN keys.
< Audio Recording >
This item allows users to enable / disable Audio recording function of the unit. When it’s set
to <ON>, audio input is recorded and saved with the video. When it’s set to <OFF>, audio is
ignored.
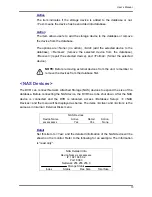
< Purge Data >
This item is used to delete the Normal or Event recording video. In Record Setup menu,
move the cursor to <Purge Data> and press ENTER; the Purge Data menu is displayed.
Purge Data
1. Purge All Data
2. Purge All Event Data
3. Purge Event Before
4. Start To Purge
No
No
2008/01/01
No
Purge All Data
The item is used to delete all recorded video from database(s). Set this item
to <Yes> using UP / DOWN keys, and start the deleting by enable (Yes) the
<Start to Purge> function.
Purge All Event Data
The item is used to delete all event video from database(s). Using UP /
DOWN keys to select <Yes> and start the deleting by setting the <Start to
Purge> to <Yes>.
Purge Event Before
The item is used to delete event video before a specific date. Use LEFT /
RIGHT keys to move the cursor to next or previous field, ENTER to select the
item and UP / DOWN to adjust the value.
Start To Purge
After selecting the video you want to delete or setting the date for deletion, set
this item to <Yes> for starting the deletion or choose <No> to cancel.
Содержание Premium H.264 DVR
Страница 1: ...Ness Ultimate Premium H 264 DVR OSD Setup Manual REV1 1 Sep11 ...
Страница 49: ...User s Manual 49 This page is intentionally blank ...
Страница 50: ...User s Manual 50 This page is intentionally blank ...
Страница 51: ...User s Manual 51 This page is intentionally blank ...
Страница 52: ...User s Manual 52 This page is intentionally blank ...
Страница 53: ...User s Manual 53 This page is intentionally blank ...
Страница 89: ...User s Manual 89 Click Finish to complete the dial in connection Now the dial in connection is established ...
Страница 94: ...User s Manual 94 Click Finish to complete the process The Incoming connection is established ...
Страница 100: ...User s Manual 100 Appendix D ezRecord Diagram Sample ...
Страница 101: ...User s Manual 101 ...
Страница 102: ...User s Manual 102 ...


