background image

Chapter 6: Settings

Buttons Icon

112

NEO Hand-Held with Windows Mobile 6.1 Classic User Manual

6.4

Buttons Icon

Tap on this icon to display your options.

6.4.1

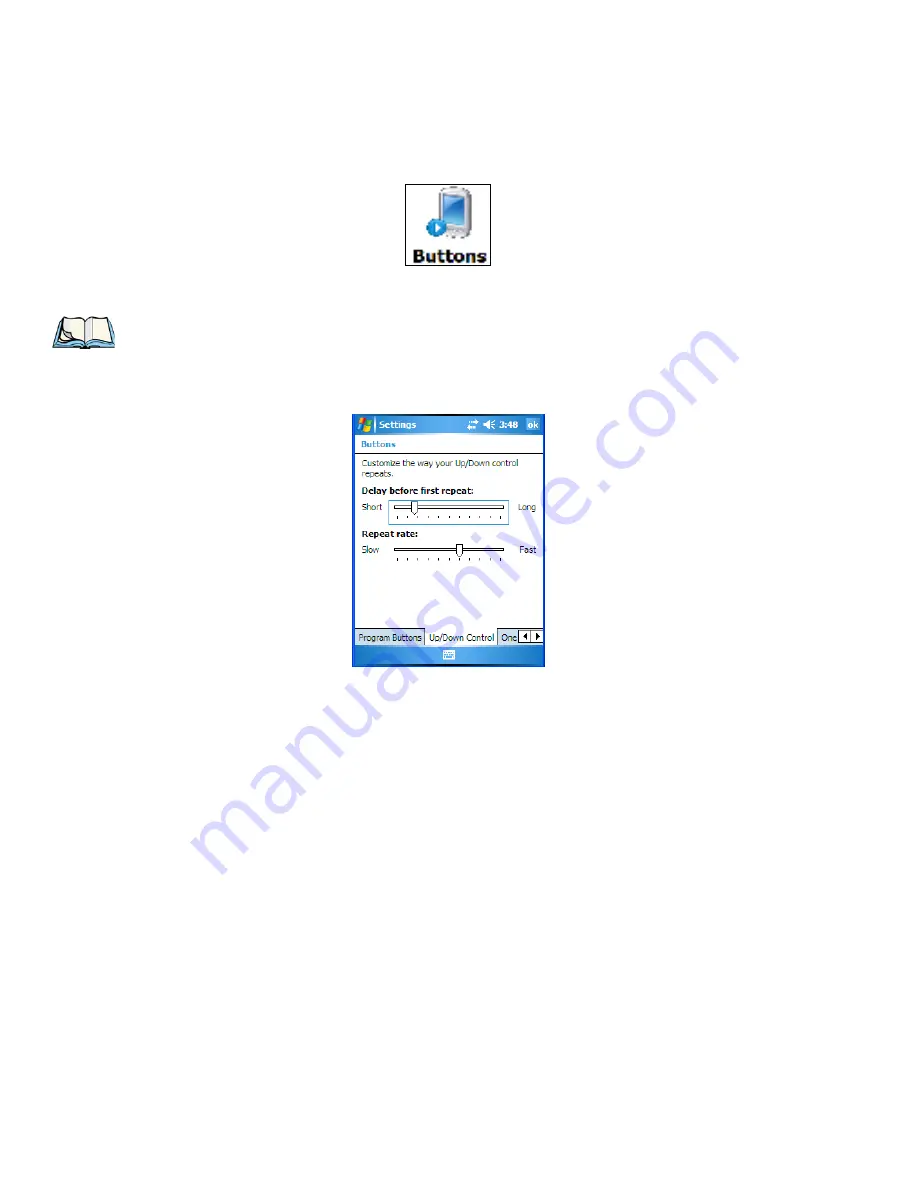
Up/Down Control

Sliding the 

Delay before first repeat

 bar to the left decreases the amount of time an 

[Up/Down] key must be held before it starts repeating; sliding the bar to the right increases 
this delay time. 
Sliding the 

Repeat rate

 bar to the left slows the rate at which an [Up/Down] button repeats 

when pressed. Sliding the bar to the right increases the key repeat rate.

Note: The ‘Program Buttons’ option is not available on this unit.

Содержание PX750BT

Страница 1: ...ISO 9001 Certified Quality Management System NEO Hand Held Computer With Windows Mobile 6 1 Classic Model No PX750 User Manual May 11 2010 Part No 8100202 A...

Страница 2: ...purpose of promoting the sale of Psion Teklogix manufactured goods and ser vices Furthermore this document is not to be used as a basis for design manufacture or sub contract or in any manner detrime...

Страница 3: ...to any product that has been tampered with altered or repaired by any person other than an employee of an authorized Psion Teklogix service organization See Psion Teklogix terms and conditions of sale...

Страница 4: ......

Страница 5: ...Suspend 12 2 3 Connecting NEO to a PC 12 2 4 Wireless Networking Wi Fi Config 12 2 4 1 Status Tab 13 2 4 2 Wi Fi Configuration Tab 14 2 4 2 1 Authentication Modes 15 2 4 2 2 EAP 16 2 4 2 3 Encryption...

Страница 6: ...Numeric Keyboard Accessing Keys 35 3 4 4 26 Key Numeric Keyboard Accessing Alpha Keys 35 3 4 4 1 Choosing a Single Alpha Character 35 3 4 4 2 Creating Uppercase Letters 36 3 4 4 3 Choosing Multiple A...

Страница 7: ...lendar of Upcoming Appointments 59 4 2 6 1 Creating and Editing Appointments 59 4 2 6 2 Adding Reminders 60 4 2 6 3 Using Categories 61 4 2 6 4 Deleting Appointments 62 4 3 Start Menu 63 4 3 1 Customi...

Страница 8: ...10 2 Using Internet Sharing 90 5 11 Notes 91 5 11 1 Creating a Note 91 5 11 2 Converting Handwritten Notes to Text 92 5 11 3 Renaming a Note 93 5 11 4 Recording Notes 93 5 11 5 Synchronizing a Note 9...

Страница 9: ...ol 112 6 4 2 One Shots 113 6 4 3 Keyboard Macro Keys 114 6 4 4 Unicode Mapping 116 6 4 5 Scancode Remapping 117 6 4 6 Lock Sequence 120 6 5 Input 121 6 5 1 Input Method Tab 121 6 5 1 1 Word Completion...

Страница 10: ...41 6 22 1 Trigger Mappings 142 6 22 1 1 Add and Edit Trigger Mapping 143 6 23 Managed Programs 144 6 24 Memory 145 6 24 1 Main Tab 146 6 24 2 Storage Card 146 6 25 Power Icon 146 6 25 1 Battery Tab 14...

Страница 11: ...User System Setting 173 6 33 5 Registry Editor 174 6 34 Windows Update 174 6 35 Connections Tab 174 6 36 Beam 177 6 37 Bluetooth Setup 177 6 37 1 Paired Tab 178 6 37 2 Device Tab 180 6 37 2 1 Discove...

Страница 12: ...The Pistol Grip With Stylus 210 7 2 The Battery 211 7 3 Adaptor Cable Options 212 7 3 1 RS 232 Adaptor Model No PX3050 212 7 3 2 Micro USB Adaptor Model No PX3054 214 7 4 Charging Options 215 7 4 1 I...

Страница 13: ...Not Light When Docked 224 7 9 Scanners and Imagers 225 7 9 1 Basic Scanner Operations 225 7 9 2 Scanning Techniques 225 7 9 3 Troubleshooting 226 7 10 Bluetooth Peripherals 226 Chapter 8 Specificatio...

Страница 14: ...om Preset B 8 B 4 Configuring the Bar Code Decoding Camera Presets B 8 B 4 1 Selecting a Camera B 9 B 4 2 Setting the Active Preset B 9 B 4 3 Viewing a Preset B 10 B 4 4 Creating a Custom Preset B 10...

Страница 15: ...32 B 5 19 GS1 DataBar B 33 B 5 20 Posi Code Reduced Space Symbology B 33 B 5 21 Composite B 34 B 5 22 TLC 39 B 34 B 5 23 2D PDF 417 B 34 B 5 24 2D Micro PDF 417 B 34 B 5 25 Code 16K B 34 B 5 26 Code...

Страница 16: ...C 2 10 UPC E C 11 C 2 11 UPC EAN Shared Settings C 12 C 2 12 Code 93 C 13 C 2 13 Codabar C 13 C 2 14 MSI Plessey C 14 C 2 15 Interleaved 2 of 5 C 15 C 2 16 Discrete 2 of 5 C 16 C 2 17 GS1 DataBar C 17...

Страница 17: ...Mobile 6 1 User Manual xiii C 3 15 Matrix 2 of 5 C 31 C 3 16 Discrete 2 of 5 C 31 C 3 17 Telepen C 32 C 3 18 GS1 DataBar C 32 C 3 19 Composite C 33 C 3 20 TLC 39 C 33 C 3 21 PDF 417 C 34 C 3 22 Micro...

Страница 18: ......

Страница 19: ...NEO Hand Held with Windows Mobile 6 1 Classic User Manual 1 INTRODUCTION 1 1 1 About This Manual 3 1 2 Text Conventions 4 1 3 NEO Features 4 1 3 1 NEO Hand Helds 5...

Страница 20: ......

Страница 21: ...escribes the Microsoft Windows Mobile 6 1 Today screen and how to use it This chapter also outlines basics like moving around a window displaying menus and so on Chapter 5 Programs provides a descript...

Страница 22: ...visible This means that the operator can scan a bar code and view the results on the display in one movement no need to manually tilt the unit to view the results after each scan In addition the tilt...

Страница 23: ...sic User Manual 5 1 3 1 NEO Hand Helds Figure 1 1 NEO Hand Held Computer Numeric Alpha Numeric Model Variants Connected NEO Standard Features 2 7 inch Colour Touchscreen Windows Mobile 6 1 Classic mic...

Страница 24: ...00 mAh Battery Additional Batch Options Bluetooth Radio Bluetooth Radio and 1D Imager Bluetooth Radio and 1D Laser Scanner Bluetooth Radio and 2D Imager Keyboard Variants 48 Key Alpha Numeric or 26 Ke...

Страница 25: ...ger Option HHP 5000 Internal Expansion Slots One microSD slot Expansion Port Battery Output Power USB Signalling Scanner Trigger Input Docking Port RS 232 USB DC Input Power Management 3 7 V 3300 mAh...

Страница 26: ...Held with Windows Mobile 6 1 Classic User Manual Accessories Desktop charger Quad charger Pistol grip Holster Hand Strap Shoulder Strap Additional miscellaneous adaptors and cables a complete list of...

Страница 27: ...3 2 4 2 Wi Fi Configuration Tab 14 2 4 2 1 Authentication Modes 15 2 4 2 2 EAP 16 2 4 2 3 Encryption 17 2 4 2 4 Connecting the Wireless Network 18 2 4 3 Configuring TCP IP 19 2 4 3 1 IP Address and Na...

Страница 28: ......

Страница 29: ...protect data while you swap in a new battery all unnecessary draws on power such as the display and CPU are shut down to preserve power 2 2 Switching NEO On and Off 2 2 1 Installing the Battery and S...

Страница 30: ...e the communication link between the hand held and the PC 2 4 Wireless Networking Wi Fi Config NEO contains an integrated 802 11b g radio module The Wi Fi Config application is used to configure NEO f...

Страница 31: ...g The Wi Fi Config screen is displayed 2 4 1 Status Tab The Status tab displays information about the wireless network to which NEO is configured to connect When there are no network profiles configur...

Страница 32: ...le when configuring a radio network you can either scan for an existing network or manually create a network If you tap on the Scan button a list of networks detected by the radio is displayed Highlig...

Страница 33: ...ation Open WEP WPA PSK and 802 1x with EAP Tapping on the Auth Mode menu displays your authentication options Open Authentication Open authentication does not provide security When this option is chos...

Страница 34: ...When 802 1X is se lected NEO uses WEP encryption with automatic as opposed to static keying For the others the user may choose TKIP AES or TKIP AES encryption WPA WPA2 Personal PSK Pre Shared Key When...

Страница 35: ...as SecureID TLS Provides strong security via the use of client certificates for user authentication Server Certificate Verification When the Verify Server Certificate box is checked NEO will verify t...

Страница 36: ...etwork is listed in the Configure tab An X next to a network indicates that this is the network to which NEO will connect Tap on the Connect button to activate your network The Status tab is displayed...

Страница 37: ...l SDIO8686 Wireless Card in the adaptor list The Marvell SDIO8686 Wireless Card dialog box offering two options a server assigned IP address or a user assigned IP address If you want an address assign...

Страница 38: ...ned SSID Auth Type EAP Type and Encryption 2 5 Checking The Scanner If your hand held is equipped with an internal scanner you can test it to ensure that it is op erating properly Point the scanner wi...

Страница 39: ...oft ActiveSync If you are using Windows XP or earlier your data transfers require Active Sync To install ActiveSync follow the step by step instructions provided at this website http www micro soft co...

Страница 40: ...uctions about an operation tap on an option in the Getting Started list Follow the instructions provided Where applicable a link to an associated screen is provided Tap on the link to display the scre...

Страница 41: ...en goes blank release the keys 2 9 2 Performing a Cold Reset to the Windows Mobile 6 1 OS A cold reset in Windows Mobile is almost identical to a warm reset except that some lower level hardware PCon...

Страница 42: ......

Страница 43: ...ys 32 3 4 2 The Keys 33 3 4 3 48 Key Alpha Numeric Keyboard Accessing Keys 35 3 4 4 26 Key Numeric Keyboard Accessing Alpha Keys 35 3 4 4 1 Choosing a Single Alpha Character 35 3 4 4 2 Creating Upperc...

Страница 44: ...th Windows Mobile 6 1 Classic User Manual 3 9 1 Pairing a Bluetooth Device 42 3 10 The microSD Card 45 3 10 1 Inserting The Card 45 3 11 General Maintenance 47 3 11 1 Caring For The Touchscreen 47 3 1...

Страница 45: ...apter 3 Get To Know NEO Features of NEO NEO Hand Held with Windows Mobile 6 1 Classic User Manual 27 3 1 Features of NEO Figure 3 1 Front View Protective Rib Microphone LED Light Emitting Diode Receiv...

Страница 46: ...ry Cover microSD Card Compartment Expansion Port BACK OF NEO BOTTOM OF NEO Docking Port Cover Beeper Accessory Attachment Point Accessory Attachment Point Battery Door Detection Magnet inside battery...

Страница 47: ...longer period of time Refer to Suspend Threshold on page 150 for details about reserving battery power for data backup purposes 3 2 4 Charging The Battery Batteries shipped from the factory are charg...

Страница 48: ...nd held inserted in docking station requires 3 hours to charge the battery to 75 capacity NEO is equipped with an intelligent charging system that protects the battery from over charging by terminatin...

Страница 49: ...ALT FN BLUE and FN ORANGE keys are modifier keys Pressing a modifier key changes the function of the next key pressed The SHIFT CTRL and ALT keys operate much like a desktop keyboard except that they...

Страница 50: ...lp you identify when a modifier key is locked on the key is represented in the shift state indicator icon with a black frame around it Figure 3 4 Shift State Indicator Icon Locked Modifier Key Once a...

Страница 51: ...e Arrow Keys The Arrow keys move the cursor around the screen in the direction of the arrow up down left and right The cursor is the flashing box or underline character that indicates where the next c...

Страница 52: ...e located on the LEFT ARROW and RIGHT ARROW keys The LEFT ARROW key the decrease backlight key is labelled with a minus symbol The RIGHT ARROW key the increase backlight key is labelled with a plus sy...

Страница 53: ...the FN ORANGE key and then press the numeric key above which the alpha character you want to type is printed 3 4 4 1 Choosing a Single Alpha Character The examples below illustrate how to access A B a...

Страница 54: ...th display backlighting to improve character visibility in low light con ditions The backlight switches on when a key is pressed or the screen is tapped 3 5 1 Adjusting the Backlight To set the backli...

Страница 55: ...been aligned calibrated or if you find that the stylus pointer is not accurate when you tap on an item follow the steps below Tap on Start Settings Tap on the System tab to display the Screen icon Ta...

Страница 56: ...Indicators NEO uses an LED Light Emitting Diode onscreen messages and audio tones to indicate the various conditions of the hand held the batteries the scans and so on 3 6 1 LED Indicator A tri colour...

Страница 57: ...ondi tions refer to Sound Notifications on page 128 3 6 2 1 Adjusting The Receiver Volume The volume can be adjusted using the UP ARROW and DOWN ARROW The increase volume key is labelled with a plus s...

Страница 58: ...tery Try to keep its brightness as low as possible The hand held is event driven that is when the unit is not in use it reverts to sleep mode even when it appears to be running saving battery power Ev...

Страница 59: ...upload transac tion data to a server computer when a radio link is not available The desktop docking station can complete batch uploads to a Client USB connected PC or server An optional 10 100 Base...

Страница 60: ...the Power dialog box Tap on the Built in Devices tab and tap in the checkbox next to Enable Bluetooth Next tap on Start Settings Connections tab Bluetooth icon Tap on the Mode tab and check Turn on Bl...

Страница 61: ...entication tap on Next After entering the device PIN the Services dialog appears with a list of services available for that device Click in the checkbox to the left of the service to activate it Click...

Страница 62: ...Encryption and se lecting three different modes Serial ActiveSync and Scanner Serial is used for simple serial port communication ActiveSync is for ActiveSync over Bluetooth Scanner is used to create...

Страница 63: ...ired is listed in the Pair tab 3 10 The microSD Card A microSD card slot is available in the battery compartment microSD cards provide addi tional non volatile memory to your hand held 3 10 1 Insertin...

Страница 64: ...roSD card onto the guides on the SD door position the card with the con nector pads at the bottom so that when the door is closed they make contact with the connectors in the unit Carefully flip the S...

Страница 65: ...screen sodium hydroxide concentrated caustic solutions benzyl alcohol and concentrated acids 3 11 2 Cleaning NEO Use only mild detergent or soapy water to clean the hand held unit Avoid abrasive clean...

Страница 66: ......

Страница 67: ...on 56 4 2 5 Task Notification 56 4 2 6 Calendar of Upcoming Appointments 59 4 2 6 1 Creating and Editing Appointments 59 4 2 6 2 Adding Reminders 60 4 2 6 3 Using Categories 61 4 2 6 4 Deleting Appoin...

Страница 68: ...50 NEO Hand Held with Windows Mobile 6 1 Classic User Manual 4 10 3 Block Recognizer and Letter Recognizer 73...

Страница 69: ...olders launch applica tions and programs make selections and so on 4 2 Windows Mobile 6 1 Classic Desktop Today Screen Units running Windows Mobile 6 1 Classic provide a Calendar option in the Softkey...

Страница 70: ...n provides icons that when tapped open their associated programs Start Button Tapping on the Start button displays the Start menu Connectivity The Connectivity hotkey provides a shortcut to the Connec...

Страница 71: ...iding tab that allows you to adjust the speaker volume or turn the speaker on and off Battery Capacity Tapping on the Battery hotkey displays the Battery tab allowing you to view the remaining battery...

Страница 72: ...Tap on the Time Zone drop down menu to set the GMT Next tap in the Date and Time drop down menus to set the current date and time Alarms Tab To set an alarm Tap on the Alarms tab 10 Note A checkmark...

Страница 73: ...t the minutes highlight the min utes and type the appropriate minutes or You can also assign the alarm activation time using the clock graphic Position the stylus on the hour hand of the clock and dra...

Страница 74: ...e mail it will be indicated in the Today desktop screen To view your e mail tap on the E mail Notification option Refer to Messaging on page 98 for details about setting up your Inbox 4 2 5 Task Noti...

Страница 75: ...new task The text is replaced with a blink ing cursor If you prefer to type the task using the soft keyboard tap on the soft keyboard icon in the softkey bar Type your task description Tap anywhere in...

Страница 76: ...he Tasks list tap the checkbox next to the items that are completed Sorting Tasks Tap on the Menu option in the lower right corner of the softkey bar and tap on Sort By You can choose from Status Prio...

Страница 77: ...lay the calendar You can also tap on Calendar in the softkey bar The default calendar displays an Agenda of appointments for the week divided into days You can choose to leave the calendar as is or yo...

Страница 78: ...ve your changes and close the screen 4 2 6 2 Adding Reminders In the Today screen tap on the appointment for which you d like a reminder In the next screen tap on the appointment title Finally in the...

Страница 79: ...u can choose the time unit for your reminder minute s hour s day s or week s Tap OK to finish You are returned to the view you were in before adding the reminder Tap on the appointment in the Calendar...

Страница 80: ...en Tap in the checkbox next to the category to which you want to assign the appointment Tap OK Your appointment is assigned to the category or categories you chose 4 2 6 4 Deleting Appointments Tap an...

Страница 81: ...the Start button in the upper left corner of the Navigation Bar Tap on the Start menu item with which you want to work 4 3 1 Customising the Start Menu You can choose the items you want to appear in t...

Страница 82: ...art menu When you ve finished your selections tap on OK 4 4 Managing Files and Folders Windows Mobile 6 1 files are stored in folders and sub folders that are accessible with File Explorer You can ope...

Страница 83: ...s displayed fol lowed by a pop up menu Tap Rename The file name is highlighted Type a new name 4 4 3 Copying a File Press and hold the stylus on the file you want to copy A ring of dots is displayed f...

Страница 84: ...Menu to display the commands associated with it and then tap on the command you want to execute 4 5 1 Pop Up Menus Pop up menus are available in many screens and programs They offer quick access to a...

Страница 85: ...ociated with the softkey for example in the sample screen above the Menu softkey displays the commands associated with Word Mobile The View softkey lets you to tailor how the Word document will be dis...

Страница 86: ...ample above the FN ORANGE key is active To distinguish a locked modifier key a key that has been locked on from a modifier key that is only active until the next key is pressed locked keys are encircl...

Страница 87: ...rogram Minimizing an Application Tap on the X button in the upper right corner of an application screen to minimize the application Note that sometimes an OK button is displayed Switching Between and...

Страница 88: ...Task To shut down an application highlight the program in the list and tap on the End Task softkey in the taskbar at the bottom of the screen End All Tasks To shut down all applications tap on the Men...

Страница 89: ...on tents or Search softkeys Keep in mind that help is not always available 4 10 Entering Text You can enter text using either the soft keyboard or the hand held unit keyboard You can also use the Tran...

Страница 90: ...in the keyboard to enter text in your document To switch to a numeric keyboard Tap on the 123 key in the upper left corner of the soft keyboard Tap on this key again to return to the standard keyboar...

Страница 91: ...ough the text you want to select and wait a few seconds until the Transcriber highlights the text Once the text is highlighted write the new text that is to replace the highlighted information or Pres...

Страница 92: ...Bar to display the Character Recognizer screen This screen provides a visual demonstration of how to enter letters that will be recognized Tap on a character in the soft keyboard for a demonstration o...

Страница 93: ...Second write only lowercase letters with your stylus Tap on the icon in the Recognizer Icon Bar to display the Character Recognizer screen This screen provides a visual demonstration of how to enter l...

Страница 94: ......

Страница 95: ...87 5 5 3 2 Sharing Documents with Your PC 87 5 5 4 PowerPoint Mobile 87 5 6 Demo Scanner 88 5 7 File Explorer 88 5 8 Getting Started 89 5 9 Imager Demo 89 5 10 Internet Sharing 89 5 10 1 Creating an I...

Страница 96: ...7 5 14 Messaging 98 5 14 1 Folders 98 5 14 2 Synchronizing E mail with Outlook 99 5 14 3 Changing Synchronization Settings 100 5 15 Remote Desktop Mobile 101 5 15 1 Connecting to a Terminal Server 101...

Страница 97: ...Tabs 5 2 Games NEO is equipped with a few standard games Bubble Breaker and Solitaire should you feel the need to pass the time 5 3 ActiveSync For PCs using the Microsoft Windows XP operating system A...

Страница 98: ...regular functions Use your stylus to tap on the calculator buttons 5 5 Office Mobile This icon contains the following abridged Microsoft programs Excel Mobile OneNote Mobile PowerPoint Mobile and Wor...

Страница 99: ...new workbook To create a workbook In Excel Mobile tap Menu File New 5 5 1 1 Workbook Components If the toolbar is not visible tap on View Toolbar You can enter data work with rows and columns and crea...

Страница 100: ...es Prepare information in OneNote on your PC and then transfer it to NEO where it will be available to you wherever you and your hand held go Setting Up a Partnership Start Office OneNote and ActiveSy...

Страница 101: ...ext Tap on Finish to begin the partnership between NEO and the PC Now you ll be able to pass notes back and forth between your PC and hand held Creating A Note If Office Mobile is listed in your Start...

Страница 102: ...ndows Office application Format Tapping on this command lists the formatting options you can apply to your note Bold Italic Underline Strikethrough and Clear All Insert Picture Tapping on this command...

Страница 103: ...to listen to your voice message To discard your message tap on X the Cancel button To save your message tap on OK An audio icon is displayed in your note You can tap on it to listen to your message Sy...

Страница 104: ...mind however that Word Mobile is designed for a small screen and limited memory Tap on Start Programs Office Mobile Word Mobile If Office Mobile is listed in your Start menu tap on Start Office Mobile...

Страница 105: ...created on a PC are recognized by NEO However some formatting is lost when a Word document is converted to a Word Mobile document This loss also occurs when you open a doc file and change it on NEO 5...

Страница 106: ...test your scanner Tap on Start Programs Demo Scanner icon A Demo Scanner dialog box is displayed Tap on the Settings button to display the Scanner Settings dialog box Use this dialog box to tailor the...

Страница 107: ...ve established a data connection on NEO 5 10 1 Creating an Internet Connection Follow the steps in this section only if you have not already setup an Internet connection You ll need the following info...

Страница 108: ...ctiveSync USB connection On your PC open the ActiveSync window and click on File Connection Settings Disable Allow USB connection by clicking in the checkbox to the left of this option Connect NEO to...

Страница 109: ...Tap on Start Programs Notes to launch this application If a blank Note like the sample screen here is not displayed tap on New in the softkey bar 5 11 1 Creating a Note Choose an entry mode for your...

Страница 110: ...eep them as is if you like You can also teach NEO to recognize your handwriting and convert it into printed text To convert handwriting into text Tap on the pen tool and compose a note using your styl...

Страница 111: ...rsions Tap on the correct word in the list If the correct word is not listed as is the case in the sample screen above tap on the soft keyboard icon to display the soft keyboard and type the correct w...

Страница 112: ...ing into the microphone on NEO or move the hand held to within a few feet of the source of the sound you want to record Tap on the Stop button when you ve completed your recording Tap on OK to save th...

Страница 113: ...in NEO help file to synchronize your note 5 12 Pictures Videos Pictures Videos is a photo and video viewing program This program also provides a number of tools that allow you to crop adjust picture...

Страница 114: ...p menu Tap on Delete Confirm your choice when prompted 5 12 4 Editing a Photo Tap a thumbnail photo to open it Tap on Menu Edit The Rotate command is now displayed in the softkey bar Additional editin...

Страница 115: ...79 5 13 1 Browsing Web Sites There is little difference between the standard Internet Explorer found on your PC and that found on NEO sometimes referred to as Pocket Internet Explorer You can enter U...

Страница 116: ...on your PC 5 14 Messaging The Messaging program is used to send and receive e mail on NEO To send and receive e mail you ll need to synchronize your PC or connect to a Post Office Protocol 3 POP3 or...

Страница 117: ...ounts the folders you create and the messages you move are reflected on the server making messages available any time whether you connect to your mail server from NEO or your PC 5 14 2 Synchronizing E...

Страница 118: ...ll be transferred to the Messaging program on NEO 5 14 3 Changing Synchronization Settings In ActiveSync on your PC double tap the E mail item in the Sync Options tab Tap on the Select Folder button A...

Страница 119: ...Tap on Start Programs Remote Desktop Mobile In the Server dialog box type the Terminal Server name or TCP IP address or choose a server from the drop down menu Tap on Connect In the Remote Desktop Con...

Страница 120: ...em for which you re looking To narrow your search tap on the Type drop down menu and choose from a list of pre existing programs To search through all files leave this option at All Data 5 17 Task Man...

Страница 121: ...io 5 20 Windows Live This applet provides access to a group of Windows Live services from NEO such as Hotmail Messenger Maps and so on Tapping on this icon displays a setup wizard that will walk you t...

Страница 122: ......

Страница 123: ...g 116 6 4 5 Scancode Remapping 117 6 4 6 Lock Sequence 120 6 5 Input 121 6 5 1 Input Method Tab 121 6 5 1 1 Word Completion 125 6 5 2 Options Additional Choices 125 6 6 Lock 126 6 7 Menus 127 6 7 1 St...

Страница 124: ...ting 139 6 21 GPS Global Positioning System 139 6 22 Manage Triggers 141 6 22 1 Trigger Mappings 142 6 22 1 1 Add and Edit Trigger Mapping 143 6 23 Managed Programs 144 6 24 Memory 145 6 24 1 Main Tab...

Страница 125: ...A Profile 166 6 32 3 Viewing a Profile 167 6 32 4 Deleting a Profile 168 6 33 TweakIT 169 6 33 1 Advanced Interface And Network Settings 170 6 33 2 Advanced Services Settings 171 6 33 3 Radio Features...

Страница 126: ...ager Icon 194 6 40 1 Flight Mode Disabling Wireless Components 194 6 40 2 Setting Up A Network Card 195 6 40 3 Network Adaptor Cards 195 6 40 4 Changing Network Card Settings 196 6 40 5 VPN Connection...

Страница 127: ...ded into three tabs Personal System and Connections Tap on Start Settings to display this screen Figure 6 1 Settings Tabs 6 2 Personal Settings The Personal tab allows you to tailor the general behavi...

Страница 128: ...applica tion from a single key press To assign an application key Tap the Add button Press the key you want to use to launch an application If an unsupported key is pressed a message appears on this s...

Страница 129: ...parameters you can leave the Data field blank If for example you want to assign an application launch key to launch the Word Mobile application you can leave this field blank If you want to assign an...

Страница 130: ...ore first repeat bar to the left decreases the amount of time an Up Down key must be held before it starts repeating sliding the bar to the right increases this delay time Sliding the Repeat rate bar...

Страница 131: ...t Lock OneShot Lock allows you to combine these functions When you choose this option and you press the modifier key once it remains active only until the next key is pressed If you press the modifier...

Страница 132: ...DEL FN BLUE BKSP function keys and arrow keys Each macro can have up to 200 programmable characters or positions To create a macro Recording and Saving a Macro In the Macro menu highlight a macro key...

Страница 133: ...ro sequence tap on the Stop Recording button A new screen Verify Macro displays the macro sequence you created Tap on the Save button to save your macro Your macro key sequence is listed in the Macro...

Страница 134: ...xample a U 0061 indicates that the character a is represented by the Unicode value 0061 and so on Keep in mind that Unicode configura tions are represented as hexadecimal rather than decimal values Al...

Страница 135: ...has a unique scancode that is mapped to a virtual key a function or a macro Scancode Remap ping allows you to change the functionality of any key on the keyboard A key can be remapped to send a virtu...

Страница 136: ...tab displays the Scancodes in hexadecimal If the scancode is remapped to a virtual key that virtual key is displayed in the next column la belled V Key A virtual key that is Shifted or Unshifted is di...

Страница 137: ...s dependent on whether the shift state is on or off at the time the virtual key is sent When Function is selected a list of valid functions appears in the dialog box When Macro is selected the macro k...

Страница 138: ...the checkbox next to Enable key lock sequence Tap in the checkbox next to Keyboard locked at startup In the Key sequence drop down menu choose the key sequence you need to type to unlock the keyboard...

Страница 139: ...ognizer letter recognizer and transcriber along with voice recording options 6 5 1 Input Method Tab A drop down menu next to Input method allows you to tailor your methods of input Block Recognizer Ke...

Страница 140: ...on the soft keyboard If you enable Use gestures for the following keys these keys are removed from the soft keyboard Gestures are handwriting shortcuts for the keyboard keys Letter Recognizer Options...

Страница 141: ...ons are available to you Quick Settings Inking and Advanced Quick Settings The Quick Settings tab allows you choose the writing direction the icons indicate direc tion In addition you can choose to en...

Страница 142: ...Add space after automatically adds a space after each word you write The Pen option allows you to choose the line Width and Colour Finally tapping on Match Letter Shapes to your writing displays a scr...

Страница 143: ...option displays what it assumes is the complete word saving you having to type the word in its entirety You can also tailor how and when you want word sug gestions made 6 5 2 Options Additional Choice...

Страница 144: ...t if device unused to turn on password protection Choose the amount of time that the unit can remain idle before you are prompted to enter your password In the Password type drop down menu choose the...

Страница 145: ...the items that will be listed in your Start menu In the Start Menu dialog box tap on the items you want to appear in your Start menu The checked items will be listed in your Start menu 6 8 Owner Info...

Страница 146: ...n NEO will emit sounds 6 9 1 Sounds Tap on Start Settings Tap on the Sounds Notifications icon Tap in the checkboxes and radio buttons to enable the event s that will cause your unit to emit a sound 6...

Страница 147: ...of reminder a special sound a message or a flashing light from the drop down menu next to Play sound 6 10 Today Screen This option allows you to tailor the appearance of the Today screen the desktop s...

Страница 148: ...Today screen Tap in the checkbox to the left of the item s you want displayed in the Today screen To rearrange the list of items highlight the item you want to move up or down and tap on the Move Up o...

Страница 149: ...ce with the same name is already connected you ll need to assign a new name here Copyrights The Copyright tab lists the copyright information for the software loaded on NEO 6 13 About Device Tapping o...

Страница 150: ...you to tailor NEO backlight behaviour to best preserve battery life To define how long the backlight should stay on when NEO is not in use tap in the checkbox to the left of Turn off backlight if dev...

Страница 151: ...the backlight when the hand held is using external rather than battery power 6 14 3 Intensity This tab is used to adjust the light intensity of the display backlight and the keyboard back light Slidin...

Страница 152: ...ification authority that the hand held explicitly trusts NEO has certificates already preinstalled in the unit Personal certificates establish your identity intermediate certificates as the name sugge...

Страница 153: ...list help identify intermediate certification authorities Root Certificates To view details about a certificate who issued the certificate to whom it was issued the issue date and the expiry date tap...

Страница 154: ...connect automatically 6 16 Clock Alarms Located under Start Settings System tab the Clock Alarm icon allows you to set the current date and time and it allows you to set up to three alarms 6 17 Custo...

Страница 155: ...Status This tab indicates the status on off of the tools Tapping on Browse logs displays error logs for your review 6 18 2 Settings Choose an Error Level from the drop down menu To change the location...

Страница 156: ...Log utility is used to log network traffic When you tap on the Start button debug data is collected so that if necessary it can be forwarded to a Psion Teklogix technician for evaluation 6 19 Encrypti...

Страница 157: ...orting Error Reporting allows you to enable or disable Microsoft error reporting prompts 6 21 GPS Global Positioning System With a Global Positioning System GPS receiver you can locate your exact posi...

Страница 158: ...receiver Tap on the Hardware tab and choose a GPS hardware port and the appropriate Baud rate Windows Mobile 6 1 automatically manages access to the GPS receiver However some programs may not work wi...

Страница 159: ...map viewing program is not included with your hand held 6 22 Manage Triggers Manage Triggers allows you to configure how bar code scanners and other devices such as RFID readers are triggered You can...

Страница 160: ...Mappings for drivers or applications that are not currently active are not normally displayed By checking this checkbox all mappings both active and inactive are displayed Add Tapping this button brin...

Страница 161: ...cted Add Key Only existing trigger sources are shown in the Source combo box To add a new source to this list tap on the Add Key button A dialog box pops up allowing you to select the key board key to...

Страница 162: ...event will occur If a mapping with the Up down type has also been configured for the same source it will only receive the first set of trigger events Module To Trigger This identifies the driver or a...

Страница 163: ...ssic User Manual 145 Tap on Start Settings System tab Managed Programs icon 6 24 Memory This applet allows you to view memory use and storage card memory allocation Note Your system administrator can...

Страница 164: ...24 1 Main Tab This tab lists the memory allocated for file and data storage and for program storage 6 24 2 Storage Card The Storage Card screen indicates the total storage card or RAM disk memory alon...

Страница 165: ...Advanced Tab The Advanced tab allows you to manage battery consumption On Battery Power When NEO is operating on battery power this option allows you to determine how long the unit will remain on whe...

Страница 166: ...u to determine the number of minutes the unit will remain on when not in use Tap in the checkbox to the left of On external power to enable this option Tap in the drop down menu to choose the number o...

Страница 167: ...to enable provide power to the device s installed in your unit Tapping on OK activates your selections 6 25 5 Card Slots Slot Power Status Selecting the card slot listed in this dialog box supplies po...

Страница 168: ...attery so RAM can be backed up for a longer period of time Important Selecting Maximum backup time reserves approximately 20 of the battery capacity for memory backup Once the battery is drained the s...

Страница 169: ...o choose your language and region Once you ve selected a language and region you may need to adjust the way numbers cur rency the time and the date appear in NEO Tap on the tab associated with each of...

Страница 170: ...ograms icon displays a screen listing the programs that can be removed from your unit To remove a program highlight it and then click on the Remove button 6 28 Screen This icon allows you to change sc...

Страница 171: ...s a number of options to manage these Tap on Start Settings Tap on the System tab and then the Task Manager icon the Task Manager screen is opened To shut down an application highlight the program in...

Страница 172: ...highlighted application active End All Tasks Shuts down all applications listed View Allows you to list either all running applications or all processes Sort By Allows you to sort active applications...

Страница 173: ...ipal uses of the applet are to decode bar codes and to capture images To launch this applet Tap on Start Settings System tab and then tap on the Teklogix Imagers icon 6 30 1 Imager Demo An Imager demo...

Страница 174: ...and then tap on the Imager icon 6 31 Teklogix Scanners Settings The Teklogix Scanners icon in the Settings menu provides access to dialog boxes in which you can tailor bar code options and choose the...

Страница 175: ...the double click parameters and the display options associated with your scanner 6 31 2 1 Double Click Parameters Click Time msec This parameter controls the maximum gap time in milliseconds for a dou...

Страница 176: ...Scan Indicator When this parameter is enabled the laser warning logo appears on the display whenever the scanner is activated Scan Result Time sec The value assigned to the Scan Result Time sec parame...

Страница 177: ...859 1 Latin 1 Codepage Tapping on this option displays a window in which you can define the code page NEO will use If you choose Default Local ASCII the code page of the local OS is used For example i...

Страница 178: ...ions Tab 160 NEO Hand Held with Windows Mobile 6 1 Classic User Manual if all rules specified in the case are successful if a rule within a case fails the entire case fails In the Translation tab tap...

Страница 179: ...displayed in which you can define the rule 6 31 3 1 Case Rules The case rules are defined as follows No rule ignored Match at index matches the match string at a specified index Match and replace at i...

Страница 180: ...ettings System tab Tap on the Total Recall icon Note Keep in mind that the effects of previously applied rules must be taken into account when creating subsequent rules For example if the bar code siz...

Страница 181: ...Create Profile button to begin the process Profile Information This dialog box displays the default profile name the type of restore AutoRestore or Man ualRestore and the possible storage destination...

Страница 182: ...a backup that is manually restored by the operator Finally if you want to choose another location for your backup file optional tap on the button to the right of the Profile Location field Navigate t...

Страница 183: ...Advanced Backup Choosing Advanced Backup allows you to define what you would like to include in your backup profile Tap in the checkbox next to the option s listed here to tailor what you want include...

Страница 184: ...backup progresses When the backup is complete the last item in the list indicates the location and name of the backup profile 6 32 2 Restoring A Profile To manually restore a profile In the Total Rec...

Страница 185: ...screen click on the Next button In the final screen click on Restore Profile to restore the files to NEO 6 32 3 Viewing a Profile To view a profile In the Total Recall home screen tap on View Profile...

Страница 186: ...1 Classic User Manual In the Profile view screen click on the Next button In the final screen click on View Details to display the backup file on your hand held 6 32 4 Deleting a Profile In the Total...

Страница 187: ...u re certain that you want to delete this file Tap on Yes to delete the file 6 33 TweakIT Tap on Start Settings System tab Tap on the TweakIT Settings icon This utility allows you to tweak or adjust A...

Страница 188: ...Settings Enable IPv6 This option allows you to enable Internet Protocol version 6 that has been published to use 128 bit IP address replacing version 4 Modem Logging When this option is enabled NEO l...

Страница 189: ...6 1 Classic User Manual 171 6 33 2 Advanced Services Settings SNTP Simple Network Time Protocol Server The SNTP Server Name typed in this dialog box is used to synchronize NEO time with that of the t...

Страница 190: ...strong signal strength Setting AP Density to Low will cause the radio to wait until the signal strength is significantly low before attempting to connect to another Access Point Depending on your site...

Страница 191: ...detected to reduce power consumption Another benefit is that when Radio Power Management is enabled even when no activity is de tected the access point does not disassociate the hand held 6 33 4 User...

Страница 192: ...egistry keys and values Careless registry editing can cause irreversible damage to NEO 6 34 Windows Update This program checks for software updates and if found downloads updates to NEO You can choose...

Страница 193: ...of the connectivity icons in the Navigation Bar along the top of the screen are hotkeys that offer shortcuts to connection setups Tapping on a hotkey displays a bubble that pro vides information about...

Страница 194: ...een will automatically connect to a network that s already been set up Tapping on Settings in the network bubble will launch the Wireless Manager applet If you prefer not see this notification bubble...

Страница 195: ...luetooth equipped devices come within range of each other they can establish a connection Because Bluetooth utilizes a radio based link it does not require a line of sight connection in order to commu...

Страница 196: ...his tab lists all paired devices and their corresponding services The format of the name is Device Name Service Name Additional information may appear in this screen such as the Port Numbers for Seria...

Страница 197: ...PP defines two roles a Push Server and a Push Client Push Server is the device that provides an object exchange server Push Client is the device that pushes and pulls objects to and from the Push Serv...

Страница 198: ...volume can be adjusted 6 37 2 Device Tab This tab discovers and displays Bluetooth devices 6 37 2 1 Discovering and Removing Devices Scan discovers Bluetooth devices in range of NEO and lists them in...

Страница 199: ...Computer from this menu only computers within range of NEO are listed in the Device tab Choosing All lists all detected devices 6 37 2 3 Device Pop up Menu The Device pop up menu allows you to pair a...

Страница 200: ...e device in pairing mode Choose the Devices tab and Scan for devices in your area When the scan is complete tap on the device to which you want to pair In the pop up Device menu tap on Pair An Authent...

Страница 201: ...e to activate it Click on Done The sample dialog box below is an example of a service requiring additional information in this case the Serial Port Service This dialog box offers a number of additiona...

Страница 202: ...ese services to be enabled and configured There are three server services available Serial Scanner and OBEX OPP Serial server enables the Serial Port Profile server a Serial Port can be selected from...

Страница 203: ...scans for other de vices The higher the value assigned the greater the scan duration Printer Port allows you to choose a port for the printer Keep in mind that you need to choose a port from the Selec...

Страница 204: ...phone are enabled turned on and that the hand held and phone are within 10 metres of each other Both should be discoverable 1 Tap on Start Settings and then tap on the Connections tab 2 Tap on the Con...

Страница 205: ...ext 14 In the User name Password and Domain fields enter the logon information for this connection and tap on Finish You re ready to use the Bluetooth phone connection for example to send and receive...

Страница 206: ...mber of bits for the data going through this port Possible values are 4 5 6 7 8 Parity This parameter determines the type of parity checking used on the data going through the port The options are non...

Страница 207: ...speed connection when using a modem disable this option tap in the checkbox to the left of this option Wait For Credit Card If you are paying for calls with a credit card enter the number of seconds...

Страница 208: ...owing information from your ISP or network adminis trator telephone number password domain name and TCP IP settings If your hand held unit does not have access to a mobile phone network insert a modem...

Страница 209: ...a modem tap on your modem type 5 Tap on the Next button 6 In the next screen enter the phone number exactly as you want it dialed If for example you need to dial 9 for an outside line enter 9 at the b...

Страница 210: ...Modem Settings in the next section Note Generally you will not need to change any of the Advanced settings For information about the Advanced settings refer to Advanced Modem Settings on page 193 Cha...

Страница 211: ...Tab If your server assigns IP addresses dynamically you will not need to change these settings Servers requiring assigned IP addresses may also need a way to map computer names to IP addresses NEO sup...

Страница 212: ...mponents when for example you are taking your hand held onto a plane where wireless connections need to be shut down Tap on the Disable All button To enable wireless components Tap on Enable All To di...

Страница 213: ...or Cards When the network card is inserted in your unit for the first time the Network Settings screen is displayed automatically so that you can configure the card If it does not appear or if you wan...

Страница 214: ...Configure Network Adapters dialog box tap on the drop down menu below My network card connects to choose either The Internet or Work 6 40 5 VPN Connection Setup A VPN connection provides a secure conn...

Страница 215: ...the Advanced settings refer to Advanced Modem Settings on page 193 for details about this tab Tap on Finish Launch a program like Internet Explorer to activate the connection The VPN connec tion will...

Страница 216: ...the pop up menu 6 40 6 2 Changing a Connection Setting Name Your hand held has two sets of connection settings My ISP and My Work Network If you want to change one or both of these options to somethi...

Страница 217: ...e network connec tions corporate networks while My ISP settings are used for Internet network connections When you use programs such as Internet Explorer NEO automatically connects using private netwo...

Страница 218: ...on proxy server name server type port type of Socks protocol used and the user name and password Tap Start Settings Tap on the Connections tab followed by the Connections icon Under My Work Network ta...

Страница 219: ...40 8 1 Changing Advanced Proxy Server Settings To change advanced settings such as the port number or proxy server type tap on the Advanced button Tap on the proxy type you want to change For the app...

Страница 220: ...anual 6 41 Wireless Statistics Tap on Start Settings Connections Wireless Statistics icon to display the communi cation statistics of your wireless connection along with the radio card name MAC addres...

Страница 221: ...216 7 5 Desktop Docking Station PX3001 216 7 5 1 Desktop Docking Station Setup 217 7 5 2 Charging a Battery Installed in NEO 217 7 5 3 Charging a Spare Battery 218 7 5 4 Battery Charge Duration 218 7...

Страница 222: ...cking Station 223 7 8 4 Network Access 223 7 8 4 1 Network Addressing 224 7 8 5 Battery Charging LED Behaviour 224 7 8 6 Troubleshooting 224 7 8 6 1 Network Link Unsuccessful 224 7 8 6 2 NEO LED Does...

Страница 223: ...ing Accessory Model Number Hand Strap PX3024 Wrist Strap with stitched stylus holder PX3028 Carrying Holster compatible with pistol grip PX3020 Carrying Case leather with protective key cover and clip...

Страница 224: ...the lanyard attached to the quick release buckle through one of the accessory attachment points the eyelets on the either side of the base of the unit You may find Figure 7 2 useful as a reference Fi...

Страница 225: ...Manual 207 To attach the hand strap align the eyelet at the top of the hand strap with the threaded insert near the corner of the hand held and secure it in place using the M2x6 screw included with th...

Страница 226: ...osition the belt clip adaptor plate so that the thicker folded end aligns with the angled scanner section on the back of NEO as illustrated in Figure 7 5 6 Stylus Holder Note In addition to the hand s...

Страница 227: ...Plate for Installation To attach the belt clip adaptor plate to NEO thread the screws through the eyelets into the metal inserts on NEO Figure 7 6 Attaching The Adaptor Plate With the adaptor plate at...

Страница 228: ...attach to NEO without tools or screws For added convenience the pistol grip is equipped with a stylus inserted in the handle Remove the expansion port cover on the back of NEO Store the cover in the...

Страница 229: ...n a 3300 mAh lithium ion battery pack Model No WA3006 Pistol Grip Thumb Latch Release Stylus Note To maintain proper operation ensure that the expansion port and the pistol grip con tacts are dry and...

Страница 230: ...rtain that the adaptor connector and NEO docking port are free of dust or any other debris before connecting them A slot on the side of the adaptor is provided to accommodate the carrying strap Thread...

Страница 231: ...Figure 7 8 Threading Wrist Strap Through Adaptor Thread Carrying Strap Through Slot in Adaptor Slot to Accommodate Carrying Strap...

Страница 232: ...ntly snap the adaptor into place 7 3 2 Micro USB Adaptor Model No PX3054 This adaptor is equipped with a micro USB port along with a DC IN socket When attached to NEO the adaptor allows you to connect...

Страница 233: ...hrough the slot on the adaptor See Figure 7 8 on page 213 for details Align the docking port on the base of NEO with the adaptor and gently snap the adaptor into place 7 4 Charging Options Psion Teklo...

Страница 234: ...mperature between 18 C and 25 C 64 F to 77 F for maximum performance After unpacking your unit Visually inspect the docking station for possible damage Install the IEC power cord and apply power 7 4 2...

Страница 235: ...ind this instruction sheet on Teknet Go to www psionteklogix com Tap on Teknet and enter your user name and password If you re not already a member you will be asked to register free of charge 7 5 2 C...

Страница 236: ...contacts on the battery with the contacts in the spare battery charge well 7 5 4 Battery Charge Duration A NEO inserted in the desktop docking station requires 3 hours to charge the battery to 75 capa...

Страница 237: ...or there is a power supply problem 7 5 6 2 NEO Power LED Does Not Light Up Ensure NEO is fully seated in the dock Verify that there is power from the mains outlet Remove the power cable from the docki...

Страница 238: ...in the desktop docking station Insert the micro USB connector into the docking station connector Attach the other end of the cable into a USB port on the PC 7 5 8 Linking NEO to an Ethernet Network A...

Страница 239: ...cts are not contaminated 7 6 AC Wall Adaptor Model No PX3012 The AC wall adaptor available for your docking station allows you to operate your hand held using AC power while charging the battery inser...

Страница 240: ...tach the micro USB adaptor model number PX3054 to the base of NEO Refer to Micro USB Adaptor Model No PX3054 on page 214 if you require further details The desktop docking station is also equipped wit...

Страница 241: ...ablished a green LED is illuminated next to the RJ45 connector 7 8 3 Inserting a NEO in the Quad Docking Station Slide NEO into the cradle portion of the quad dock until lightly latched The LED on the...

Страница 242: ...durations are independent of the number of NEOs docked 7 8 6 Troubleshooting The indicators applications and drivers required to use and monitor the docking station are installed on NEO no indicators...

Страница 243: ...s achieved or six seconds have elapsed 7 9 2 Scanning Techniques NEO s unique ergonomic design allows you to hold the hand held at a comfortable angle while scanning Ensure that the scanner beam is no...

Страница 244: ...scanner window for dirt fogging or damage 7 10 Bluetooth Peripherals NEOs equipped with Bluetooth radios make it possible to communicate with a variety of Bluetooth peripherals including GSM GPRS hand...

Страница 245: ...cation 231 8 1 4 Bar Code Applications 231 8 2 NEO Radio Specifications 232 8 2 1 802 11b g Radio 232 8 2 2 Bluetooth Radio 232 8 3 Scanner Imager Specifications 233 8 3 1 SE 955HP Specifications 233...

Страница 246: ......

Страница 247: ...issive with touchscreen Colour 240 x 320 graphic TFT Passive stylus or finger operation LED backlit keyboard Keyboard 48 key Alpha Numeric 26 key Numeric Ergonomically enhanced for ambidextrous one ha...

Страница 248: ...to 140 F Relative Humidity 5 to 95 RH non condensing Storage Temperature 20 C to 60 C 13 F to 140 F Shock and Vibration Random vibration 1 m2 s3 5 to 200 Hz 0 5 m2 s3 200 500 with duration of 100 min...

Страница 249: ...r 6 Office Mobile ActiveSync Open TekTerm ANSI TESS terminal emulations IBM 3270 IBM 5250 HP 2392 MCC Naurtech Stay Linked PTX Connect MCL 8 1 3 Wireless Communication On board IEEE 802 11b g CCX Cert...

Страница 250: ...1d The radio will associate with any 802 11d com pliant AP regardless of what channel is in use RX Sensitivity 86 dBm typ 11 Mbps 82dBm 6 Mbps 69 dBm 54 Mbps Data Rates 802 11g 6 9 12 18 24 36 48 54 M...

Страница 251: ...Imager Specifications 8 3 1 SE 955HP Specifications Scan Angle 47 3 default 35 3 reduced Scan Rate 104 12 scans sec bi directional Scan Pattern Linear Wavelength 650nm Input Voltage 3 0 5 5 VDC 10 Inp...

Страница 252: ...81 cm 74 93 cm 20 mil 1 75 in 35 5 in 4 45 cm 90 17 cm 40 mil 40 in 101 6 cm 55 mil 55 in 139 7 cm dependent on width of bar code Parameter Specification Light Source 617nm Highly Visible LED Scan Ang...

Страница 253: ...tion HHP 5000 Image Sensor 752H x 480 CMOS sensor Motion Tolerance 4 in 10 2 cm per second Rotational Sensitivity 360 Viewing Angle 40 Ambient light Total darkness to 100 000 lux full sunlight Illumin...

Страница 254: ...ation Aimer 5300 3 0 VDC to 5 5 VDC 23 C Operating Temperature 30 to 50 C 34 to 122 F Storage Temperature 40 to 70 C 40 to 158 F Humidity up to 95 RH non condensing at 122 F 50 C Shock 18 shocks of 3...

Страница 255: ..._EXT_POWER Power Input 6 VDC 2 8 A 5 BATT_OUT Not Connected 6 AUDIO_N Not Connected 7 AUDIO_P Not Connected 8 VBUS_5V USB Vbus 5 V 500 mA 9 DOCK_ID Dock Identifier 10 USB_DOCK_D USB Data Negative 11 U...

Страница 256: ...ional data DS2762 3 TH GND Ground 4 B Battery Positive 5 PS Power Switch Sensor POLARITY TAB 6 B Battery Negative PIN Signal Name Function 1 2 5 13 14 15 16 DGND Power Ground 3 USB USB Device port neg...

Страница 257: ...fined preset A preset is a group of exposure and image correction settings Each preset config ures the imager for a specific purpose such as bar code decoding or image capture Presets also allow easie...

Страница 258: ...most popular bar codes and their subtypes The bar code decoding symbology predefined presets define which bar codes can be decoded The bar code decoding camera predefined presets determine how the ba...

Страница 259: ...ditions It is optimized for a normal office lighting about 300 Lux Low light This preset is designed for very dark conditions such as inside a warehouse where the lights are kept low or inside an unli...

Страница 260: ...signed for dark conditions it uses a longer exposure time and includes the flash B 3 Using the Teklogix Imagers Applet B 3 1 Configuring the Image Capture Presets To configure the image capture preset...

Страница 261: ...t B 3 3 Setting the Active Preset An active preset has an A to the right in Figure B 1 on page B 4 the active preset is Low light near To set an active preset Highlight the preset and tap on the Activ...

Страница 262: ...d button In this example the Low light near preset was chosen A screen like the sample below is displayed Type the name of the new preset in the dialog box Tap on OK to save your changes The preset li...

Страница 263: ...ure that it will work reliably it should be as close as possible to the original predefined preset To change a parameter value Highlight the custom preset and tap on the Edit button Tap on the symbols...

Страница 264: ...lick on the parameter Either method toggles between the two available values When you ve completed your edits tap on OK The parameter list is displayed the new value for the changed parameter is shown...

Страница 265: ...er predefined or custom is marked as active The top portion of the window displays the bar code decoding camera presets B 4 1 Selecting a Camera To select a camera Tap on the Camera Presets drop down...

Страница 266: ...on the View button The associated preset window is displayed Tap on the sign to expand one of the lists so that you can view the parameter settings B 4 4 Creating a Custom Preset A new custom preset i...

Страница 267: ...preset appears at the end of the list It is marked as read and write B 4 5 Modifying a Custom Preset The parameter values in a custom preset can be modified It is recommended that very few changes be...

Страница 268: ...r that toggles between two values such as on or off and enabled or disabled Highlight the parameter and then press the SPACE key or double click on the parameter Either method toggles between the two...

Страница 269: ...ding tab Figure B 3 Viewing Bar Code Decoding Symbologies B 4 8 Setting the Active Preset An active preset has an A to the right in Figure B 2 on page B 9 the active preset is De faults To set an acti...

Страница 270: ...the lists so that you can view the parameter settings B 4 10 Creating a Custom Preset A new custom preset is created by modifying a preset either a predefined preset or an ex isting custom preset To...

Страница 271: ...a custom preset can be modified It is recommended that very few changes be made to a custom preset To ensure that it will work reliably it should be as close as possible to the original predefined pre...

Страница 272: ...led or disabled Highlight the parameter and then press the SPACE key or double click on the parameter Either method toggles between the two available values When you ve completed your edits tap on OK...

Страница 273: ...on the Barcoding tab tap on All and then double tap the View button To edit a default preset you must first activate it Tap on My Default and tap on the Activate button an A appears to the right of My...

Страница 274: ...other bar code decoding predefined presets are changed B 4 13 1 Symbology Settings B 4 14 Filter Tab Manipulating Bar Code Data To configure rules for manipulating bar code data Tap on Start Settings...

Страница 275: ...ymbols to expand the lists and view the parameter settings Scroll through the parameter list until you reach the parameter that you want to change For a parameter that can take a range of values Highl...

Страница 276: ...ed When you ve completed your edits tap on OK B 4 15 Translation Tab Configuring Rules Translation rules enable the automatic processing of bar code data Up to 10 cases can be de fined each consisting...

Страница 277: ...tions on adding editing and removing translation rules refer to the Translations Tab on page 159 B 4 16 Advanced Tab B 4 16 1 File Locations for Captured Images To configure the location for saved ima...

Страница 278: ...le Type Choose the Location in which your files will be saved When you have completed all the changes tap on the Save button B 4 16 2 Configuring Triggers Viewing the Trigger Configuration The trigger...

Страница 279: ...d the hardware devices that are configured to use them tap in the checkbox next to Show all modules Adding Editing and Removing Triggers For instruction about adding editing and removing triggers refe...

Страница 280: ...ity of the image being captured For example the value may need to be increased to compensate for larger bar codes with more data encoded or for poor quality images On the other hand the value can be d...

Страница 281: ...his case this parameter should be turned off Check Char Strip If this parameter is set to on check characters if present are not output Concatenation When Concatenation is set to on all decoded Code 3...

Страница 282: ...g check digit s Double tapping on these parameters displays screens in which you can set the minimum and maximum allowable code lengths 0 to 80 B 5 5 EAN 13 Enabled Set this parameter to on to enable...

Страница 283: ...nts are additions to EAN UPC codes These addendums can be 2 or 5 characters in length Usually data from an addendum is a suffix to the main symbol output data Mandatory Enabled When this parameter is...

Страница 284: ...5 8 UPC E Settings Enabled Set this parameter to on to enable UPC E Enabled UPC E1 Set this parameter to on to allow UPC E1 zero suppressed bar code scans Expand This parameter expands the UPC E code...

Страница 285: ...enable Code 93 Minimum and Maximum Length The length of a code refers to the number of characters i e human readable characters in cluding check digit s Double tapping on these parameters displays a s...

Страница 286: ...imum and Maximum Length The length of a code refers to the number of characters i e human readable characters in cluding check digit s Double tapping on these parameters displays a screen in which you...

Страница 287: ...code refers to the number of characters i e human readable characters in cluding check digit s Double tapping on these parameters displays a screen in which you can set the minimum and maximum allowab...

Страница 288: ...aracters i e human readable characters in cluding check digit s Double tapping on these parameters displays a screen in which you can set the minimum and maximum allowable code lengths 1 to 48 B 5 17...

Страница 289: ...ouble tapping on these parameters displays a screen in which you can set the minimum and maximum allowable code lengths 4 to 74 B 5 20 Posi Code Reduced Space Symbology Enable Setting this parameter t...

Страница 290: ...s displays a screen in which you can set the minimum and maximum allowable code lengths 1 to 2750 B 5 24 2D Micro PDF 417 Enabled Set this parameter to on to enable 2D Micro PDF 417 Minimum and Maximu...

Страница 291: ...ull ASCII character set below ASCII 128 Up to 49 alphanumeric characters or 81 numeric characters can be encoded into two to eight rows Each row is divided by a separator bar The top and bottom of the...

Страница 292: ...th of a code refers to the number of characters i e human readable characters in cluding check digit s Double tapping on these parameters displays a screen in which you can set the minimum and maximum...

Страница 293: ...PlaNET Enabled Set this parameter to on to enable Postal PlaNET Check Digit Strip If you enable this parameter a check digit is stripped from the decoded bar code data B 5 33 Postal PostNET Enabled Se...

Страница 294: ...on to enable Postal Japanese B 5 38 Postal Kix Enabled Set this parameter to on to enable Postal Kix B 5 39 Postal Korean Enabled Set this parameter to on to enable Postal Korean B 5 40 Postal Royal...

Страница 295: ...h NEO Decoded internal or Decoded Intermec ISCP The symbologies listed change to reflect the scanner you choose and the bar codes it supports Keep in mind that some bar code types are only available w...

Страница 296: ...a value of 0 msec 200 msec or 400 msec A value of 0 zero disables the target dot Laser On Time The value assigned to this parameter determines how long the laser will remain on when the scan button or...

Страница 297: ...or a serial communication In Low Power mode the scanner is in a standby state drawing minimal power until a trigger pull or serial communication wakes it Keep in mind that while this option is more su...

Страница 298: ...es of codes must be successfully read twice before being decoded Linear security level 3 specifies that code types other than the following must be success fully read twice before being decoded The fo...

Страница 299: ...selected the code ID character is inserted between the prefix and the decoded symbol When you double tap on this parameter a dialog box is displayed in which you can choose a transmit code None AIM or...

Страница 300: ...symbols that were not encoded using ECIs If this parameter is set to off and a symbol that was encoded using an ECI escape is scanned the scanner transmits the ECI escape followed by the uninterpreted...

Страница 301: ...can define the code length that will be decoded by your scanner Choosing One discrete length allows you to decode only those codes containing a selected length Choosing Two discrete lengths allows you...

Страница 302: ...level of between 1 and 3 Length Restriction The parameters in this sub menu allow you to define the length of the bar codes that will be decoded using either the Field Size parameter or the Minimum Si...

Страница 303: ...rmines the number of characters that will be removed from the begin ning of the bar code before the prefix character is added Strip Trailing The value entered in this parameter determines the number o...

Страница 304: ...ed in which you can enter a decode performance level of between 1 and 3 Length Restriction Refer to Length Restriction on page C 8 for details Add Remove Data Refer to Add Remove Data on page C 9 for...

Страница 305: ...are considered part of the symbol Add Remove Data Refer to Add Remove Data on page C 9 for details C 2 10 UPC E Enabled UPC E Set this parameter to on to allow UPC E bar code scans Enabled UPC E1 Set...

Страница 306: ...ementals are additionally appended characters 2 or 5 Double tapping this parameter displays a list of options If Ignore is chosen UPC EAN is decoded and the supplemental characters are ignored If Deco...

Страница 307: ...L2 Lengths for Code 93 can be set for Any length Length within a range One discrete length or Two discrete lengths The length of a code refers to the number of characters i e human readable characters...

Страница 308: ...Length within a range allows you to decode a code type within a specified range from 5 to 55 CLSI Editing When enabled this parameter strips the start and stop characters and inserts a space after th...

Страница 309: ...parameter is set to One it is assumed that the last digit is a check digit If Check Digits is set to Two it is assumed that the last two digits are check digits Transmit Check Digit If this parameter...

Страница 310: ...decode a code type within a specified range from 4 to 14 Check Digit Verification When enabled this parameter checks the integrity of an I 2 of 5 symbol to ensure it complies with a specified algorit...

Страница 311: ...structure In order to make the GTIN 12 or GTIN 13 a 14 digit data structure a leading zero or zeros is filled to the left of the GTIN Enable GS1 DataBar Omni Expanded Limited GS1 DataBar Omni and GS1...

Страница 312: ...th Restriction on page C 8 for details Add Remove Data Refer to Add Remove Data on page C 9 for details C 2 20 Micro PDF 417 Enable Setting this parameter to on enables Micro PDF 417 bar code scanning...

Страница 313: ...odeword is 910 or 911 Length Restriction Refer to Length Restriction on page C 8 for details Add Remove Data Refer to Add Remove Data on page C 9 for details C 3 Decoded ISCP Tap on the Scanner drop d...

Страница 314: ...hen a bar code is scanned a successful decode restores normal blinking When you double tap on this parameter a dialog box is displayed in which you can choose a value of 30 sec 1 min 2 min or 3 min Pa...

Страница 315: ...pe characters The combination of an escape character and the next character is converted to an equivalent ASCII character Reading Range Determines the reading distance from which a bar code can be suc...

Страница 316: ...e 128 GS1 128 GS1 128 is the GS1 implementation of the Code 128 barcode specification The former correct name was UCC EAN 128 GS1 128 Identifier GS1 128 Identifier allows the AIM ID C1 for EAN 128 to...

Страница 317: ...will be transmitted as a single code If both codes in a pair are detected they will be concatenated provided that ISBT Concat Any Pair see below is enabled ISBT Concat Any Pair Enabling this paramete...

Страница 318: ...st 3 characters 978 are ignored and the checksum 0 9 X is calculated on the remaining characters Transmit Check Digit If the check digit is to be transmitted with the data this parameter must be enabl...

Страница 319: ...converted to EAN 13 Add Remove Data Refer to Add Remove Data on page C 9 for details C 3 8 UPC E Enabled Set this parameter to on to enable UPC E Enable UPC E1 Set this parameter to on to allow UPC E...

Страница 320: ...the parameter is set to Required and Transmitted the scanner does not accept the main bar code without an addendum Addendum Add on 2 and Addendum Add on 5 Enabling these parameters sets the length of...

Страница 321: ...ta on page C 9 for details C 3 11 Codabar Enabled Set this parameter to on to enable Codabar Start Stop Transmit Codabar can use the following sets of characters as start and stop characters a b c d A...

Страница 322: ...ing check digit s Double tapping on these parameters displays dialog boxes where you can define the code length that will be recognized by your scanner Length Mode You can choose to set L1 as Minimum...

Страница 323: ...human readable characters including check digit s Length Restriction Refer to Length Restriction on page C 8 for details Add Remove Data Refer to Add Remove Data on page C 9 for details C 3 13 Code 1...

Страница 324: ...gorithm of the option you ve chosen to ensure the integrity of the symbol data before transmitting If the data does not contain that algorithm the data is not transmitted Transmit Check Digit If the c...

Страница 325: ...r to on to enable Discrete 2 of 5 Standard 2 of 5 Format This parameter allows you to choose a standard format either Identic on 6 start stop bars or Computer Identics 4 start stop bars Check Digit Ve...

Страница 326: ...rmat to either ASCII or Numeric Minimum Length Minimum lengths for the bar code can be set from 0 to 255 The length of a code refers to the number of characters i e human readable characters including...

Страница 327: ...parameter represent multi level components of a composite symbol Enable CC C and Enable CC AB To activate these components set these parameters to on Linear Transmission Only When Linear Transmission...

Страница 328: ...n on page C 8 for details Add Remove Data Refer to Add Remove Data on page C 9 for details C 3 21 PDF 417 Enabled Set this parameter to on to enable PDF 417 Length Restriction Refer to Length Restrict...

Страница 329: ...if the first codeword is 908 or 909 L5 if the first codeword is 910 or 911 Length Restriction Refer to Length Restriction on page C 8 for details Add Remove Data Refer to Add Remove Data on page C 9 f...

Страница 330: ......

Страница 331: ...ng 53 alarms setting 136 aligning touchscreen 37 All Predefined preset B 2 alpha keys accessing 35 ALT Key 33 appending to bar codes characters 158 App Launch icon 110 ASCII Full Ascii C 21 audio indi...

Страница 332: ...vers tab 184 Bluetooth specs 232 BooSt menu accessing 23 boot reset 23 Built in Devices tab 149 Buttons icon 112 C cable diagrams A 1 calculator 80 calendar 59 categories using 61 creating editing ent...

Страница 333: ...ystem 131 credit card wait for modem setup 189 CTRL Key 33 Custom preset B 1 D Data Bits modem setup 188 data entry modes handwriting 87 typing 87 Data Handling code page 159 Data Matrix 2D B 36 date...

Страница 334: ...folder creating 65 folder deleting 65 folder renaming 65 Full Ascii C 21 Full ASCII decoded scanner C 8 Function keys 34 G Games 79 Glossy surface Predefined preset B 3 Good Scan Beep 158 GPRS bluetoo...

Страница 335: ...e C 2 C 19 LED functions 38 Length Mode C 28 C 30 C 32 Length Restriction bar code scanning C 8 Field Size C 8 Maximum Size C 8 Minimum Size C 8 Letter Recognizer 75 Letter Recognizer options Input Me...

Страница 336: ...d preset B 4 MSI Plessey B 30 C 14 C 28 N name assigning to NEO 131 navigation bar 52 Battery hotkey 53 connectivity hotkey 52 Start button 52 volume control 53 network selecting 199 network card sett...

Страница 337: ...er C 3 Predefined preset B 1 All B 2 Default B 2 B 3 B 4 Glossy surface B 3 Linear B 2 Linear and PDF B 3 Low light B 3 Low power B 3 Matrix B 3 Motion B 4 Postal B 3 Predefined presets B 2 Prefix C 5...

Страница 338: ...e C 8 C 9 Delete Char Set ECIs C 6 Discrete 2 of 5 C 16 Dot Time C 2 double click 157 EAN 8 Zero Extend C 10 ECI Decoder C 6 Enable Bookland C 12 Enable CC AB C 18 C 33 Enable CC C C 18 C 33 Enable TL...

Страница 339: ...bar 67 Soft Scan Timeout 158 Sound setting events 128 Sound settings 128 SPACE Key 34 specifications SE955 scanner 233 802 11b g WLAN radio 232 Start Stop Transmit C 21 C 27 Start button 52 Start Menu...

Страница 340: ...U Unicode Mapping 116 Up_Down tab scrolling adjustments 112 UPC A B 27 C 11 C 25 UPC A Check Digit C 11 UPC A Preamble C 11 UPC E B 28 C 11 C 25 UPC EAN C 12 UPC EAN Shared Settings B 29 C 26 UPC E Ch...

Отзывы: