Configuring the SVP Server 4-11
SVP Server Installation, Setup, & Maintenance Manual - Revision 1
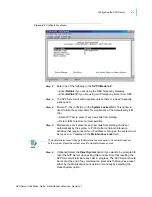
Step 4
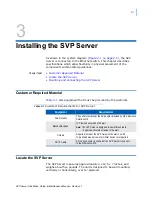
Enter the range of IP addresses this SVP Server may use when acting
as a proxy for the Wireless Telephones in the
First Alias IP Address/
Last Alias IP Address
field.
Step 5
Enter
Y
or
N
in the
Enable H.323 Gatekeeper
field. In certain H.323
protocol systems, the SVP Server may function as a gatekeeper.
Accept the
N
default unless using the H.323 protocol and elect to have
the SVP Server function as the gatekeeper, in which case, enter
Y
.
Step 6
SVP-II Mode: Set to NetLink IP when using the NEC IP telephony server.
Step 7
Ethernet link: The SVP Server will auto-negotiate unless there is a need
to specify a link speed.
Step 8
System Locked: This option is used to take the system down for
maintenance. The default entry is N (No). Set it at
Y
(Yes) to prevent any
new calls from starting. Return to
N
to restore normal operations.
Step 9
Maintenance Lock: The system automatically sets this option to
Y
(Yes)
after certain maintenance activities that require reset, such as changing
the IP address. Maintenance Lock prevents any new calls from starting.
Note that the administrator cannot change this option. It is automatically
set by the system. Reset the system at exit to clear Maintenance Lock.
Reset System: If this option is selected, you will be prompted to reset
the SVP Server upon exiting this screen.
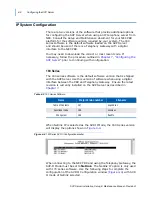
Change Password
If desired, the password to access the SVP Server may be changed.
Select Change Password from the main menu. A window similar to
the following displays
(Figure 4-6)
.
NOTE
All alias addresses must be on the same subnet as the SVP Server and cannot be
duplicated on other subnets or SVP Servers. There is no limit to the number of
addresses that can be assigned, but the capacity of each SVP Server is 500
Wireless Telephones.
NOTE
Resetting the SVP Server will terminate any calls in progress.
NOTE
• Refer to the
“
SVP
Serv
e
r
Configuration” on page 4-6
for an explanation of the
remaining options in this window.
• Refer to the Overview section for an explanation of the master
SVP
Serv
e
r
.
Содержание SVP SERVER -
Страница 2: ......
Страница 8: ...iv Contents SVP Server Installation Setup Maintenance Manual Revision 1 ...
Страница 10: ...vi Figures SVP Server Installation Setup Maintenance Manual Revision 1 ...
Страница 12: ...viii Tables SVP Server Installation Setup Maintenance Manual Revision 1 ...
Страница 16: ...1 4 Introduction SVP Server Installation Setup Maintenance Manual Revision 1 ...
Страница 26: ...2 10 SVP Server Overview SVP Server Installation Setup Maintenance Manual Revision 1 ...
Страница 30: ...3 4 Installing the SVP Server SVP Server Installation Setup Maintenance Manual Revision 1 ...
Страница 52: ...7 6 Troubleshooting via System Status Menu SVP Server Installation Setup Maintenance Manual Revision 1 ...
Страница 54: ...Index 2 SVP Server Installation Setup Maintenance Manual Revision 1 ...
Страница 56: ...SVP Server Installation Setup Maintenance Manual NEC 9120 Revision 1 NEC Business Solutions Ltd ...

