44
4. Using On-Screen Menu
4-1. Basic operations of the on-screen menu
Display the on-screen menu to adjust the quality of the image projected by the projector and to switch the operation
mode of the projector. Hereinafter, “on-screen menu” will be abbreviated to “menu”.
NOTE:
• The menu screen in this manual may differ slightly from the actual one.
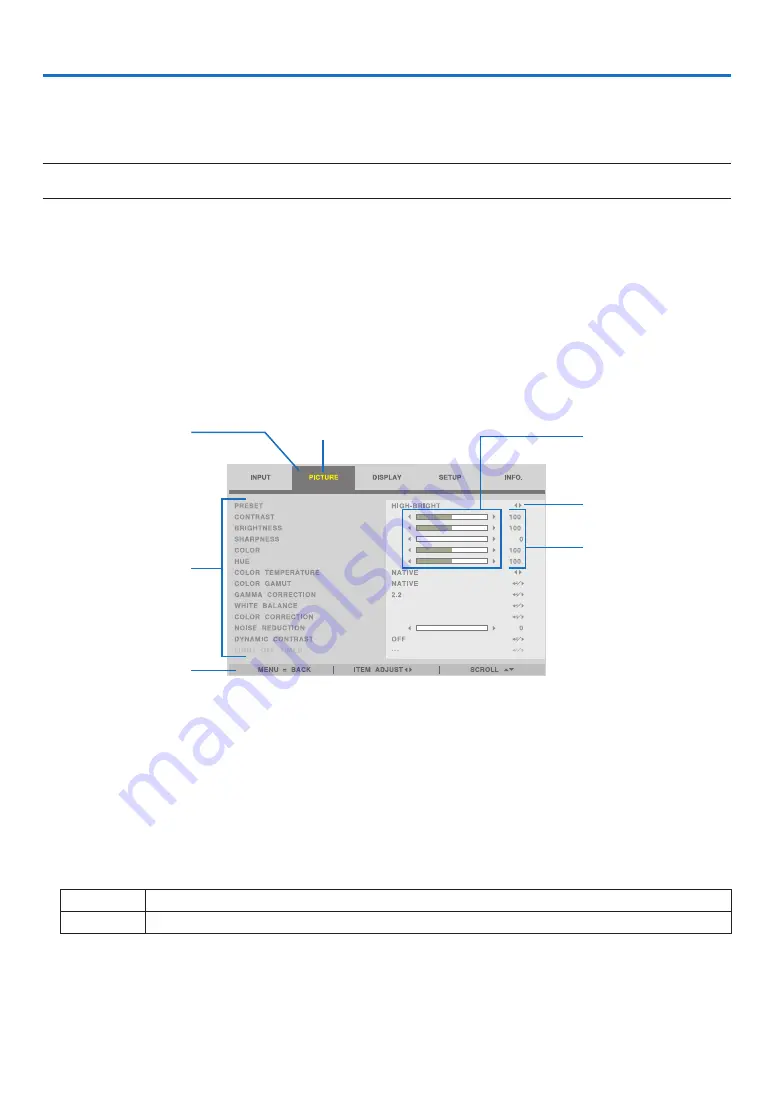
4-1-1. Configuration of the on-screen menu screen
To display the menu, press the MENU button on the projector or remote control. Press the EXIT button to close the
menu.
This section describes how to view and operate the menu.
Preparation: Turn on the projector and project the image on the screen.
1. Press the MENU button.
• Press the EXIT button to cancel the menu.
• The display position of the menu on the screen can be changed. (“MENU POSITION”
→
page
Main menu tab
Sub-menu
Key Guide
Adjustment bar
Cursor
Mark
Set value
2. Press the
◀
/
▶
button.
The cursor will move to the main menu tab (INPUT
↔
PICTURE
↔
DISPLAY
↔
SETUP
↔
INFO.).
When the main menu tab changes, the sub-menu also changes.
3. With the cursor on the main menu tab, press the
▼
/
▲
button.
The cursor will move to the sub-menu.
• To return to the main menu tab from the sub-menu, press the MENU button.
• Press the EXIT button to cancel the menu.
4. Press the
▼
/
▲
button to move the cursor to the sub-menu that you want.
The mark displayed at the right end of the sub-menu indicates a key operation.
◀
▶
Press the
◀
/
▶
button to select the setting value.
↵
/
▶
Press the ENTER button or
▶
button to continue selecting.
5. Move the cursor to the sub-menu that you want, then press the
◀
/
▶
button or ENTER button.
• An additional sub-menu that is one layer deep may also be displayed.
In this case, move the cursor to the sub-menu with the
▼
/
▲
button, then press the ENTER button.


