


31
Setting the BNC connectors
Select whether to set the input of the 5 BNC connectors to
RGB or component.
Example: Set the BNC SELECT mode to “COMP.”
Press the “PROCEED” button on the remote controller to
display the MAIN MENU on the screen, then...
1. Use the
▲
and
▼
buttons to select “OPTION”, then
press the “PROCEED” button.
The “OPTION” screen appears.
2. Use the
▲
and
▼
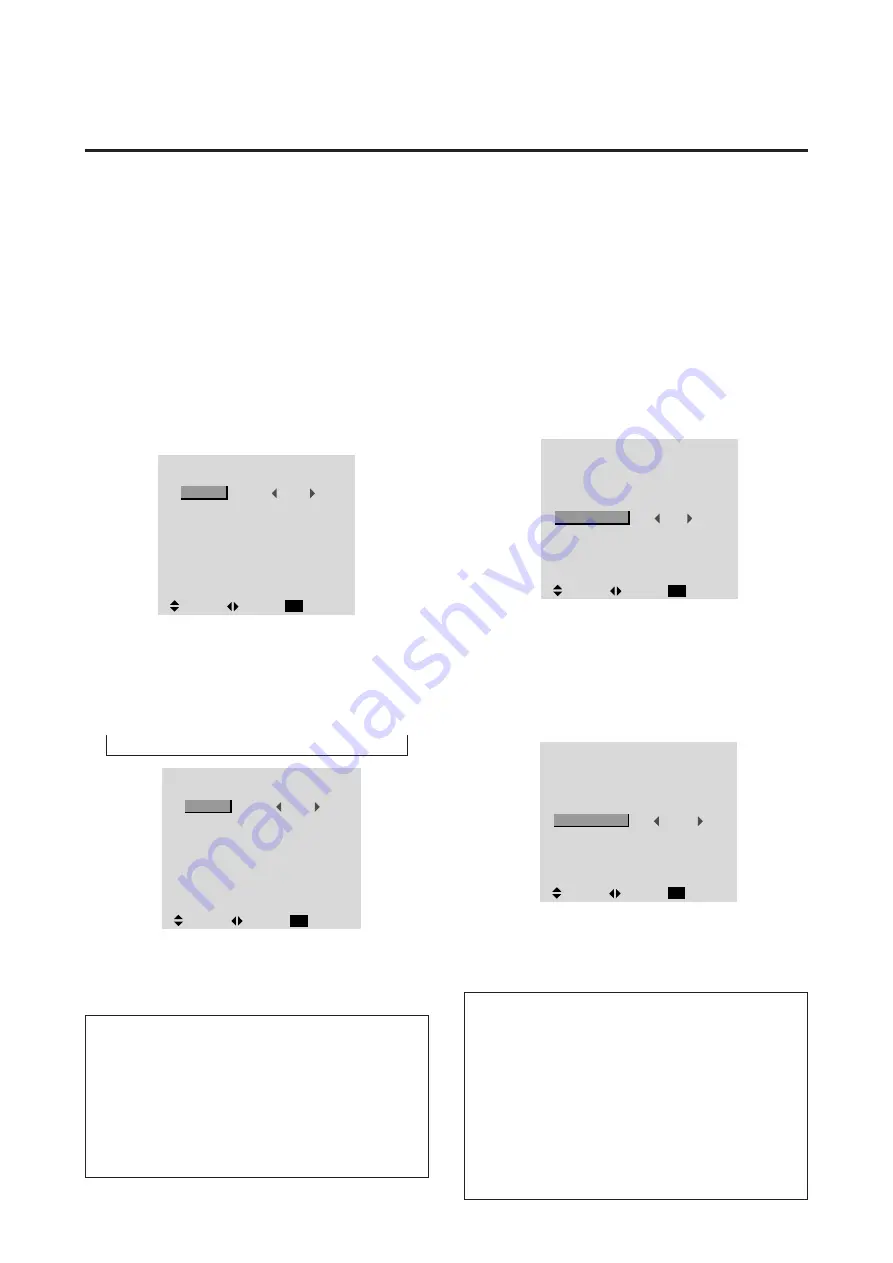
buttons to select “BNC SELECT”.
O P T I O N
AUDIO INPUT
AUDIO1
AUDIO2
AUDIO3
BNC SELECT
RGB SELECT
HD SELECT
RGB3 ADJ.
RGB1
VIDEO1
HD/DVD1
RGB
RGB
1080B
1
:
:
:
:
:
:
:
SEL.
ADJ.
RETURN
EXIT
3. To set the BNC SELECT mode to “COMP”...
Use the
§
and
©
buttons to select “COMP”.
The mode switches as follows each time the
§
or
©
button is pressed:
RGB
↔
COMP.
4. Once setting is completed...
Press the “EXIT” button to return to the main menu.
To delete the main menu, press the “EXIT” button once
more.
Information
m
BNC SELECT
RGB ..............
Uses the 5BNC terminal for RGB in-
put.
COMP. ...........
Use the 3BNC terminal for component
input.
m
Restoring the factory default settings
Select “RESET” under the function menu. Note that this
also restores other settings to the factory defaults.
O P T I O N
AUDIO INPUT
AUDIO1
AUDIO2
AUDIO3
BNC SELECT
RGB SELECT
HD SELECT
RGB3 ADJ.
RGB1
VIDEO1
HD/DVD1
COMP.
RGB
1080
B
1
:
:
:
:
:
:
:
SEL.
ADJ.
RETURN
EXIT
Setting the allocation of the audio connectors
Setting the AUDIO 1, 2, and 3 connectors to the desired
input.
Example: Set AUDIO 1 to RGB 2.
Press the “PROCEED” button on the remote controller to
display the MAIN MENU on the screen, then...
1. Use the
▲
and
▼
buttons to select “OPTION”, then
press the “PROCEED” button.
The “OPTION” screen appears.
2. Use the
▲
and
▼
buttons to select “AUDIO 1”.
O P T I O N
AUDIO INPUT
AUDIO1
AUDIO2
AUDIO3
BNC SELECT
RGB SELECT
HD SELECT
RGB3 ADJ.
RGB1
VIDEO1
HD/DVD1
RGB
RGB
1080B
1
:
:
:
:
:
:
:
SEL.
ADJ.
RETURN
EXIT
3. To set the AUDIO1 to “RGB2”...
Use the
▲
and
▼
buttons to select “AUDIO1”.
Use the
§
and
©
buttons to select “RGB2”.
The mode switches as follows each time the
§
or
©
button is pressed:
→
VIDEO1
↔
VIDEO2
↔
VIDEO3
↔
HD/DVD1
↔
RGB1
↔
RGB2
↔
RGB3
←
O P T I O N
AUDIO INPUT
AUDIO1
AUDIO2
AUDIO3
BNC SELECT
RGB SELECT
HD SELECT
RGB3 ADJ.
RGB2
VIDEO1
HD/DVD1
RGB
RGB
1080
B
1
:
:
:
:
:
:
:
SEL.
ADJ.
RETURN
EXIT
4. Once setting is completed...
Press the “EXIT” button to return to the main menu.
To delete the main menu, press the “EXIT” button once
more.
Information
m
AUDIO INPUT
A single audio input cannot be selected as the audio
channel for more than one input terminal.
m
Restoring the factory default settings
Select “RESET” under the function menu. Note that this
also restores other settings to the factory defaults.
Option Setting Menu
Содержание PlasmaSync PX-42VM1G
Страница 10: ...NEC Technologies PlasmaSync Plasma Monitor User s Manual...
Страница 118: ...METHOD OF DISASSEMBLY 7 1 1 Diagonal view of the main unit rear panel...
Страница 123: ...METHOD OF DISASSEMBLY 7 6 A01 C04 4 MAIN PWB ASSY 1 Remove the screw C04 and take out the MAIN PWB ASSY A01...
Страница 124: ...METHOD OF DISASSEMBLY 7 7 5 POWER UNIT 1 Remove the eight screws S02 and take out the POWER UNIT A10 A10 S02...
Страница 128: ...METHOD OF DISASSEMBLY 7 11 9 BRACKET MAIN 1 Remove the six screws S02 and take out the BRACKET MAIN M11 S02 M11...
Страница 134: ...MEMO...
Страница 135: ...DISASSEMBLY 8 1 S01 S01 M05 M06 M07 A06 S01 S01 S01 S01 S01 M01 M04 M06 S01 A04 P01 M03 S10 S03 S01 M02...
Страница 137: ...9 1 PACKAGING Packing details A Safety bracket SASSY B 1 Safety bag SASSY...
Страница 139: ...D CUSHION CARTON BOX 9 3 PACKAGING...
Страница 141: ...9 5 PACKAGING F CARTON BOX OUT...
Страница 147: ...CONNECTION DIAGRAMS 11 1...
Страница 148: ...BLOCK DIAGRAMS 12 1 MAIN PWB BLOCK...
Страница 149: ...BLOCK DIAGRAMS 12 2 VIDEO BLOCK...
Страница 150: ...BLOCK DIAGRAMS 12 3 AUDIO BLOCK...
Страница 151: ......
Страница 152: ......
Страница 153: ......
Страница 154: ......
Страница 155: ......
Страница 156: ......
Страница 157: ......
Страница 158: ......
Страница 159: ......
Страница 160: ......
Страница 161: ......
Страница 162: ......
Страница 163: ......
Страница 164: ......
Страница 165: ......
Страница 166: ......
Страница 167: ......
Страница 168: ......
Страница 169: ......
Страница 170: ......
Страница 171: ......
Страница 172: ......


