5 TaskDenition
In this section we will present an example of how to set a task in your NAV SD .
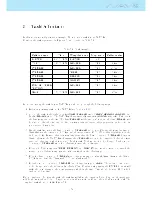
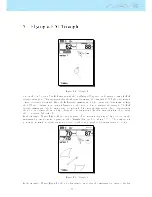
Consider the task represented in Figure
4.5
, and detailed in Table
5.1
.
Table 5.1: Task example
Cylinder type
Time
Waypoint name Map name Cylinder size
LAUNCH
12:00:00 PM LAUNCH
to
START
01:00:00 PM WHALEB
TP1
2 km
CYLINDER
WHALEB
TP2
400 m
CYLINDER
SHEEP
TP3
3 km
CYLINDER
HEBRON
TP4
6 km
CYLINDER
GOOSEN
TP5
2 km
END OF SPEED
SECTION
WHALEL
TP6
2 km
GOAL
05:00:00 PM WHALEL
TP6
400m
In order to set up the task in your NAV SD you should go trough the following steps:
1. Delete any existing task on the NAV SD (see Section
4.1.2
);
2. Add to the task, in the right order LAUNCH, WHALEB twice, SHEEP, HEBRON, GOOSEN, and
nally WHALEL twice. The NAV SD will automatically assume LAUNCH as the takeo since it is
the rst waypoint on the list. The rst WHALEB will be used as Start, and the last WHALEL will
be used to dene the landing deadline. As waypoints are entered their properties can be edited as
you enter each waypoint;
3. On the task list, select the rst occurrence of WHALEB and edit it. Change the waypoint type to
Start Out, set the distance to 2.000km, and the start time to 13:00. (Note that all times are in the
24 hour clock). Beware, that it is very important that the rst occurrence of WHALEB be set as
Start, otherwise the NAV SD will assume that WHALEB needs to be completed before the start
gate, and that is not what is required for this task. Nothing needs to be changed for the second
occurrence of WHALEB since the default values are the ones wanted.
4. Edit each of the waypoints SHEEP, HEBRON, and GOOSEN and set the distance to match the
wanted one. All these waypoints are cylinders which is the default type.
5. Edit the rst occurrence of WHALEL and change its type to End of Speed Section, the Size to
2.000km, and leave the Time with 00:00, and Cone with 0.0.
6. Edit the second occurrence of WHALEL and change its type to GOAL. The radius does not need
to be changed since the radius is by default 400m. Continuously pressing the ENTER bottom will
make the cursor jump to the next parameter which is the time. Time should be set to 17:00 which
is the goal close time.
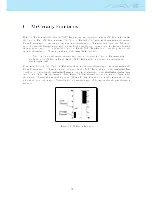
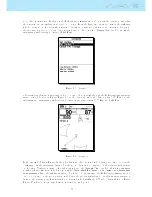
Upon completion of editing the task, the task list will show the distances for each leg, and the start gate
will be shown with an S, end of speed section is shown with an E and the goal shown with a G. The
completed task should look like Figure
5.1
.
54
Содержание Flymaster NAV SD
Страница 1: ...User manual Version 3 0...
Страница 54: ...Figure 4 42 GPS Reset 53...
Страница 66: ...Figure 9 2 Firmware Update Done 65...

